


Purpose
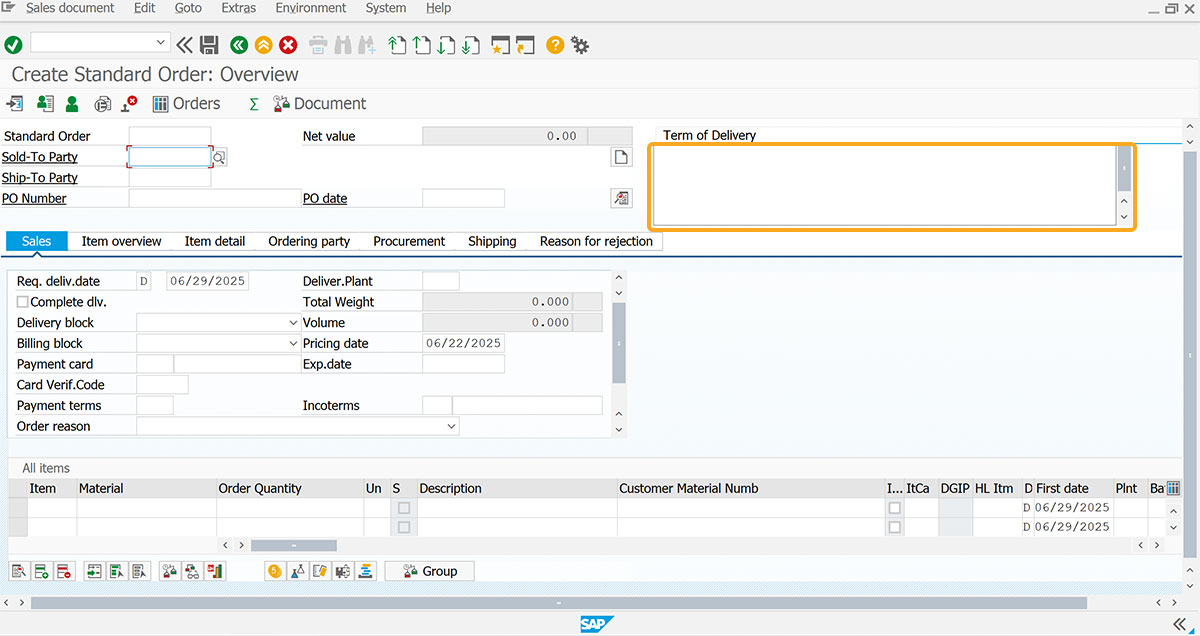
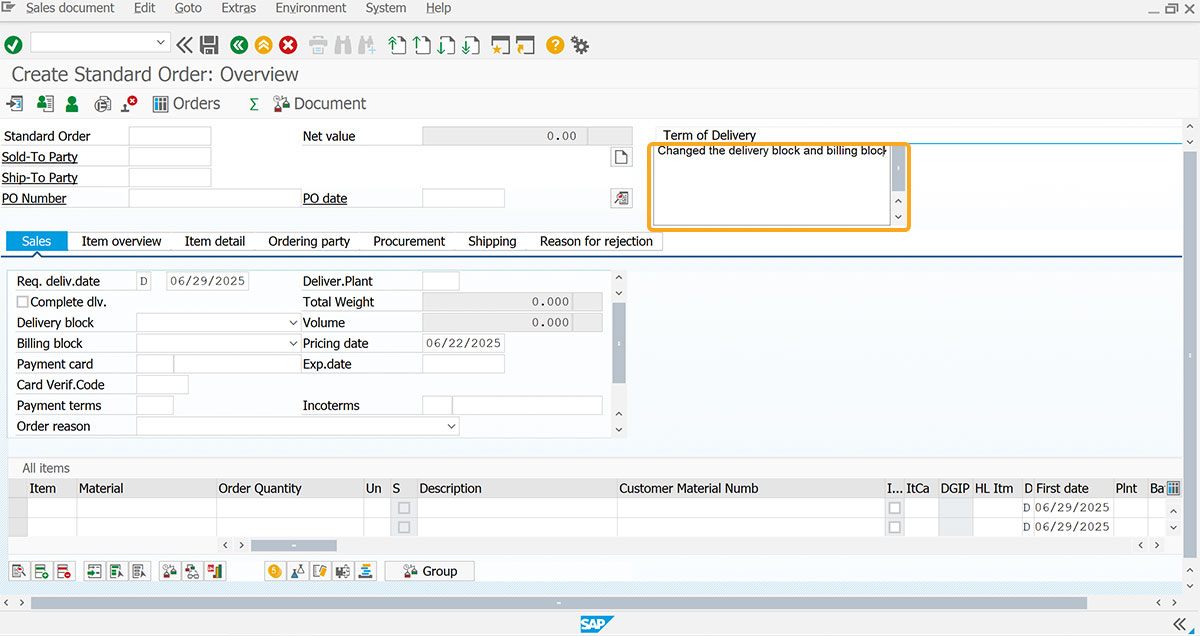
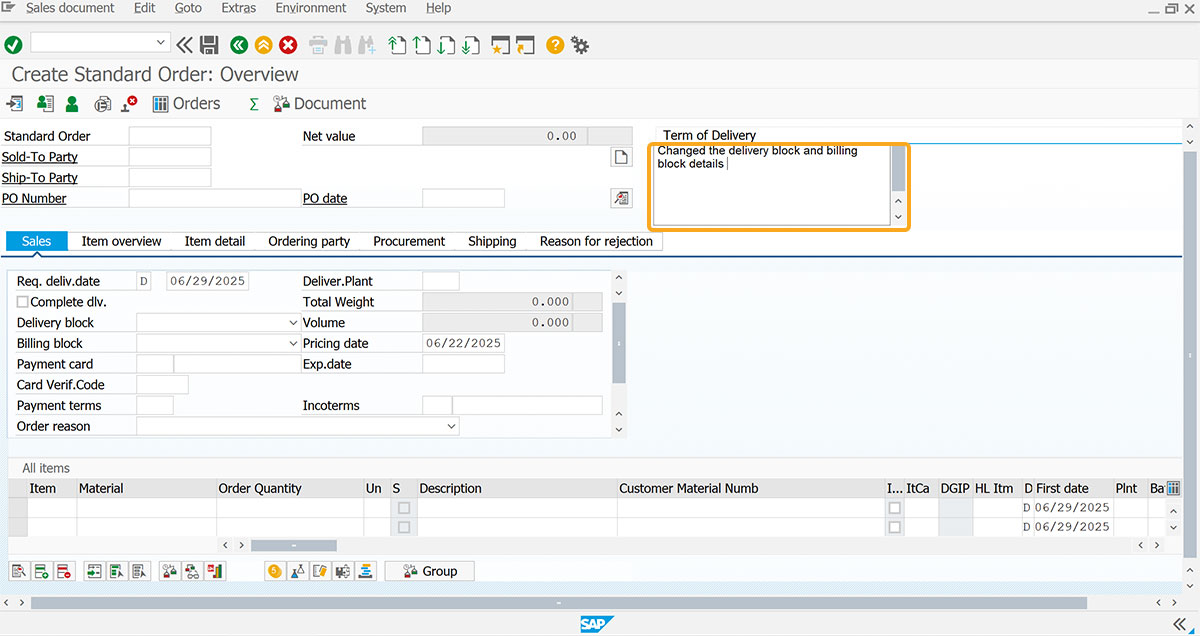
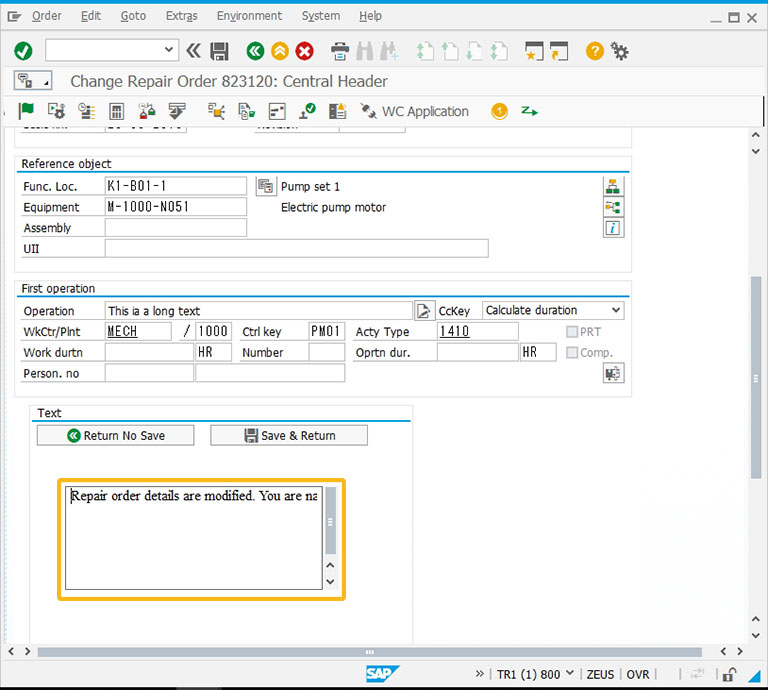
Using the textbox(), you can create a text box for inputting and displaying lengthy text or data. You can customize the textbox's position, name, text properties, and display settings with various options.

Syntax
You can create a textbox at the desired position with the required functionality.
textbox([startrow,startcol],[endrow,endcol],{"name":"name","option":"option"});
Properties
- startrow, startcol, endrow, endcol - row and column co-ordinates
Available Options
You can use the following options with the textbox command:
|
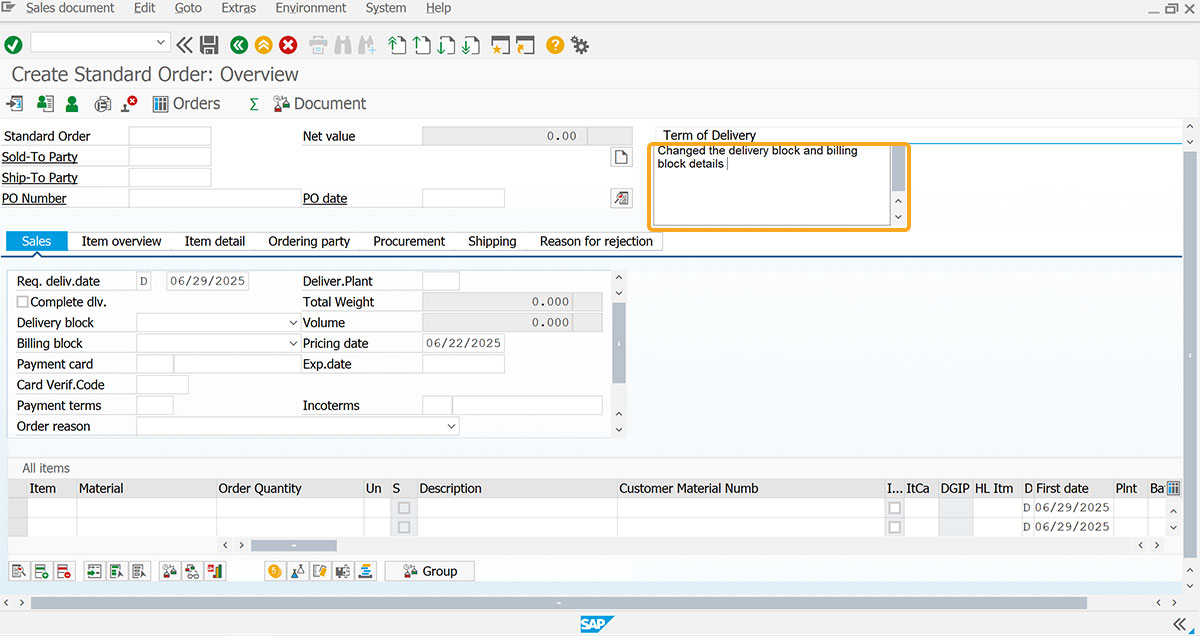
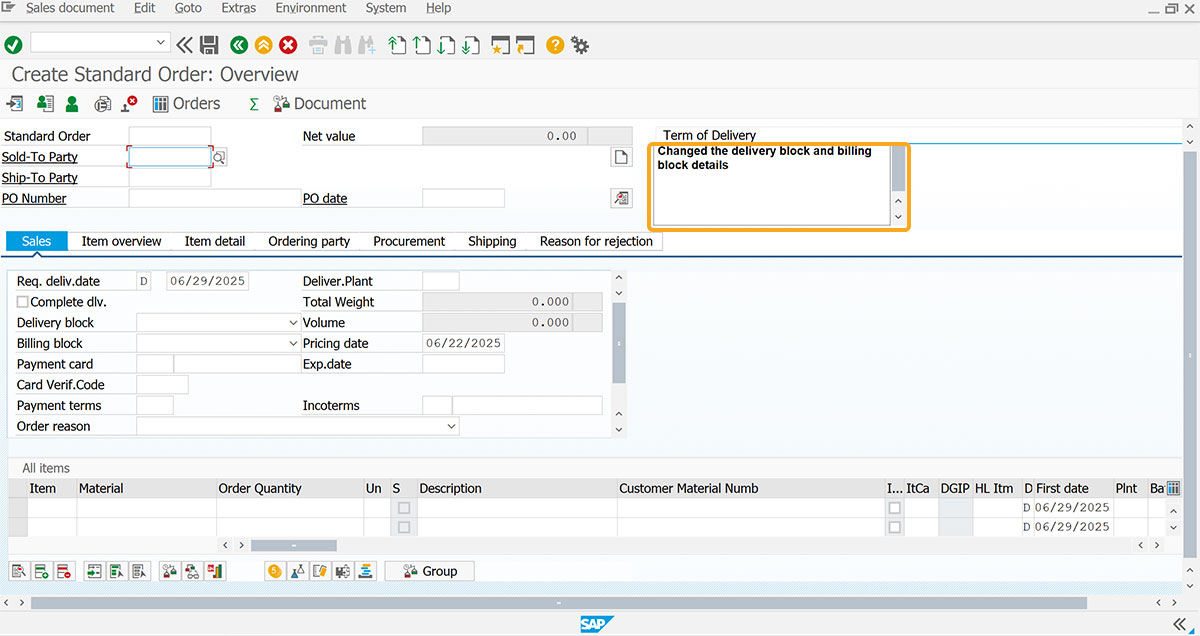
"name":string - This option specifies the technical name of the textbox for Liquid UI scripts, which is invisible to the user. |
|
|
"nowordwrap":true - Text doesn't wrap automatically; users must press Enter to begin a new line. |
|
|
"readonly":true - When this option is true, text cannot be edited or modified. |
|
|
"textfont":"font_name" - This option determines the text font, with the default being Arial. |
|
|
"textheight":x - This option sets the text height in pixels, with the default height at 16 pixels. |
|
|
"textweight":x - This option sets the text's boldness, with a default weight of 5 and a default bold setting of 7. |
Options Detail
Example
Creating a textbox
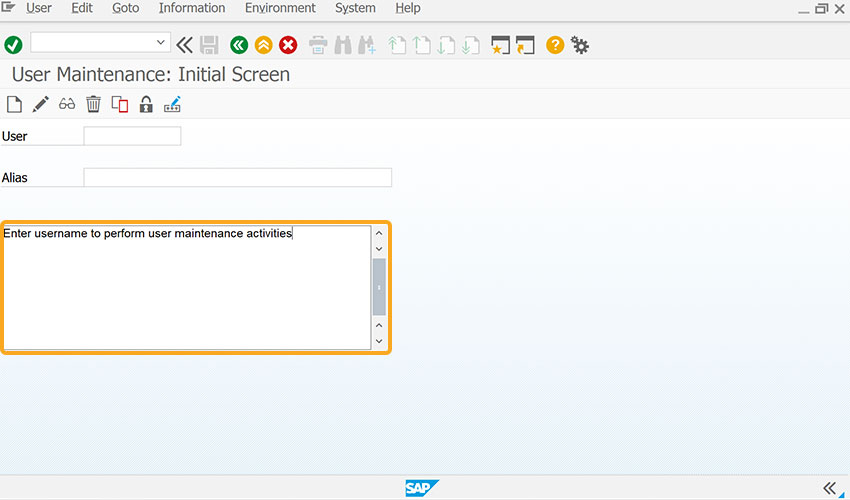
This example demonstrates how to use a textbox() to create a textbox on the SAP screen. Considering User Maintenance: Initial Screen (SU01), we’ll walk you through the following steps:
//Create the file SAPLSUU5.E0050.sjs inside your scripts folder for customizing the User Maintenance: Initial Screen (SU01).
//Now, add the Liquid UI script to the above file and save it.
- Create a textbox with a specified row and column to enter the text.
// Creates a textbox at the specified row and column
textbox([5,0],[11,51],{"textfont":"Arial","textheight":"12","textweight":"5"});
- Navigate to SU01 screen, and then you can view the textbox created, as shown in the image below.
Tips and Tricks
-
Creating a Notification
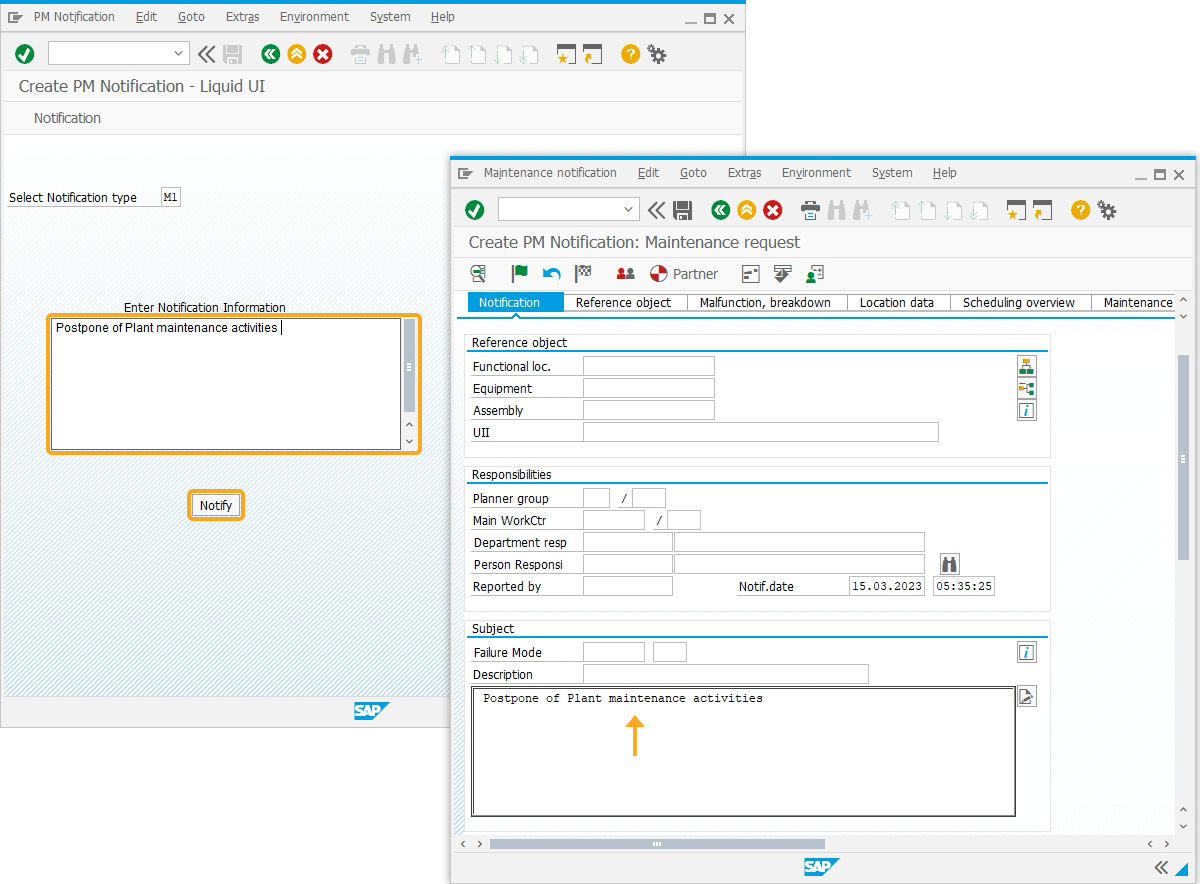
In this example. The textbox() is used to create a notification. For instance, notifications created on the PM Notification screen can be displayed on the final screen with the notification details that are auto-populated from the Initial screen.
//Create the file SAPLIQSO.E0100.sjs inside your scripts folder for customizing the Create PM Notification - Liquid UI.
//Now, add the Liquid UI script to the above file and save it.- Add a textbox to enter the notification details.
// Creates a notification based on notification type
textbox([8,15],[14,66],{"name":"z_iw21_textbox1","enter text":true,"textfont":"Arial","left":true,"textheight":"15","textweight":"5"});
- Navigate to IW21 screen, then you can see the created notification displayed on the Maintenance request screen, as shown in the image below.
Click here for details on how to create a notification.
Copy text between files
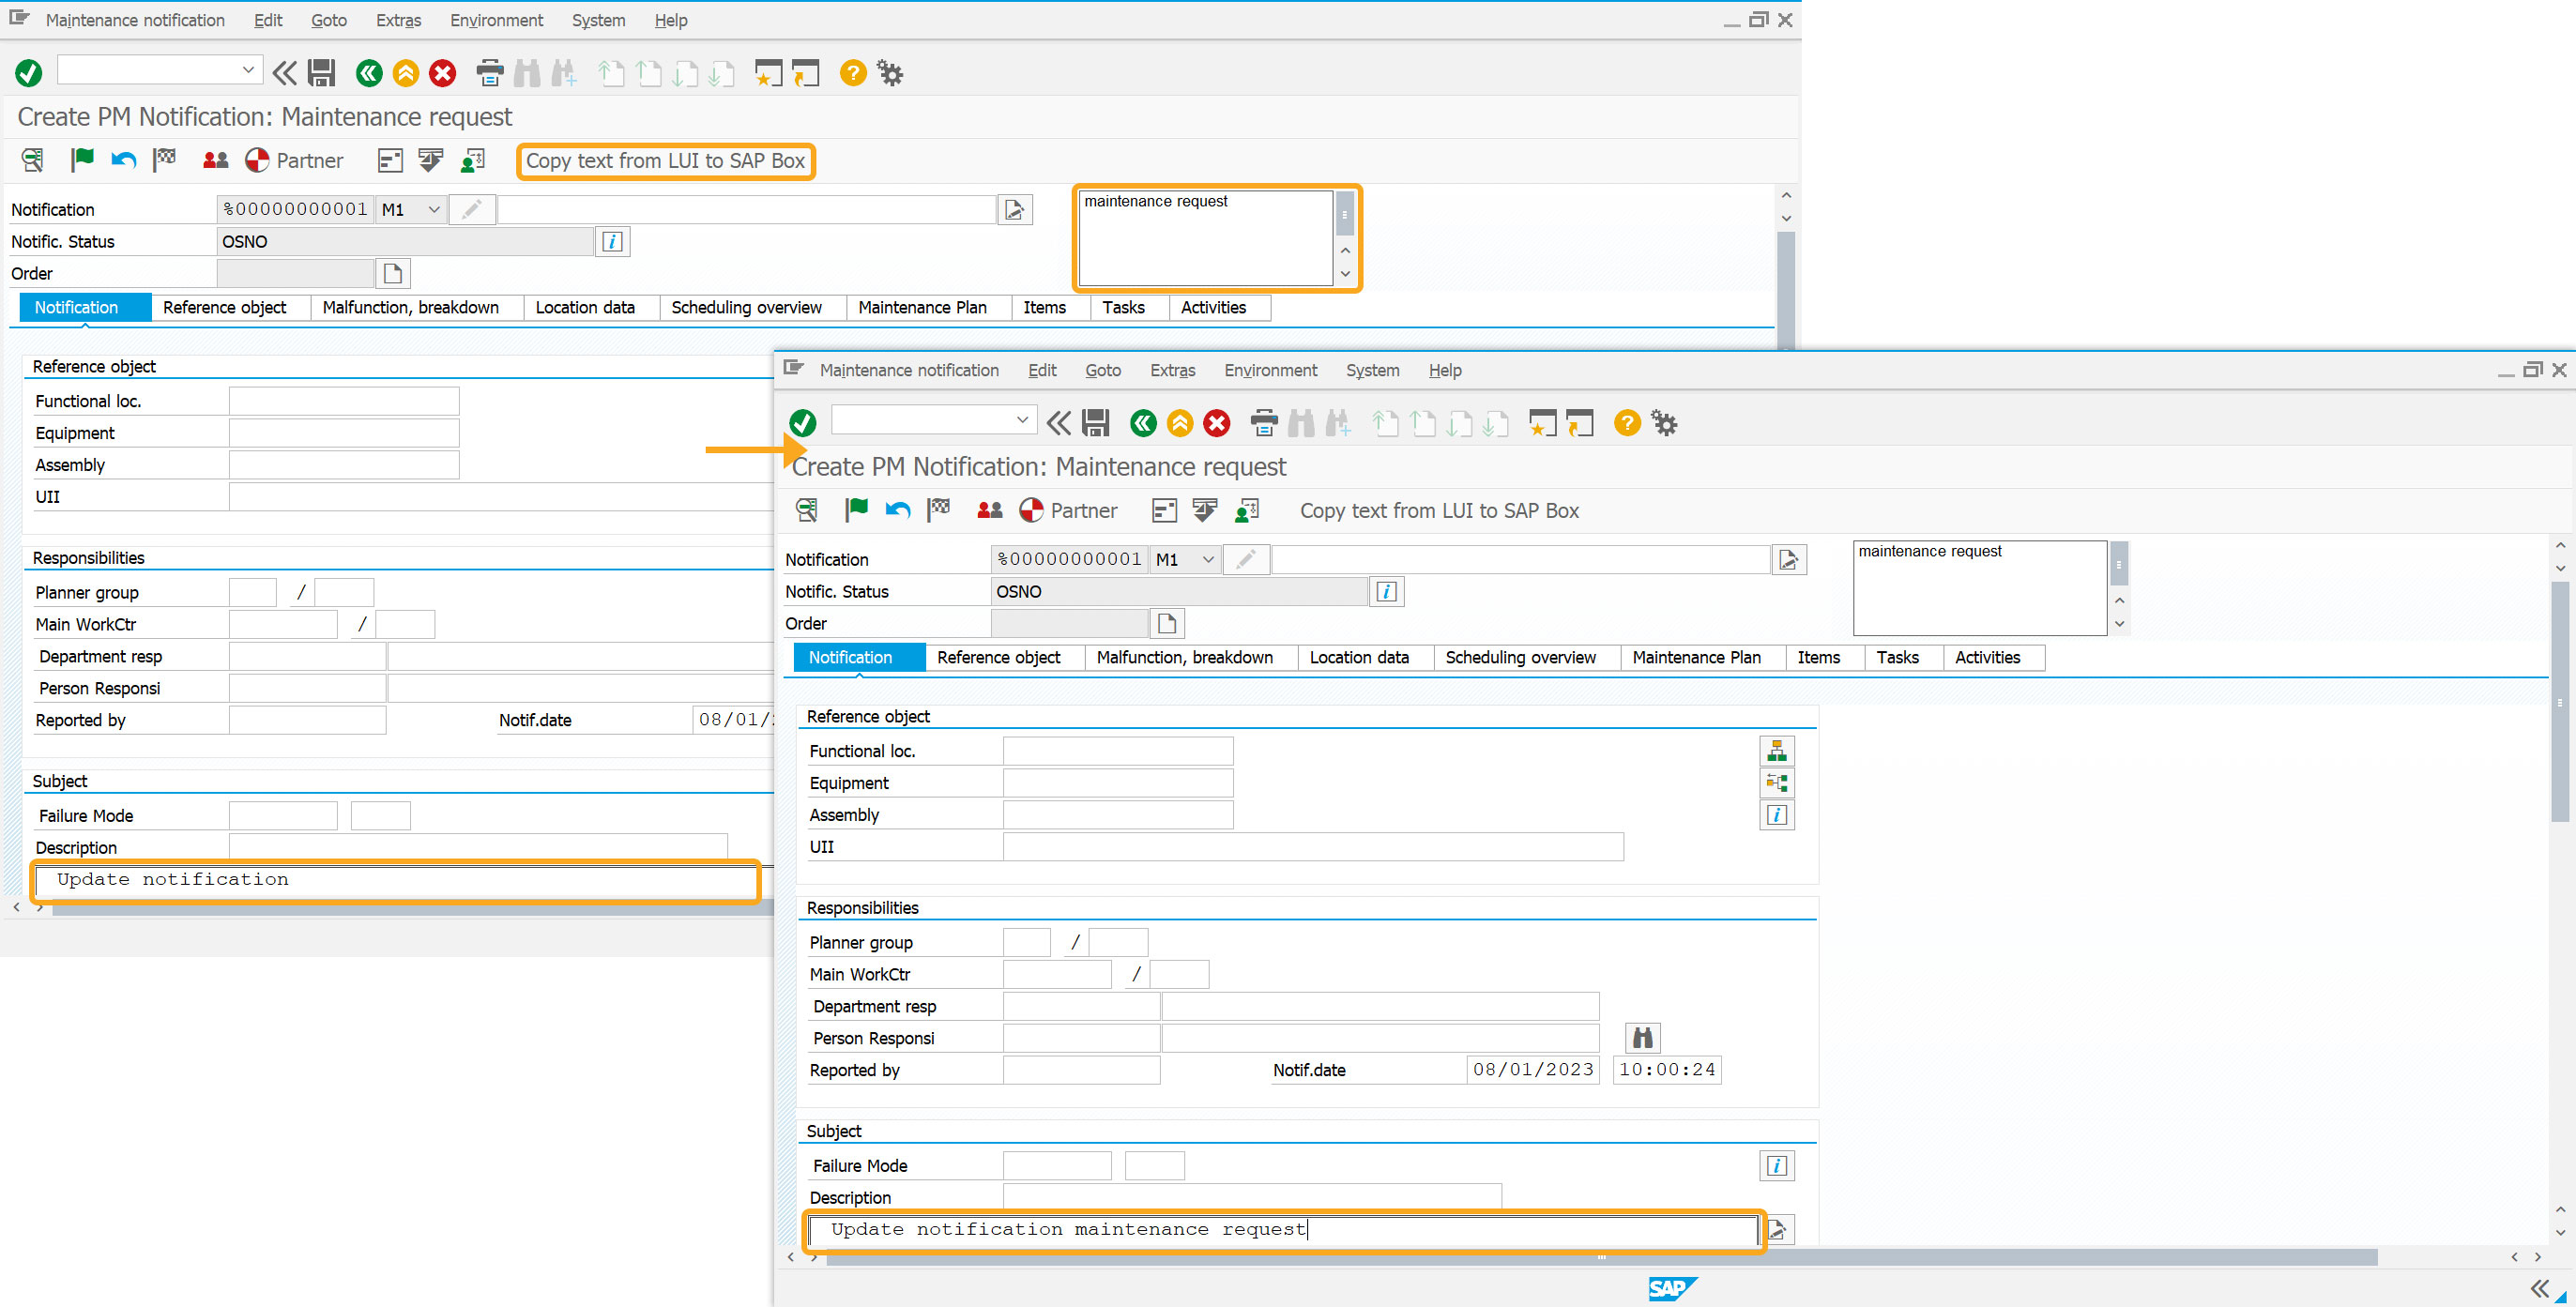
The copytext and textbox are combined to copy text between files, screen areas, and text variables. For instance, in the Create PM notification screen, the text entered in the textbox is appended to the previous notification. The image below illustrates text copying between screen areas.
// Copies text from one screen to another screen
copytext({"fromtext":"z_iw21_textbox1","toscreen":"X[TEXT]","append":true});
Click here for details about copytext().
- Add a textbox to enter the notification details.