

Purpose
The box() is used to group and visually organize screen elements, such as push buttons, checkboxes, and radio buttons, within an SAP screen. Grouping elements inside a box improves usability, readability, and layout structure.

Note: You can position a box using different ways. Click here for more details on positioning the screen elements.
Syntax
You can create a box at desired locations with required functionalities using the following formats.
Format 1: Basic group box with label
// Creates a box with a label name at specific coordinates
box([startrow,startcol],[endrow,endcol],"label name");
Format 2: Basic group box without label
// Creates a box without any label
box([startrow,startcol],[endrow,endcol]);
Format 3: Box with respect to other screen elements
// Creates a box with respect to other screen fields
box("F[screen element]+,[startrow,startcol]",[endrow,endcol],"label name");
Properties
- startrow, startcol - Starting coordinates of the box
- endrow, endcol - Ending coordinates of the box
- label name - Visible name of the box
- screen element - Specifies the field name to position the box
Note: The box command doesn't take any options.
Example 1: Creating a launch Pad using push buttons for easy access to transaction
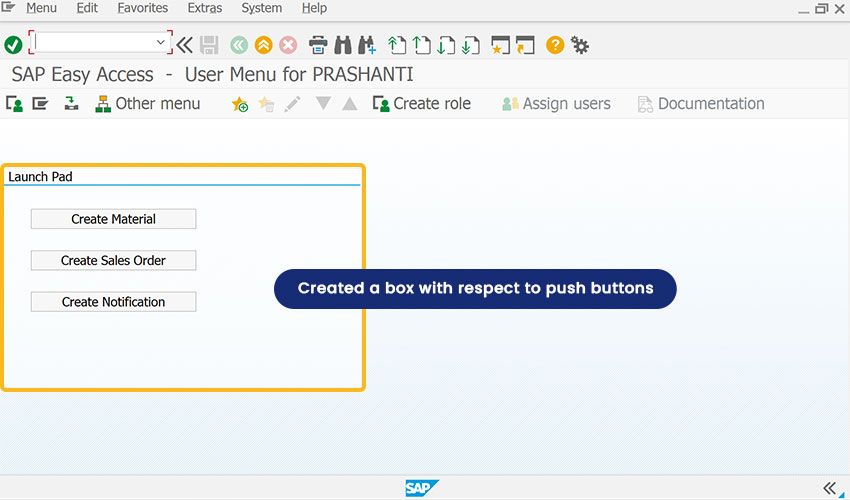
Creates a group box labeled Launch Pad to organize push buttons to launch transactions from the SAP Easy Access screen.
//Creates a box labeled Launch Pad
box([2,0],[12,46],'Launch Pad]');

pushbutton[5,9],"Create Material",/nmm01");
pushbutton[7,9],"Create Sales Order",/va01");
pushbutton[9,9],"Create Notification",/iw21");
Click here for more details on how to create a launch pad.
Example 2: Customizing Create Sales Order screen using format 3
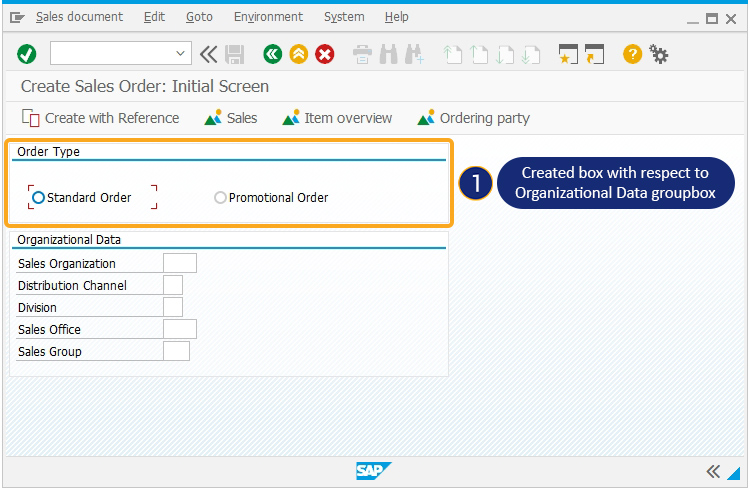
Simplifies the Create Sales Order: Initial Screen (VA01) by aggregating the options, using the box(). Here, the Order Type group box is created in relation to the Organizational Data group box.
// Creates two radio buttons labeled Promotional Order and Standard Order
radiobutton([2,29],"Promotional Order");
radiobutton([2,3],"Standard Order");
// Creates a group box for Organizational Data
box("G[Organizational Data]+[-4,0]",[3,61],"Order Type");
// Deletes Order Type input field
del("F[Order Type]",{"triple":true});
Tips and Tricks
Create Multiple Layouts on the Same Screen
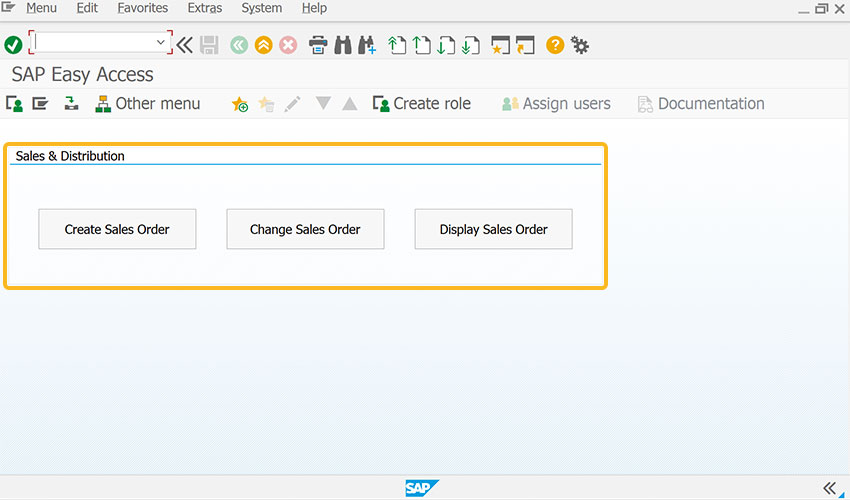
The same SAP screen can be used to display multiple layouts or different launch pads by passing different parameters.
// Creates a groupbox labeled Sales & Distribution
box([2,9],[13,56],"Sales & Distribution");
Click here for more details on how to Create Multiple Layouts on the Same Screen using box() and pushbutton() commands.
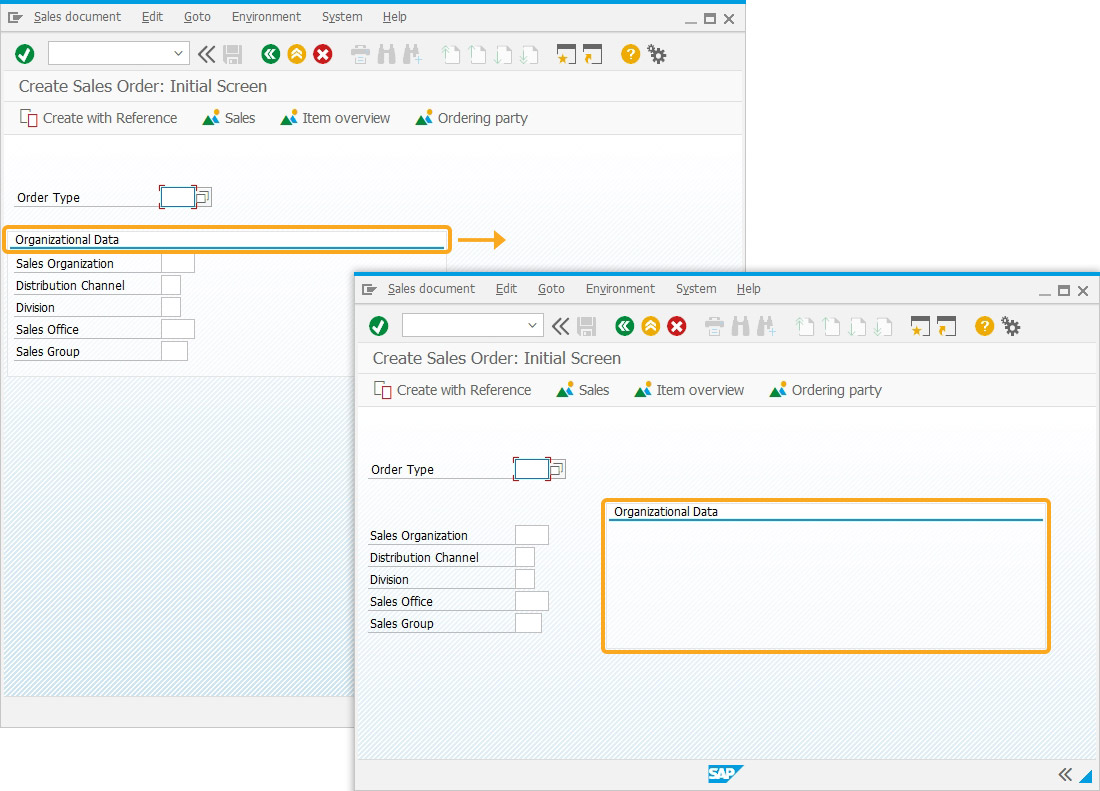
Change groupbox position using pos()
Using the pos(), you can move the existing group box to a different position without affecting internal elements.
// Changes the position of Organization Data group box
pos('G',[4,47],{"box":true});
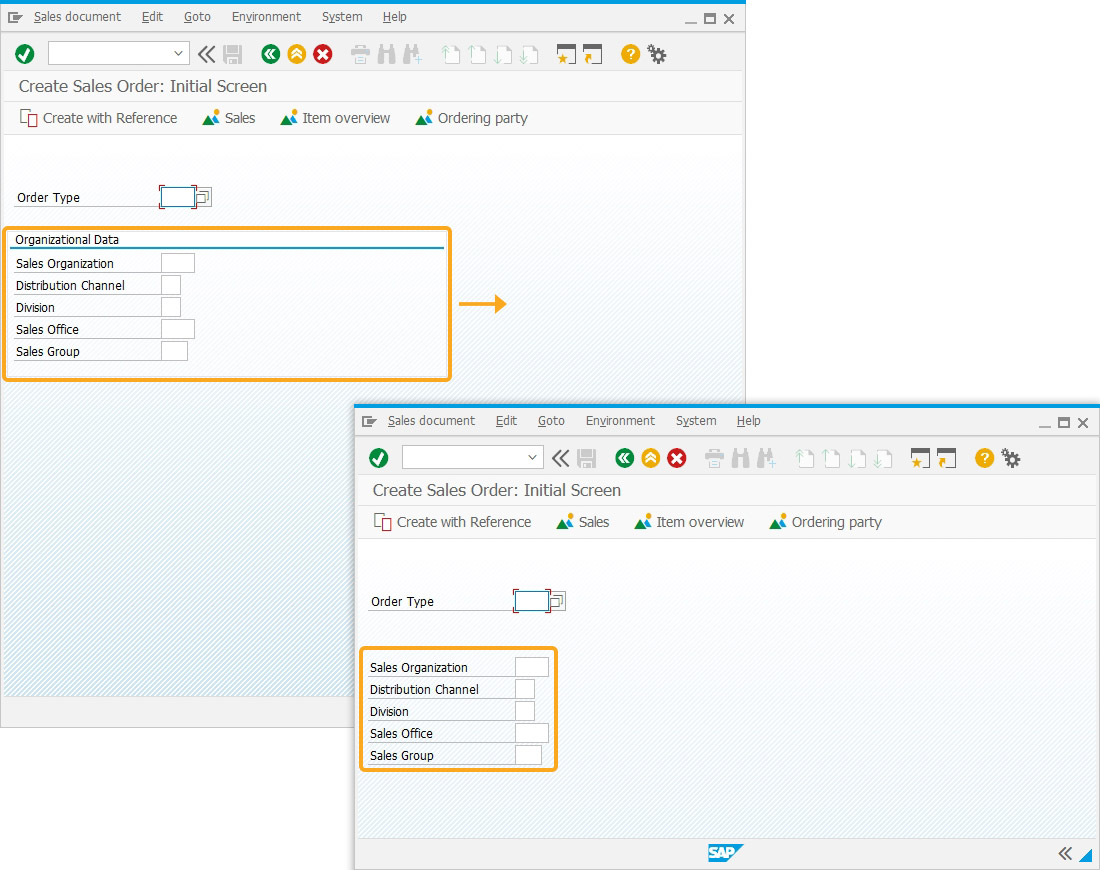
Delete a box around a group of elements
Using the del(), you can delete a box around a group of elements. However, the elements inside the box will remain on the screen.
// Deletes Organization Data group box
del("G[Organizational Data]",{"box":true});
Edit text dynamically using Box Command
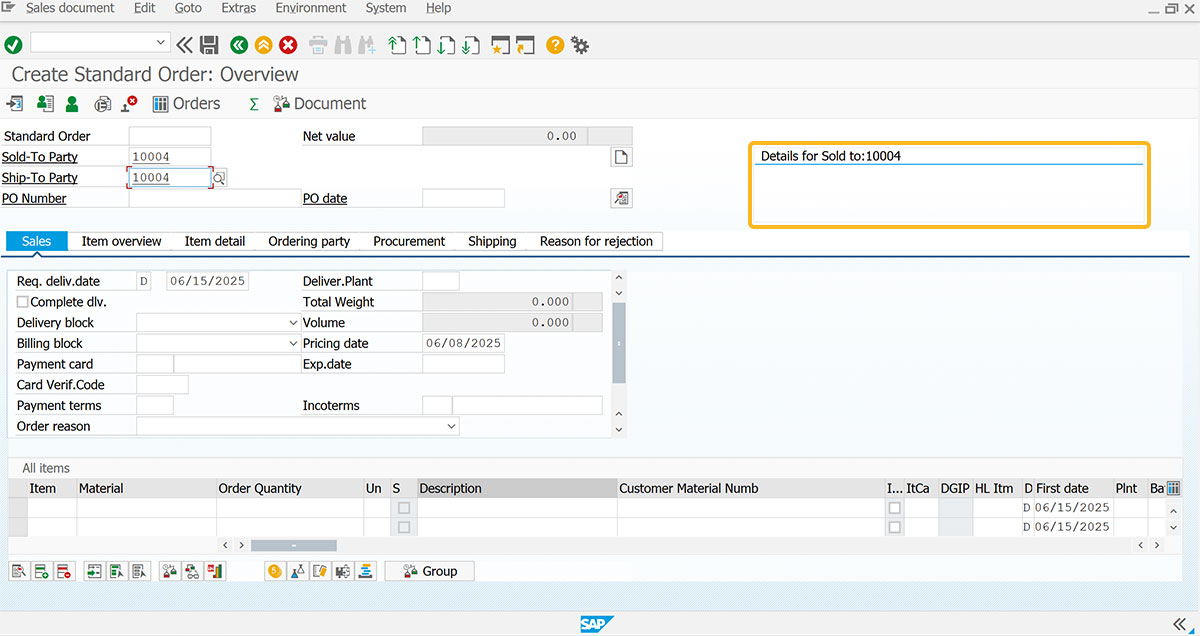
By using field names in the box(), you can dynamically add the value from any input field to the text inside the box. For example, in the Change Sales Order screen (VA02), the value from the Sold-to-party field is read and appended to the box label, as shown below.
// Creates a box
box([1,100],[4,150],"Details for Sold to:&F[Sold-to party]");