


Purpose
The pushbutton() is used to create interactive buttons on SAP GUI screens. These buttons can trigger SAP transactions, custom functions, pass variables to processes, enable scan functionality, and modify screen navigation, significantly enhancing the user experience by streamlining SAP navigation and tasks. This functionality enables user interactions and automations, streamlining common SAP tasks.

Note: You can specify the position of the push button in different ways. Click here for details about positioning the screen elements.
Syntax
You can define push buttons using different syntax and formats based on use cases.
Format 1: Basic push button placement
// Creates a push button with a label name at specified row and column coordinates
pushbutton([row,col],"label name",{"options":values});
Format 2: Push button with Function/Transaction code
// Executes a transaction or function upon click
pushbutton([row,col],"label name","/n[tcode]",{"options":values});
pushbutton([row,col],"label name","fcode",{"options":values});
pushbutton([row,col],"label name","fkey",{"options":values});
pushbutton([row,col],"label name","fcode","fkey",{"options":values});
Format 3: Push button with Scan functionality
Adds a push button that will add scan functionality for the designated field.
// Adds scan functionality to the designated field
pushbutton([row,col],"label name","/_gala_scan,?,z_scan_inputfield",{"options":values});
Format 4: Push button with icon, label name, and quick info text
This format adds an icon, label, and tooltip to the push button to display quick info text. Here, ID refers to the SAP icon ID.
// Creates a push button with icon and tooltip to display quick info text
pushbutton([row,col],"@ID\\Qtooltip@labelname",{"options":values});
Format 5: Toolbar push button
Adds a push button on the toolbar with the label name
// Creates a push button on toolbar with label name
pushbutton([TOOLBAR],"label name",{"options":values});
Properties
- startrow, startcol - Co-ordinates for placement
- label name - Visible name of the push button
- @iconID@label name - Name of the field with icon
- @iconID\\Qlabel Tip@Label name - Name of the field with tooltip and icon
- /n[tcode] - Triggers a transaction
- fcode - Triggers function code
- fkey - Triggers function key
- /_gala_scan,?,variable - Enables scan functionality on a field
- screen element - Specifies screen element
Note: Location in pushbutton() refers to the position where the button appears on the SAP screen. This can be defined using specific coordinates (e.g., [row, column]) or by using predefined areas such as the TOOLBAR or the Status Bar.
Available Options
You can use the following options with the push button:
|
Disables pushbutton on the screen. |
|
|
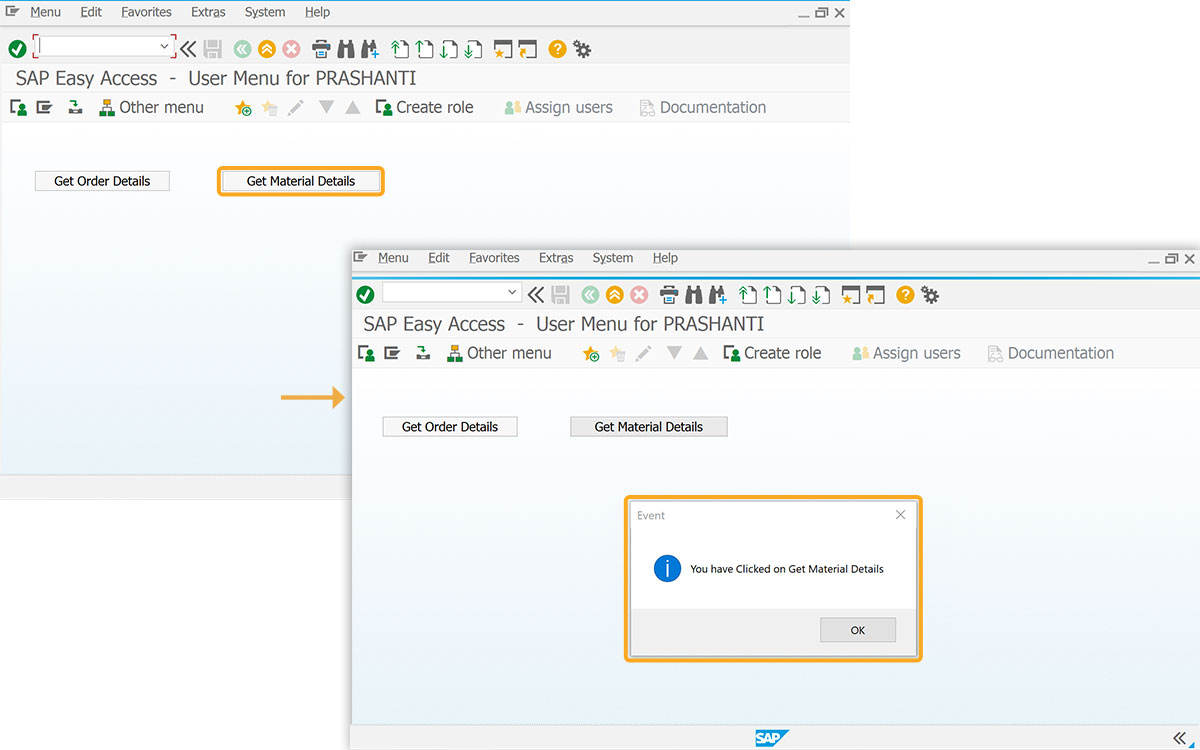
"eventid": value - Assigns a value to the push button. You can retrieve this value using _eventid system variable. |
|
|
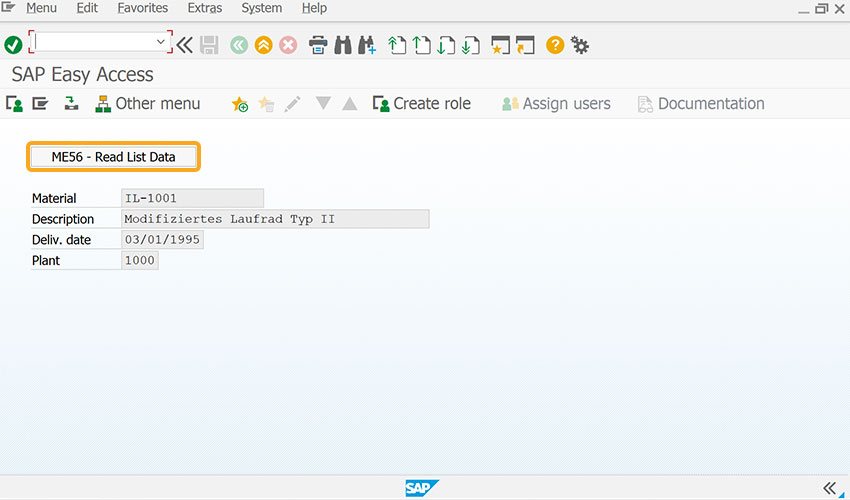
Triggers functions or transactions when clicked. |
|
|
Executes the process. |
|
|
"size":[rows,cols] - Sets the size of the push button in rows and columns. |
|
|
"separator":true - Used in conjunction with the toolbar option. Adds a small vertical line that separates the push button created from the existing ones on the toolbar. |
|
|
Places the push button on the SAP screen toolbar. |
|
|
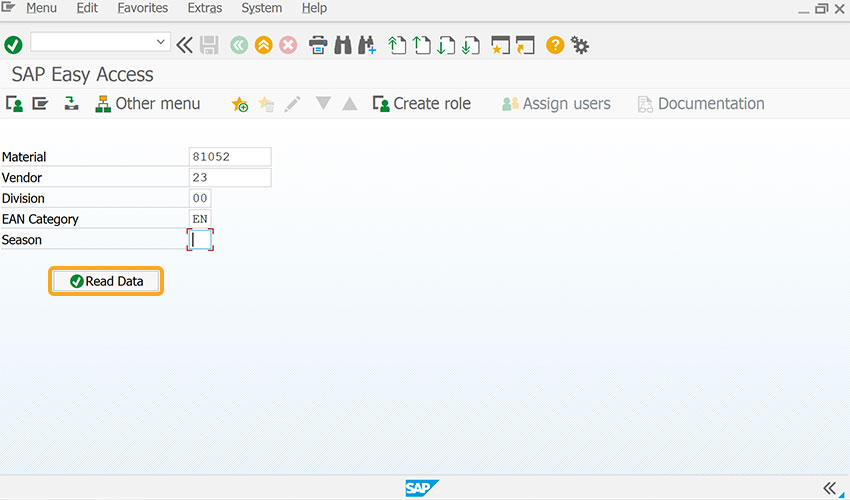
Passes values to processes. |
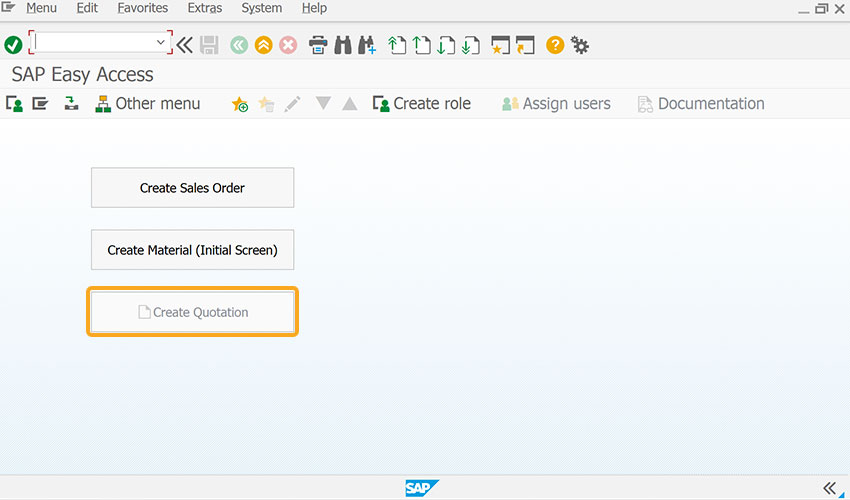
Options Detail
|
disabled |
|
|
eventid |
Click here for details about how to display event performed using the eventid option of the push button. |
|
fcode/tcode |
|
|
process |
|
|
size |
|
|
TOOLBAR |
|
|
using |
|
Example
The following example demonstrates, how the push button() is used to navigate to desired transaction screens.
//Create the SAPLSMTR_NAVIGATION.E0100.sjs file inside your script folder for customizing the SAP Easy Access screen
//Now, add the Liquid UI script to the above file, and save it.
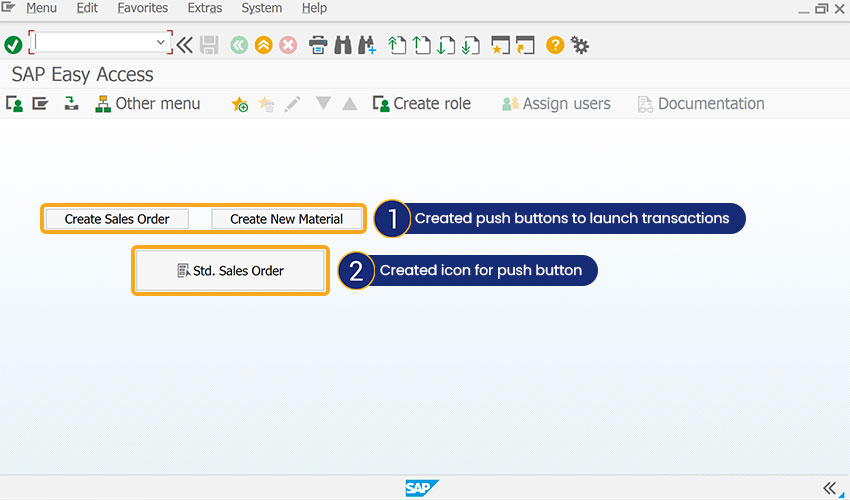
- Add three push buttons with labels Create Sales Order, Create New Material, and Std. Sales Order to navigate to the desired transactions.
// Creates three push buttons to navigate to the transactions
pushbutton([4,6],"Create Sales Order","/nva01");
pushbutton([4,28],"Create New Material","/nmm01");
pushbutton([8,15],"@4D\\QCreate a Std. Sales Order@Std. Sales Order",{"process":va01_process,"size":[2,24],"using":{"z_va01_ordertype":"OR"}});
Click here for details on how to create a push button with multiple options.
- Refresh the SAP screen, and then you can see the required push buttons, as shown in the image below.
Execute transaction with Ok code:
You can bypass the initial transaction screen and go directly to pre-filled SAP transactions by executing the transaction with OK code. This is especially useful when automating repetitive tasks or simplifying navigation for end users. Also, you can incorporate the push buttons in the standard toolbar, and a function key will be assigned automatically.
Executes in the same session:
This will start the transaction and fill in values within the current session.
//Create the SAPLSMTR_NAVIGATION.E0100.sjs file inside your script folder for customizing the SAP Easy Access screen
//Now, add the Liquid UI script to the above file, and save it.
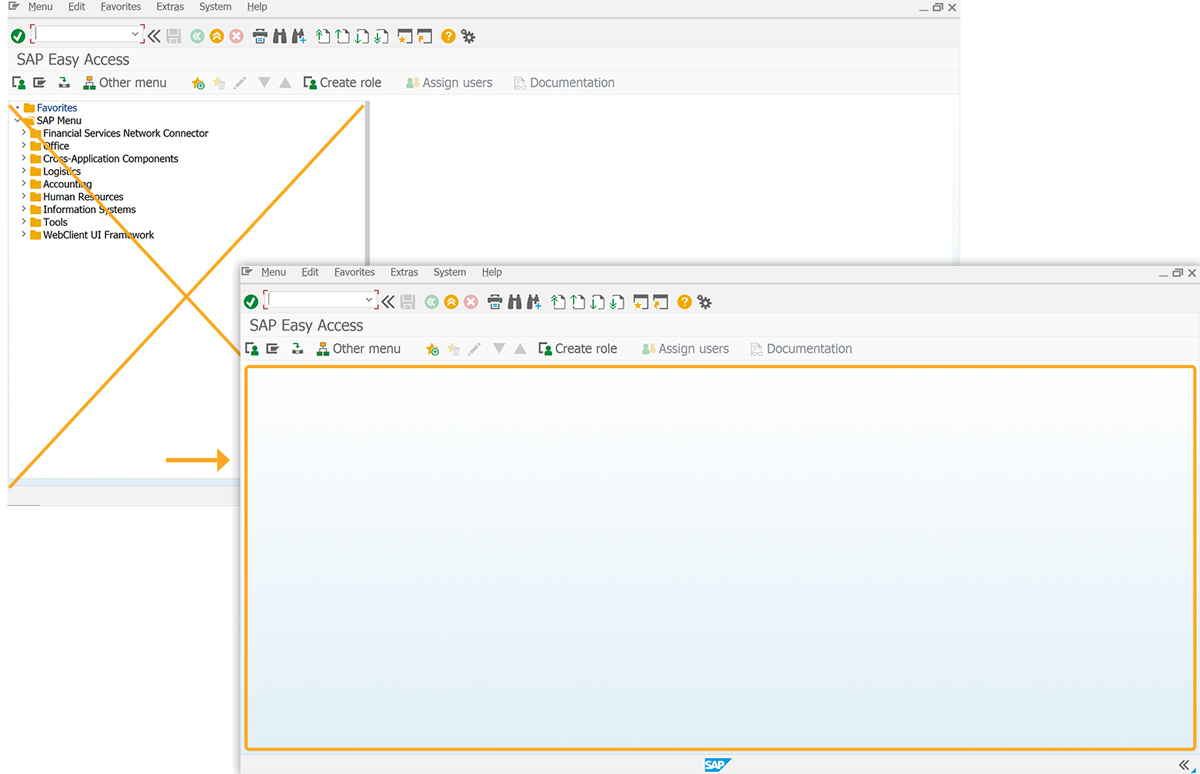
- Remove the image container from the SAP Easy Access screen with the del() function.
// Deletes the image container on the SAP screen
del("X[IMAGE_CONTAINER]");
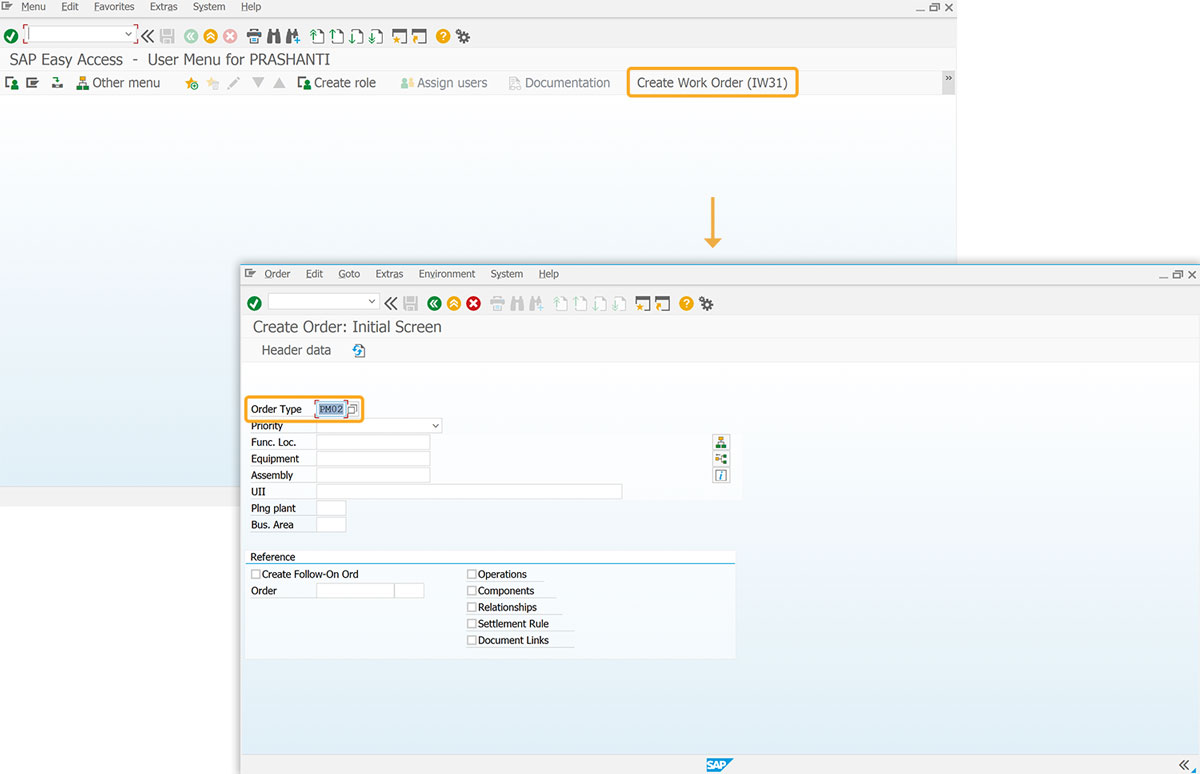
- Add a push button labeled Create Work Order (IW31) to prefill the defined values in the same session.
// Creates a push button to prefill values in the same session
pushbutton([TOOLBAR],"Create Work Order (IW31)","/nIW31 AUFPAR-PM_AUFART=PM02);
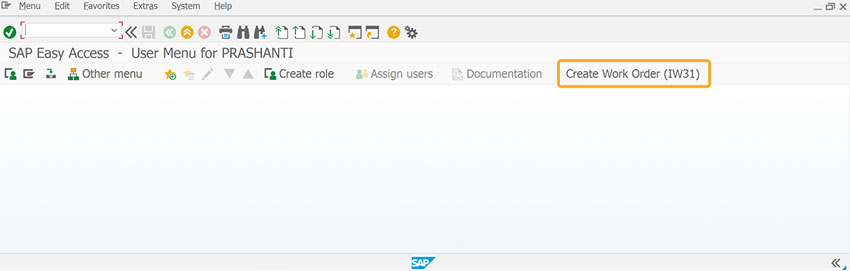
- After refreshing the SAP screen, click Create Work Order (IW31) screen. You will be navigated to the Create Order: Initial Screen within the current session, where the Order Type input field will be pre-filled with the value PM02, as shown in the image below.
Executes in a new session:
This will start the transaction and fill in values within the current session.
- Add a push button labeled Create Work Order (IW31) to prefill the defined values in a new session.
// Creates a push button to prefill values in the same session
pushbutton([TOOLBAR],"Create Work Order (IW31)","/oIW31 AUFPAR-PM_AUFART=PM02);
- After refreshing the SAP screen, click Create Work Order (IW31) screen. You will be navigated to the Create Order: Initial Screen in the new session, where the Order Type input field will be pre-filled with the value PM02, as shown in the image below.
Tips and Tricks
- Delete push buttons
// Deletes push button using the del command
del("PM[pushbutton_name]");
- Add a tooltip
// Adds a tooltip to an existing push button using tip command
tip("P[pushbutton_name]","Tip goes here");
- You can use a combination of function keys with the Ctrl and Shift keys or use numbers between 13 and 48.
Shift = +12
Ctrl = +24
Shift+F1 /13 Ctrl+F1 /25 Shift+Ctrl+F1 /37 Shift+F2 /14 Ctrl+F2 /26 Shift+Ctrl+F2 /38 Shift+F3 /15 Ctrl+F3 /27 Shift+Ctrl+F3 /39 Shift+F4 /16 Ctrl+F4 /28 Shift+Ctrl+F4 /40 Shift+F5 /17 Ctrl+F5 /29 Shift+Ctrl+F5 /41 Shift+F6 /18 Ctrl+F6 /30 Shift+Ctrl+F6 /42 Shift+F7 /19 Ctrl+F7 /31 Shift+Ctrl+F7 /43 Shift+F8 /20 Ctrl+F8 /32 Shift+Ctrl+F8 /44 Shift+F9 /21 Ctrl+F9 /33 Shift+Ctrl+F9 /45 Shift+F10 /22 Ctrlt+F10 /34 Shift+Ctrl+F10 /46 Shift+F11 /23 Ctrlt+F11 /35 Shift+Ctrl+F11 /47 Shift+F12 /24 Ctrlt+F12 /36 Shift+Ctrl+F12 /48
Usage Details
- Pushbutton with multiple options
- Pushbutton on the table column
- Toggle Layout using a Pushbutton
- Change the Directory using pushbutton
- Get attributes of a pushbutton
- Padding a String
- Validating fields
- Get first visible row and last visible row values from a list screen
- Create a launch pad inside an SAP