


Purpose
The table() is used to create or modify a table on an SAP screen. The table() allows you to:
- Add columns using column()
- Populate and display data

Note: You can specify the table's position using various methods. Click here for more details on positioning the screen elements.
Syntax
You can easily create a table using the following formats:
Format 1: Basic table with coordinates
Creates a table by specifying its name, title, and the desired number of rows and columns.
// Creates a table using start and end coordinates
table([startrow,startcol],[endrow,endcol],{"name":"table name","title":"table title","rows":number});
Note: A table becomes visible only after at least one column is added.
To add a column, use the following command:
column("heading",{"size":x,"name":"column_name","option":value…});
Click here for details on column().
Format 2: Table with reference to screen elements
// Creates a table with reference to screen elements
table("F[screen element]+[startrow,startcol]",[endrow,endcol],{"name":"table name","title":"table title","rows":number});
Liquid UI provides two categories of commands to manage tables:
- Options to manage Rows and Columns
Parameters
The table command takes the following parameters for a Liquid UI table:
- name - Defines the name
- title - Defined the title
- rows - Defines the number of rows
Properties
- startrow, startcol - Starting row and column coordinates
- endrow, endcol - Ending row and column coordinates
- screen element - field name
Available Options
You can use the following options with the table command:
|
"columnselection":true - Enables selecting one or more columns from a table. |
|
|
"fixedcolumns":X - Fixes ‘X' number of columns during horizontal scroll. |
|
|
"rowselection":true - Enables selecting one or more rows. |
|
|
"singlecolumnselection":true - Enables selecting a specific column from the table. |
|
|
"singlerowselection":true - Enables selecting a specific row from the table. |
Options Detail
The following options are demonstrated using the existing table in the SAP screen.
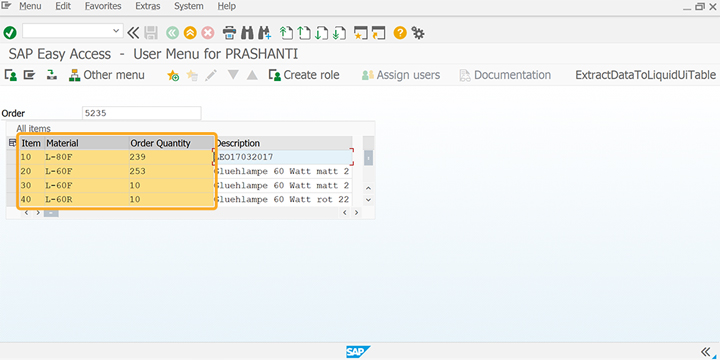
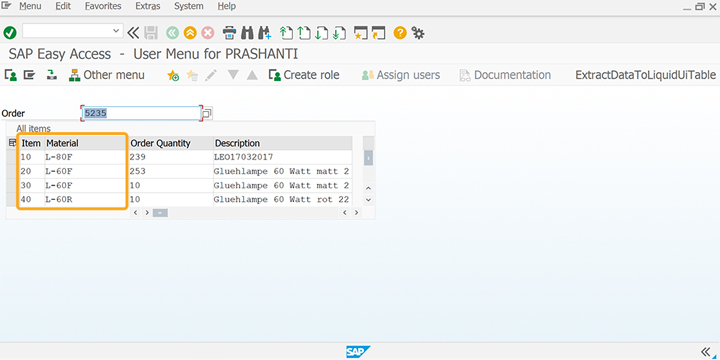
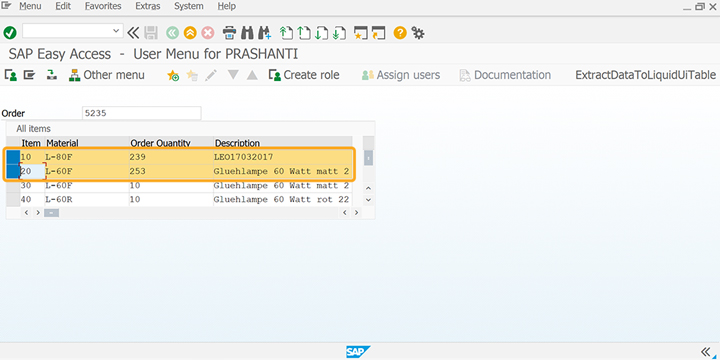
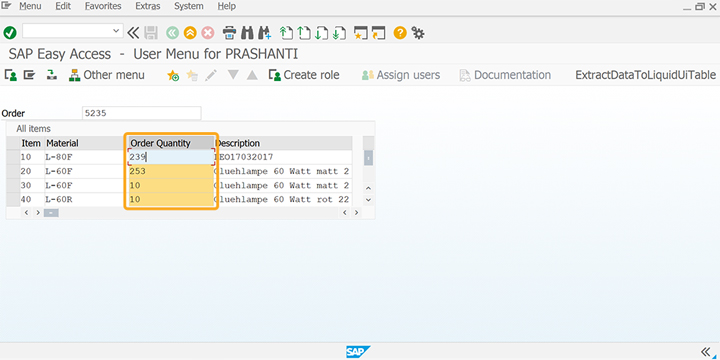
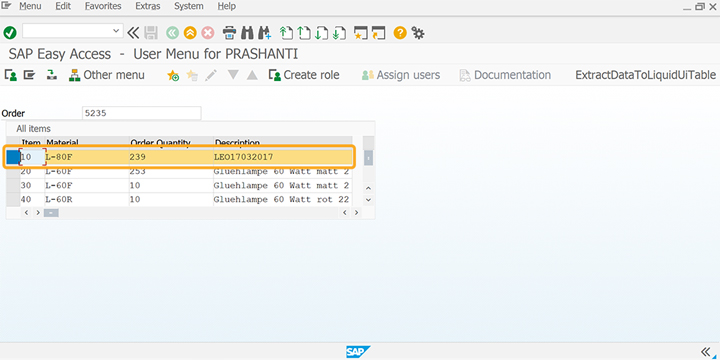
Other system variables can be associated with SAP tables in addition to those listed above. The capabilities include:
Populating and displaying table data
|
Data Population |
|
|
Data Display |
|
Note: You can use the table name and column name instead of the table title and labels to reference a column.
Displaying table data using System Variables
The table() function supports various system variables that allow you to display data from any cell within the table. You can use either of the following syntax options:
V[cursortabname.cell.column_name.row_number]
V[cursortabname.cell.column_number.row_number]
The available system variables are as follows:
_tabrow
Displays the count of rows in a table.
println("The number of rows is >> " +_tabrow);
_tabcol
Displays the count of columns in a table.
println("The table columns are >> " +_tabcol);
_cursortabname
Displays the title of a table, which is shown on the screen; Liquid UI scripts use the technical name.
The table title is visible on the screen, while Liquid UI scripts employ the technical name.
println("Table title is: " + _cursortabname);
_cursortabtechname
Displays the technical name of a table, used by Liquid UI scripts.
The technical name used by Liquid UI scripts appears while the table title appears on the screen.
println("Table name is:" +_cursortabtechname);
_cursorcolname
Displays the heading of the current table column, visible on the screen; Liquid UI scripts use the technical name.
Column heading appears on the screen while the column name (technical name) is used by Liquid UI scripts.
println("Column title is:" +_cursorcolname);
_cursorcoltechname
Displays the technical name of a column in a table, used by Liquid UI scripts.
Column technical name is used by Liquid UI scripts while the column heading appears on the screen.
println("Column title is:" +_cursorcoltechname);
_tabrowabs
Displays the absolute row number of the cursor's position in a Liquid UI table, even during scrolling.
println("Absolute cursor row is:" +_tabrowabs);
_cursorrow
Displays the first row of a table.
println("Row where table begins: " +_cursorrow);
_cursorcol
Displays the absolute column number of the cursor in a Liquid UI table, accounting for scrolling.
println("Column where table begins:" +_cursorcol);
Example 1: Displaying sales order items table in va02: dynamic selection and custom row limits.
This example provides a simplified view of sales order items, illustrating how to effectively display required data in the Change Sales Order: Initial Screen from the all items table.
//Create the file SAPMV45A.E0102.sjs inside your scripts folder for customizing the Change Sales Order: Initial Screen
//Now, add the Liquid UI script to the above file and save it.
- Create a toolbar push button labeled Get Table Data to display the values in the all items table.
// Creates a table to display the values
pushbutton([TOOLBAR], "Get Table Data", "?", {"process":va02Get5235TableValue});
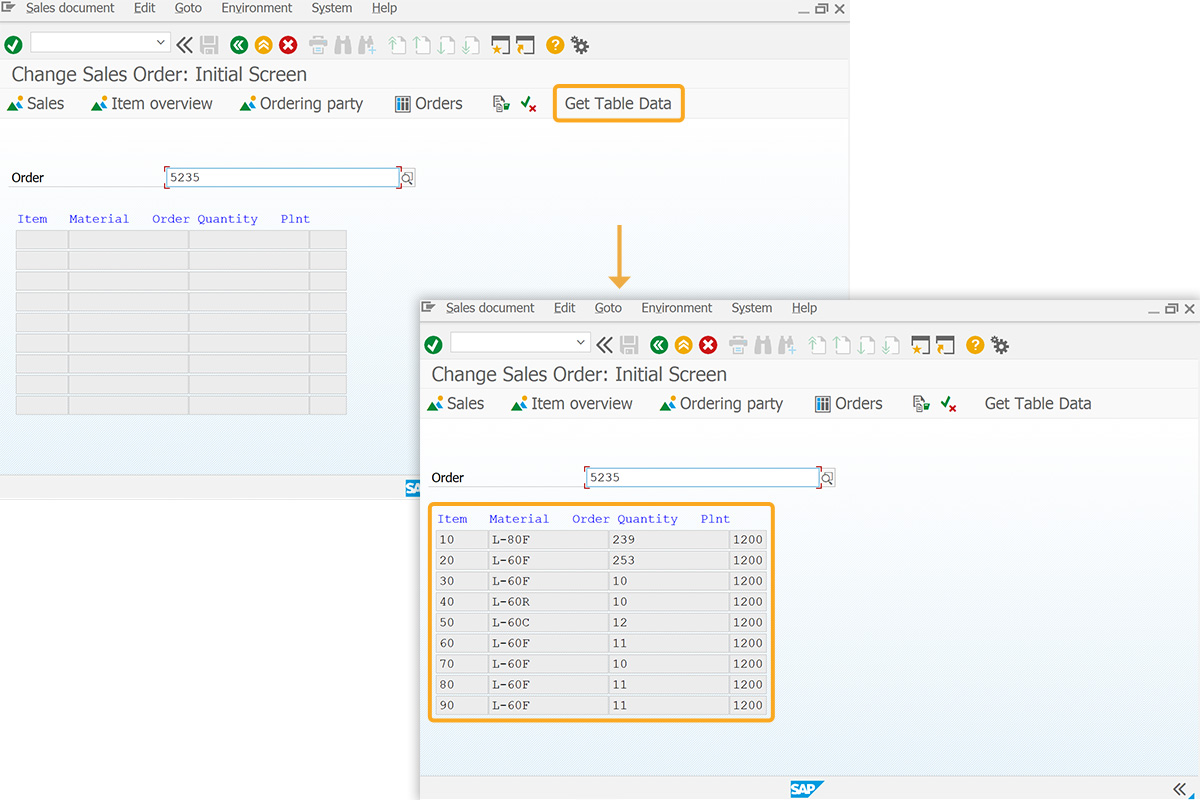
Click here for details about how to display sales order items in VA02 screen.
Example 2: Selection of rows and columns at run time
Using the table(), you can easily pre-select rows and columns in a Liquid UI table by utilizing the selectedrows and selectedcols parameters.
Syntax
You can select a specific row in a table using the following syntax.
table_name.selectedrows[row_index] = “X”;
You can select a specific column in a table using the following syntax.
table_name.selectedcols[col_index] = “X”;
- table_name - Represents the name of the Liquid UI table.
- row_index - Represents the row number you want to select.
- col_index - Represents the column number you want to select.
User Interface
To pre-select rows and columns in the Liquid UI table, follow the steps below:
//Create the file SAPLSMTR_NAVIGATION.E0100.sjs inside your scripts folder for customizing the SAP Easy Access screen
//Now, add the Liquid UI script to the above file and save it.
- Delete the image container on the SAP Easy Access screen using del().
// Deletes image container on the SAP Easy Access Screen
del("X[IMAGE_CONTAINER]");
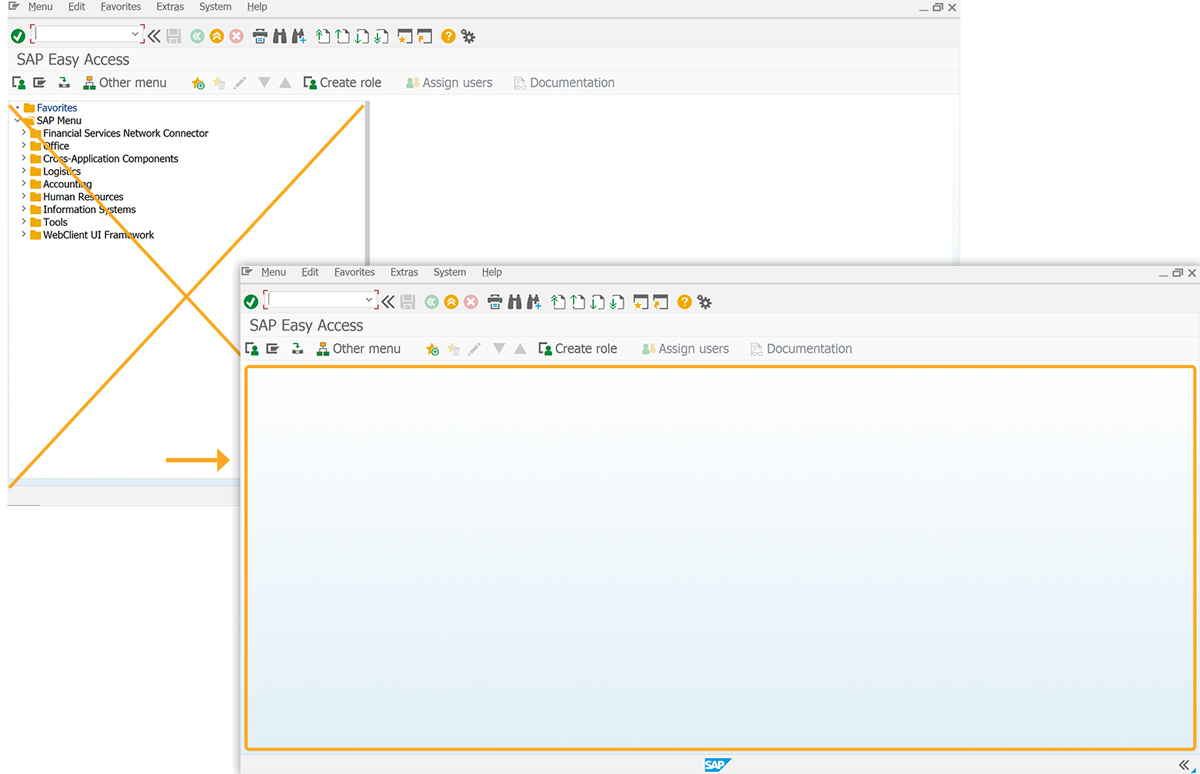
- Create a table labeled All items with 10 rows and 2 columns labeled Material and Quantity.
// Creates a table labeled All items
table([1,1], [12,48],{"name":"proj", "title":"All items", "rows":10,"rowselection":true,"columnselection":true});
column('Material', {"table":"T[All items]", "size":30, "name":"matnr", "position":1, "table":"T[All items]"});
column('Quantity', {"table":"T[All items]", "size":10, "name":"qty", "position":2, "table":"T[All items]"});
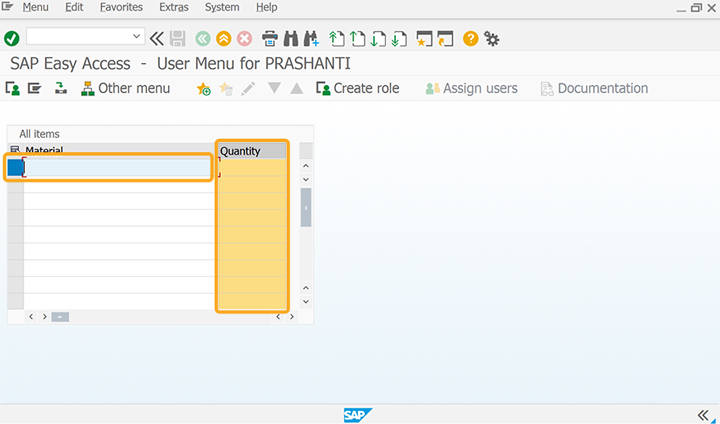
Note: selectedrows and selectedcols are arrays, and their index starts from ‘0’
Tips and Tricks
- Arrays using Key/Value Pairs
Inserts and display values from an array using Key/Value pairs.
table([1,1],[20,50],{"name":"matl_table","title":"Material Info","rows":20});
Click here for details on Arrays using Key/Value Pairs
- Clear Liquid UI Table
Clears all or a few of the columns of a Liquid UI table.
table([1,1],[20,50],{"name":"matl_table","title":"Material Info","rows":20});
Click here for details on how to clear the Liquid UI table
- Dynamic create table and read/write value into table cell
This example is to create the logic of displaying multiple Liquid UI tables on the screen and read or write values from the table.
table([start_row,10],[start_row+5,40],{"name":"z_table_"+i,"title":"Record"+i,"rows":50});
Click here for information about Dynamic Table Data Handling
- Change the width of the SAP table
In this example, you can see how easy it is to change the width of a SAP table.
tablewidth([T[table_name]],50);Click here for details about how to change the width of the SAP table.