


Several configurations can be made on the target device after installing the Liquid UI for iOS. Three types of App Settings are available for configuring the Liquid UI for iOS, as explained below:
Configuration via Home Screen
You can configure the Liquid UI for iOS directly from the Home Screen, where you will find two options: Connect to My SAP and Connect to Liquid UI Demo Server. The Connect to My SAP option helps configure the app with your existing SAP server connection, while the Connect to Liquid UI Demo Server option provides access to sample SAP server screens. Below is a detailed explanation of both options:
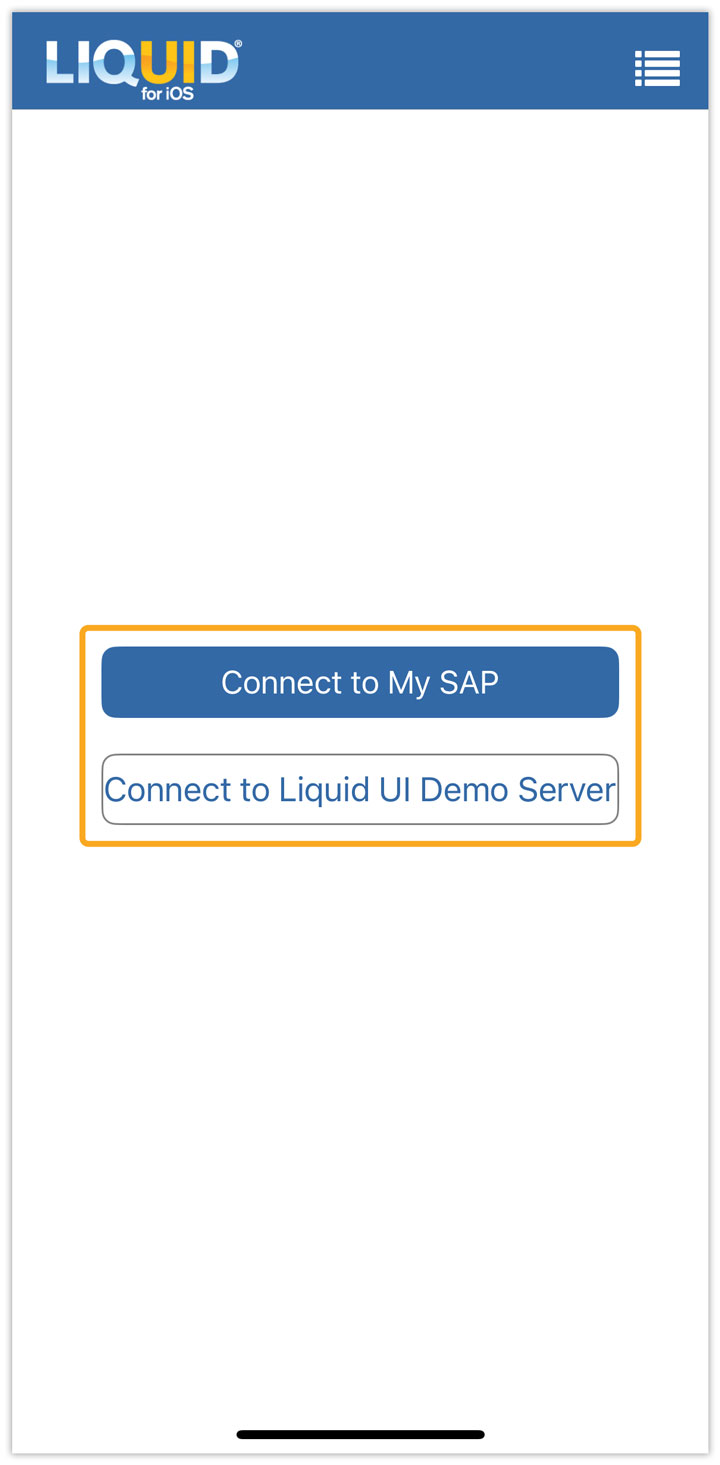
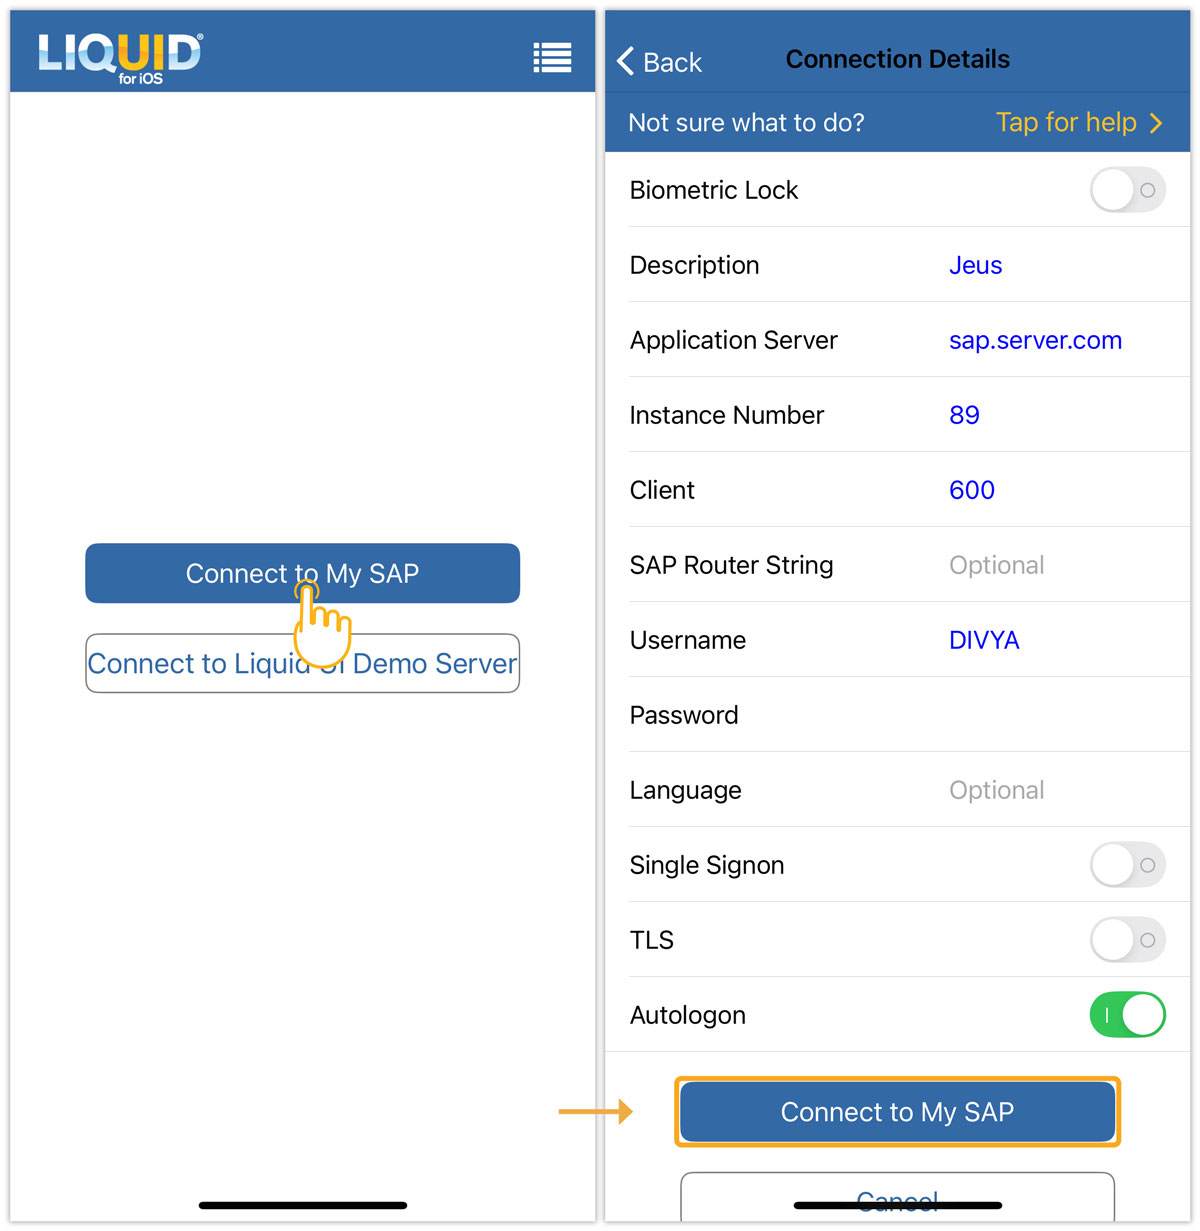
- Connect to My SAP
The Connect to My SAP option allows users to add a new SAP server connection. To add a new server connection, enter the details on the Connection details screen and then select Connect to my SAP.
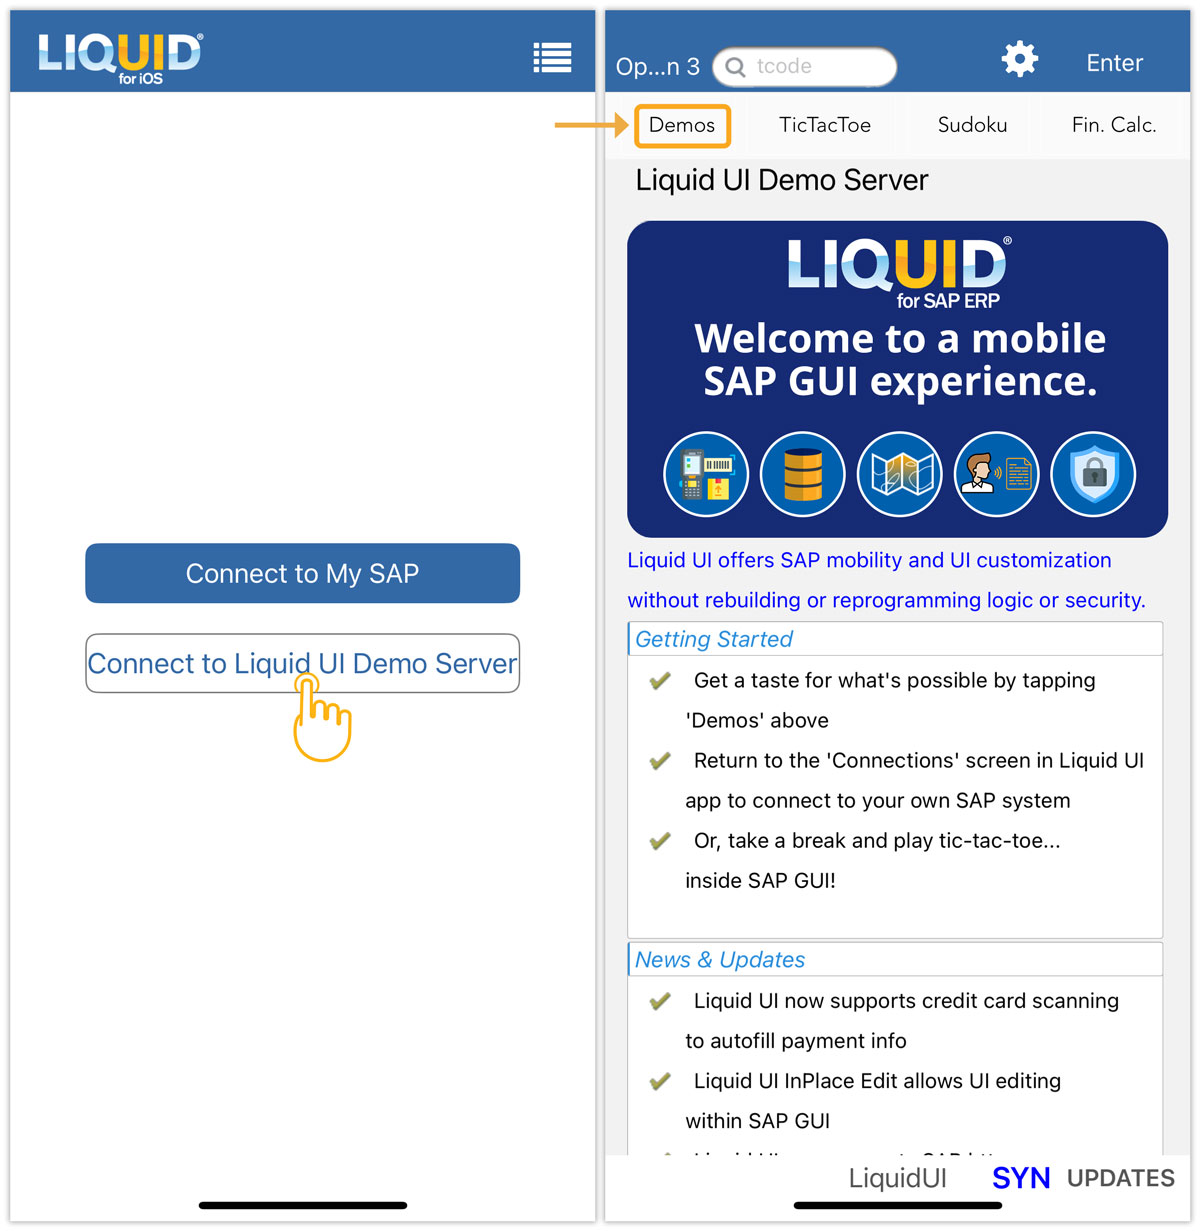
- Connect to Liquid UI Demo Server
The Connect to Liquid UI Demo Server option allows you to connect to our demo server, where you can explore screens such as Create Material, Create Sales Order, and Create PM Notification. You can view both native SAP screens and customized Liquid UI screens for these transactions. Additionally, with our customization engine, you can combine transactions, add field validations, create custom barcodes, send notifications, and automate actions.
Click here for details on the Demo server.
Configuration via Main Menu
The Main Menu is located at the top right corner of the home screen and provides settings to configure the Liquid UI for iOS. You can access the Main Menu by tapping the top-right corner or swiping left on the app screen. The Main Menu contains various settings for your Liquid UI client, allowing you to customize and configure your app.
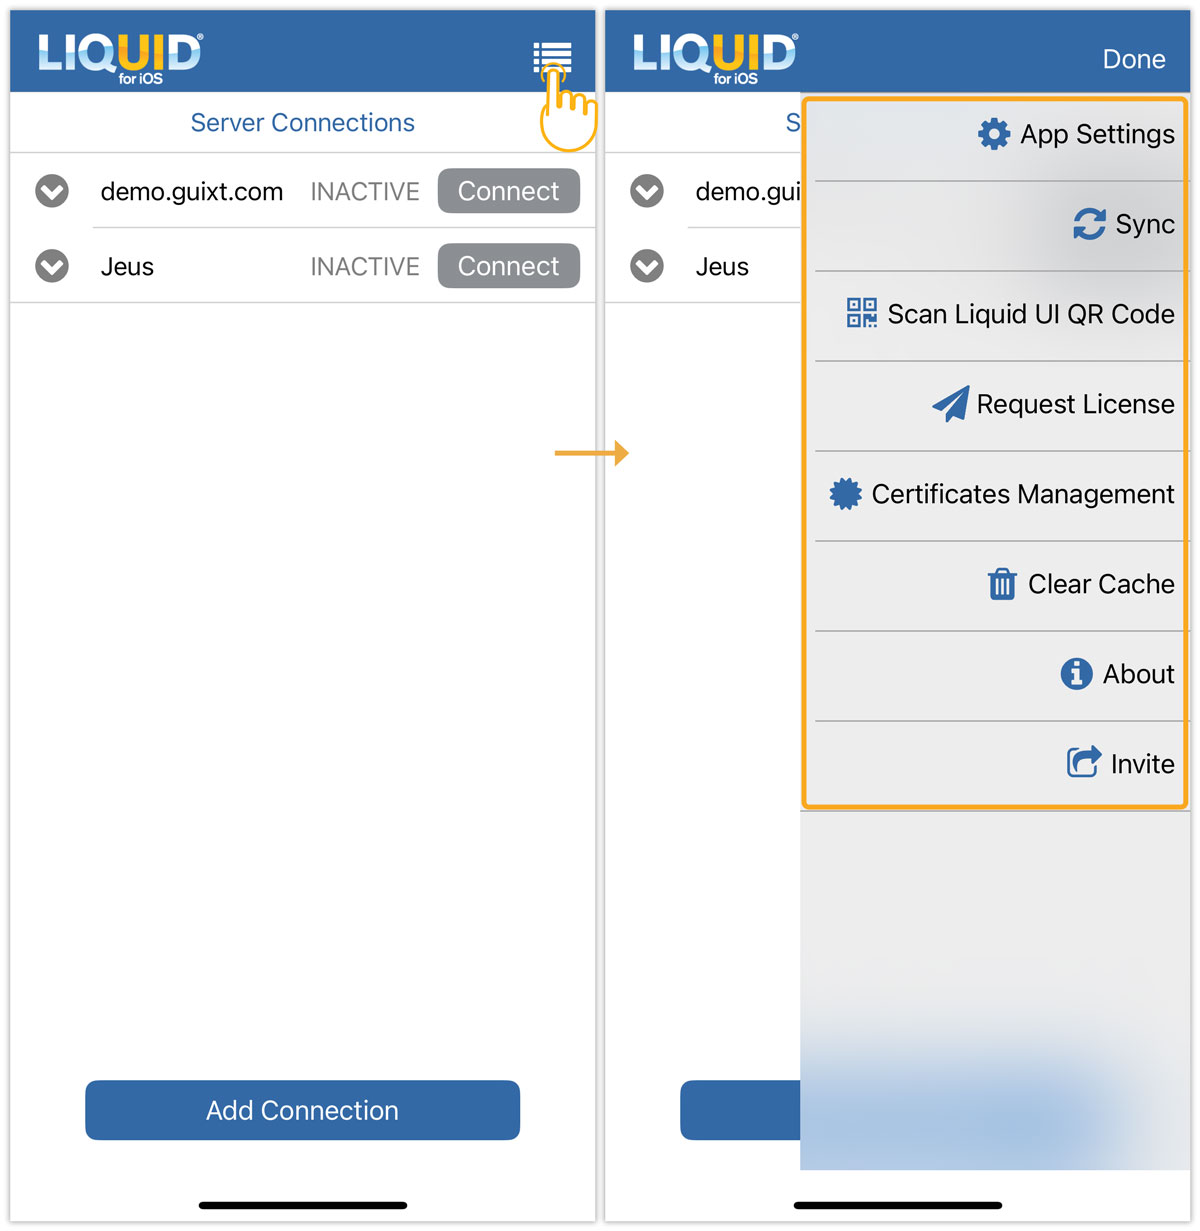
Click here for details on the Main Menu.
Configuration via Device Settings
You can adjust the SAP screen layout to meet display requirements using the Device Settings on your iOS device. These settings include controls like Dialog Box at Message, Logging, Start Connection List Screen, Turn on Inputfield History, Persistence Mode, Hide Toolbar, Hide TCode Entry, Dynamic Listview, Enable Sliding Gestures, UI Assist for Tables and Grids, UI in English, and Responsive UI. Below is a step-by-step guide on how to adjust the SAP screen using device settings:
- Open the Settings app on your iOS device, click Apps, and select GuiXT Liquid UI.
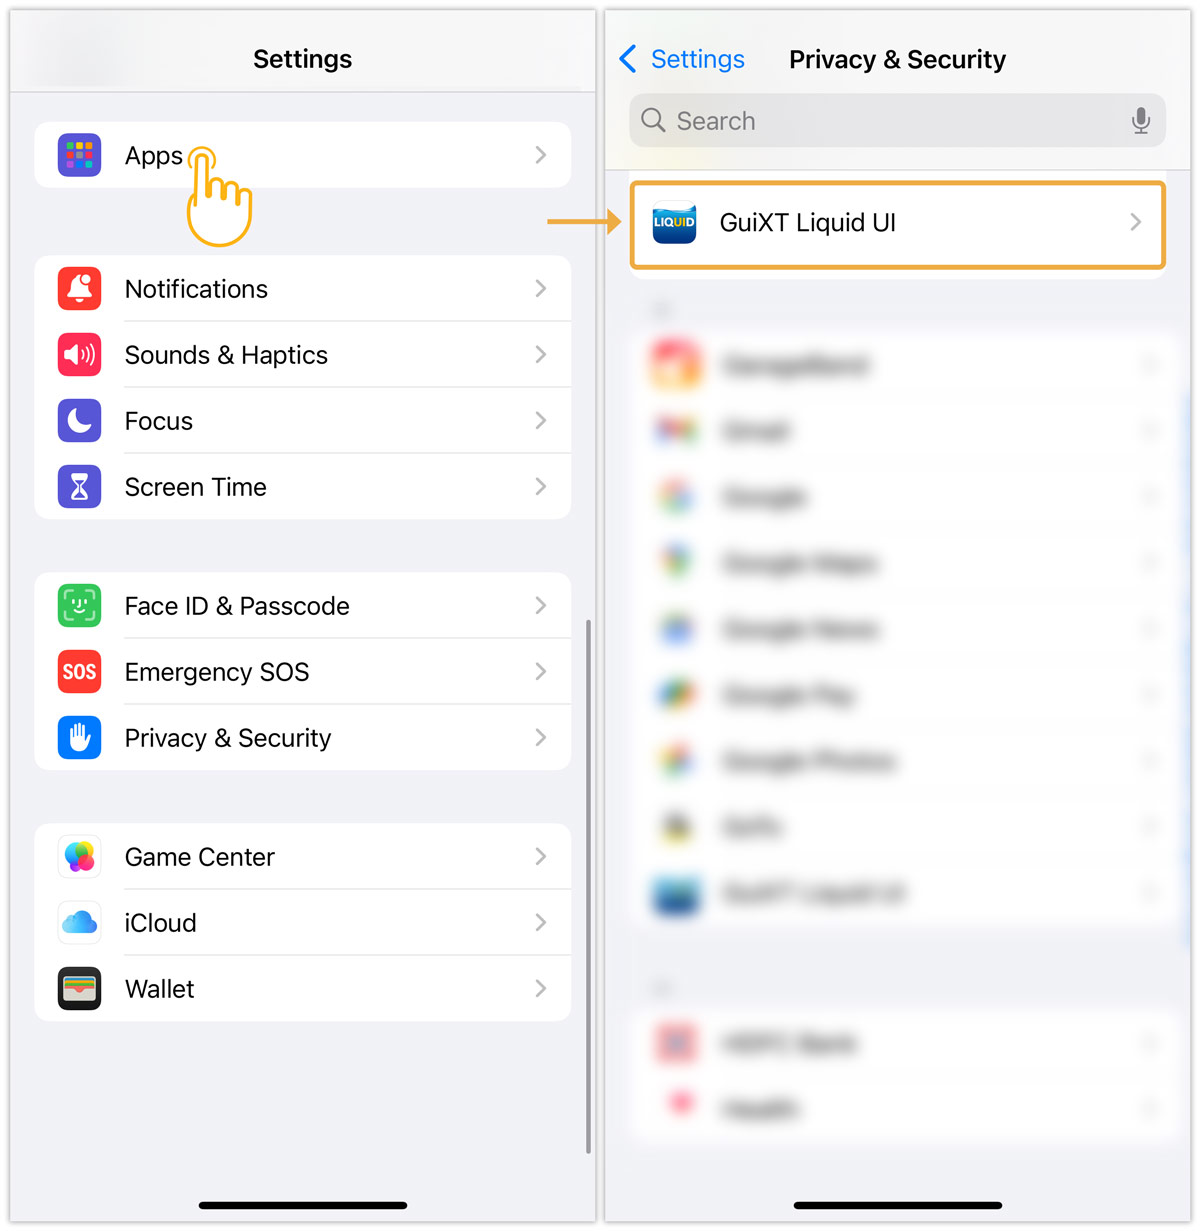
- Now, scroll down to the GUIXT LIQUID UI SETTINGS. The settings screen consists of the following controls:
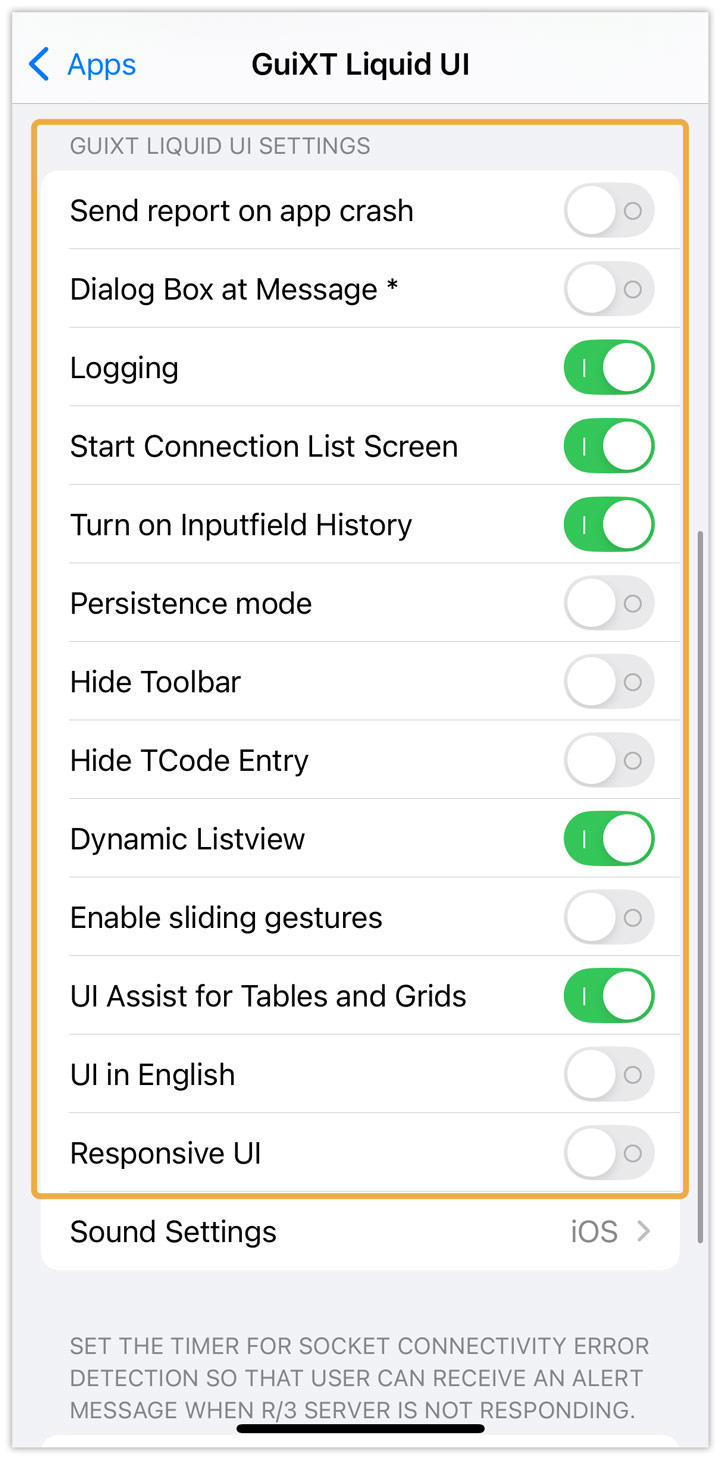
- Dialog Box at Message
When enabled, messages will appear in dialog boxes on the screen. If disabled, messages will be shown only in the status bar at the bottom of the screen.
- Logging
Enable this setting to activate the logging functionality.
Click here for details on Logging.
- Start Connection List Screen
Enable this setting to display the Connection List when you launch the app.
- Turn on Inputfield History
Enables you to show or hide the user input history within the input fields.
- Persistence Mode
Enable this setting to keep the socket alive for 20 to 30 minutes even when the app is idle or when the screen is locked.
Click here for details on Persistence Mode.
- Hide Toolbar
Enables you to hide the toolbar on the SAP screen.
- Hide TCode Entry
Enables you to hide the TCode entry field on the SAP screen.
- Dynamic Listview
When enabled, this option will preload Listview data for faster and smoother scrolling.
- Enable sliding gestures
When enabled, the App will support native iOS gestures like scroll and swipe on SAP transactions.
- UI Assist for Tables and Grids
Enables to streamline of navigation and data entry within tables and grids by providing additional assistive functionality.
- UI in English
When enabled, the entire SAP screen information will be displayed in English.
- Responsive UI
Ensures the app adapts to different screen sizes and orientations, providing a well-aligned, intuitive, and user-friendly experience across devices without the need to zoom.
- Dialog Box at Message