

Purpose
Liquid UI for Android offers robust Barcode Scanning capabilities, supporting both the device's integrated camera and external devices like Linea Pro.
This feature facilitates rapid and accurate data entry into SAP by scanning 1D and 2D barcodes, thereby minimizing manual input and data entry errors.
The system can be configured with rules to automate post-scan actions such as populating fields, auto-entering data, or tabbing through fields. For instance, this can greatly simplify tasks like auto-filling PO Numbers, Line Items, and Quantity fields during the PO receipts process.
Barcode Scanning Configuration Rules
- Rule 1 - Modify scanned values: Add or remove prefixes and suffixes based on the barcode type to extract only relevant data.
- Rule 2 - Automate actions after scanning: Automatically perform actions such as auto-populate, TAB, or ENTER after scanning.
- Rule 3 - Default Configuration: The default rule is applied if no configuration is defined.
- Rule 4 - Dynamic Action Selection: Users can manually choose actions like SCAN, DONE, TAB, or ENTER once the scanning is done.
Scanning Options
- Single barcode: Scan one barcode into an SAP input field.
- Multiple barcodes: Scan multiple barcode values in one scanning session and select the values to retrieve.
- Continuous scanning: Scan multiple barcodes one after another without reopening the scanner.
Minimum Requirements
An active Liquid UI for Android license is required.
For details about Liquid UI for Android licensing, Click Here.
Pre-configuring a Barcode Scanner
Liquid UI for Android supports full native scanner configuration capability, allowing users to execute various functions based on their specific needs.
- Open the Main Menu.
- Select App Settings.
- Select Configure Barcode Scanner.
You can configure the following settings:
- Add or edit barcode types.
- Edit default barcode types.
- Define prefixes and suffixes for barcode types.
For details about configuring barcode types, default barcode types, and barcode prefixes or suffixes, see Barcode Scanner Settings.
Scan a 1D Barcode
Liquid UI's SCAN feature streamlines data entry by enabling users to populate information with barcode scanning. Users can also modify the scanned data directly within the input field. The steps below detail how to scan a 1D barcode.
- Open the MM03 transaction.
- Enter the required material information.
- Navigate to the Material input field.
- Long-press the Material input field.
- Select SCAN.
- Point the camera at the barcode.
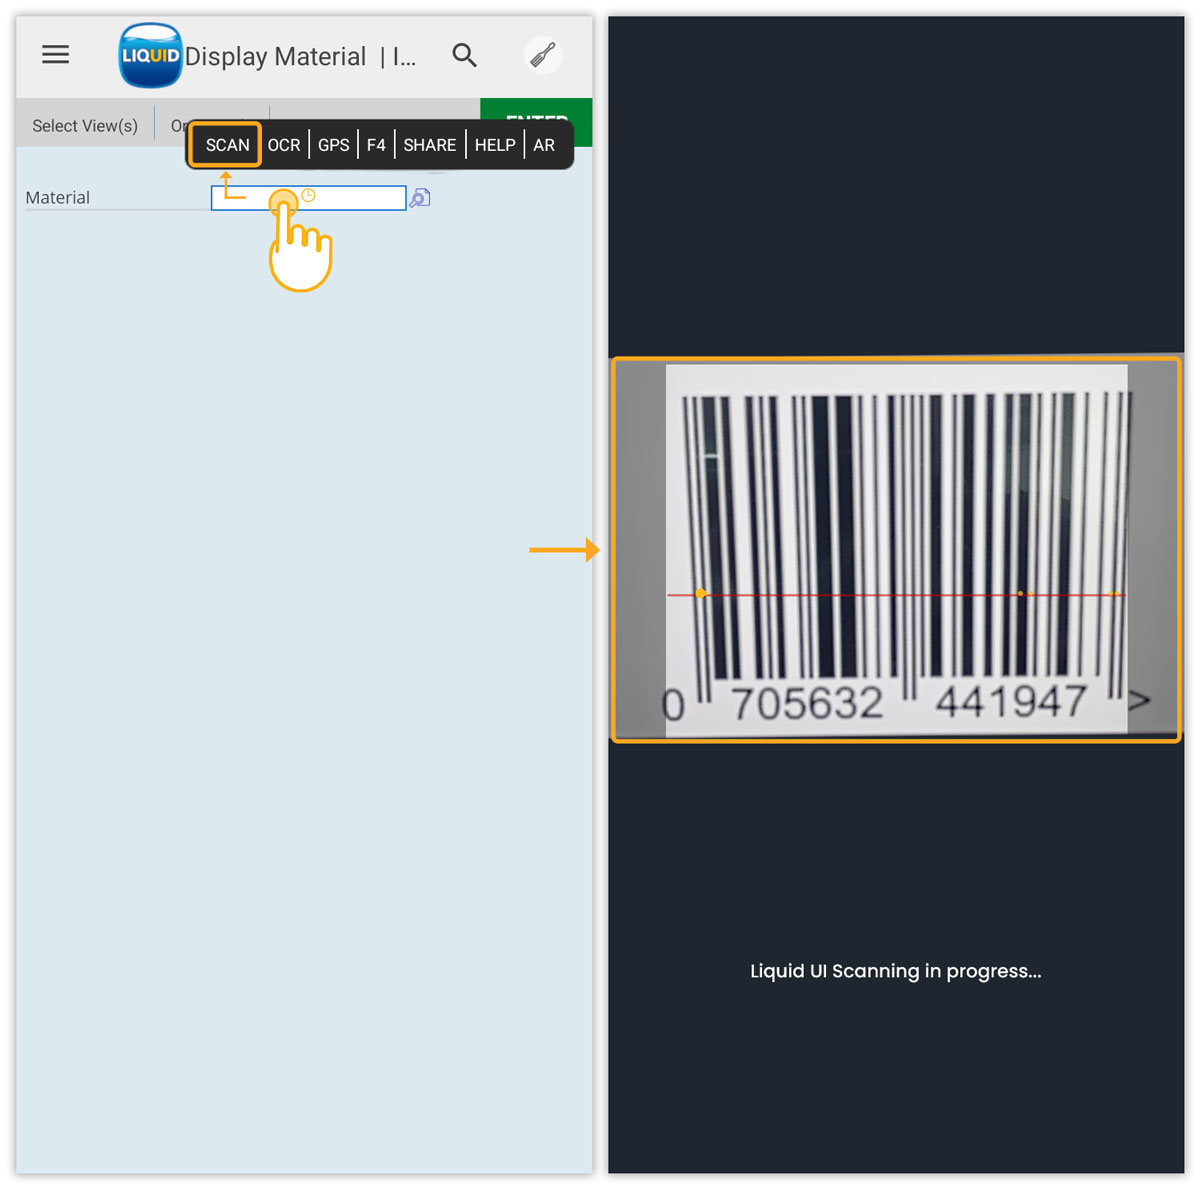
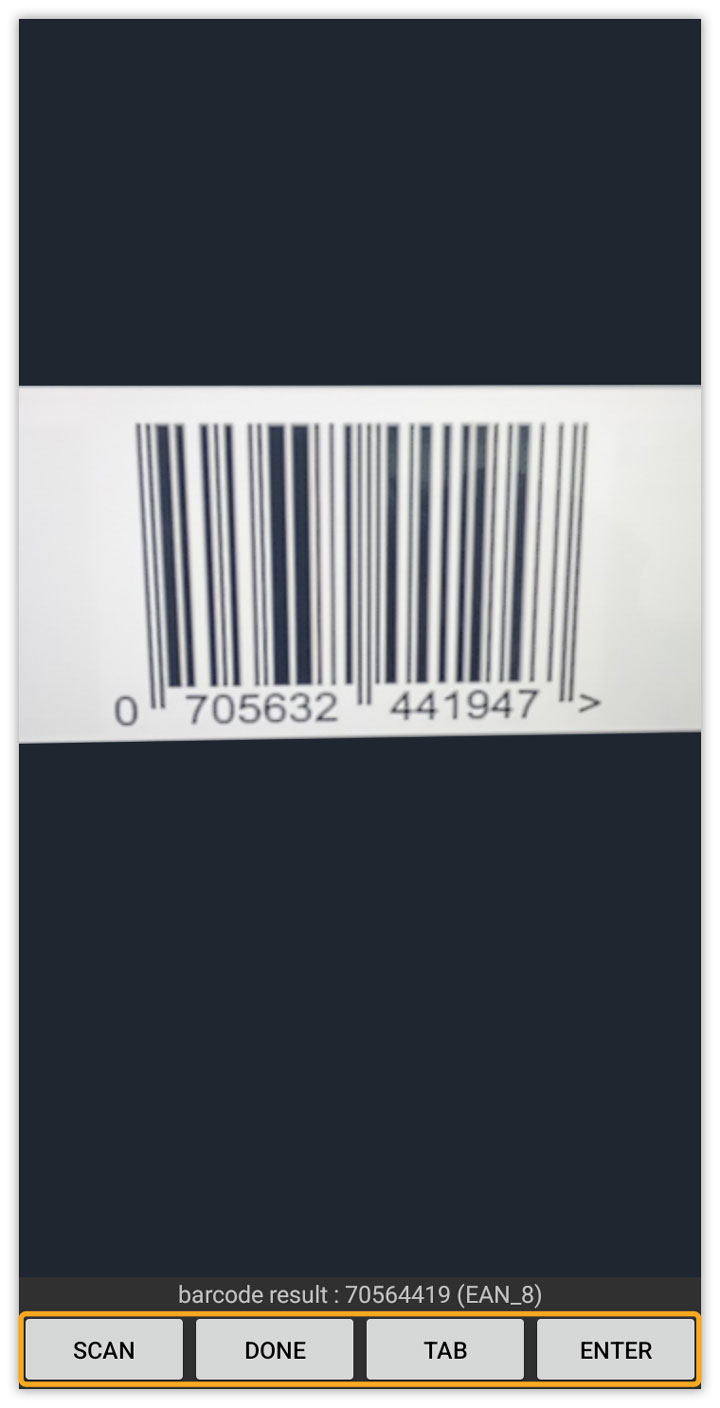
- Review the scanned barcode value. The available actions include SCAN, DONE, TAB, and ENTER.
Single-scan Actions
- After scanning a barcode, the following actions are available:
- SCAN: Select SCAN to rescan the barcode or QR code.
- DONE: Select DONE to populate the scanned value in the Material input field.
- TAB: Select TAB to populate the scanned value and move to the next field. This button functions as an Auto-Tab, typically found in SAP GUI.
- ENTER: Select ENTER to populate the scanned value and perform the SAP Enter action.
Edit a Scanned Value
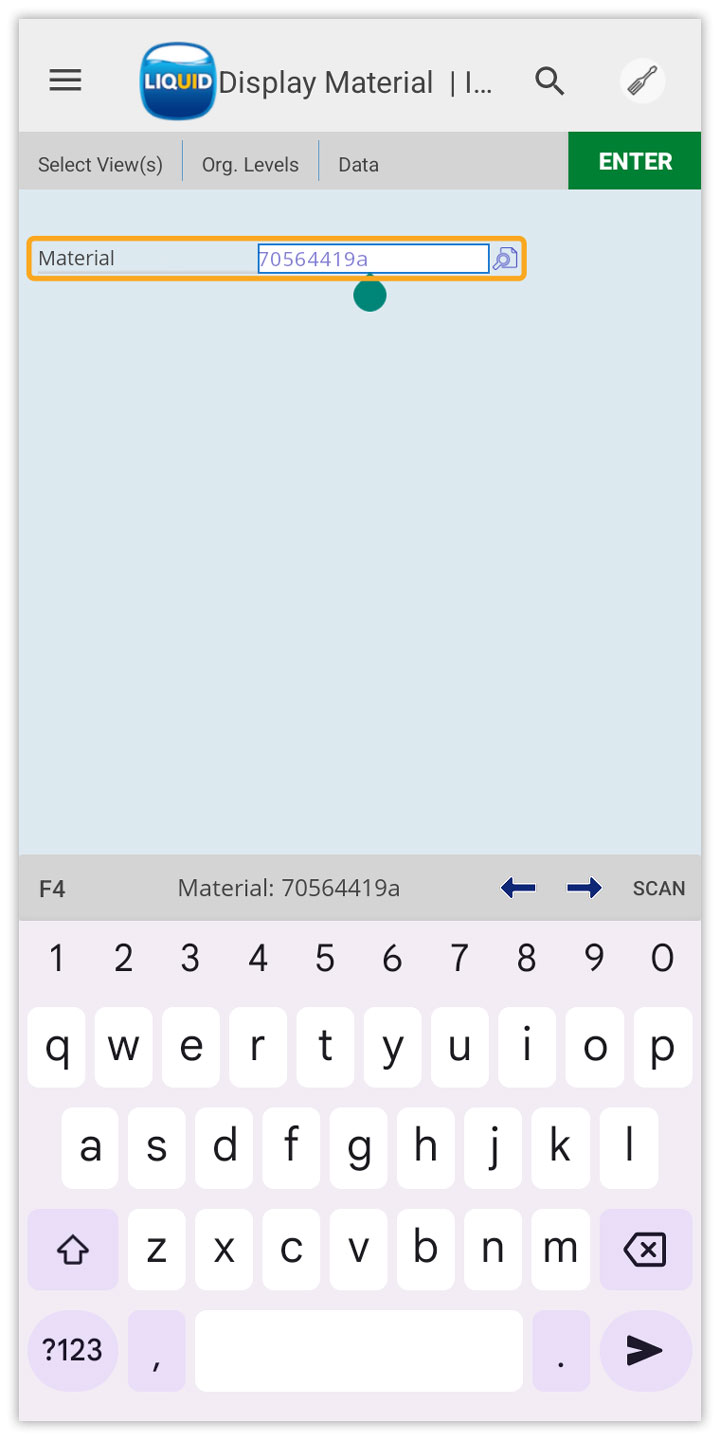
You can manually edit the scanned value in the SAP input field.
- Place the cursor in the input field containing the scanned value.
- Edit the value as required.
Scan a 2D Barcode
2D barcodes are images composed of dots, squares, rectangles, or hexagons that can store a large amount of data both vertically and horizontally, up to 7,089 characters.
These barcodes can encode various types of information, including URLs, text, images, and coupons, often in encrypted format. One of the most common 2D barcode types is the QR code, which is widely supported by mobile devices and laser scanners. It is used for quick access to information and has many applications.
Similar to 1D barcodes, 2D barcodes typically fill a single SAP input field. Follow the steps below to scan a 2D barcode. 2D barcode scanning is demonstrated using the XK02 transaction.
- Open the XK02 transaction, enter the required vendor details, select the Address checkbox, and select ENTER to open the Change Vendor: Address screen.
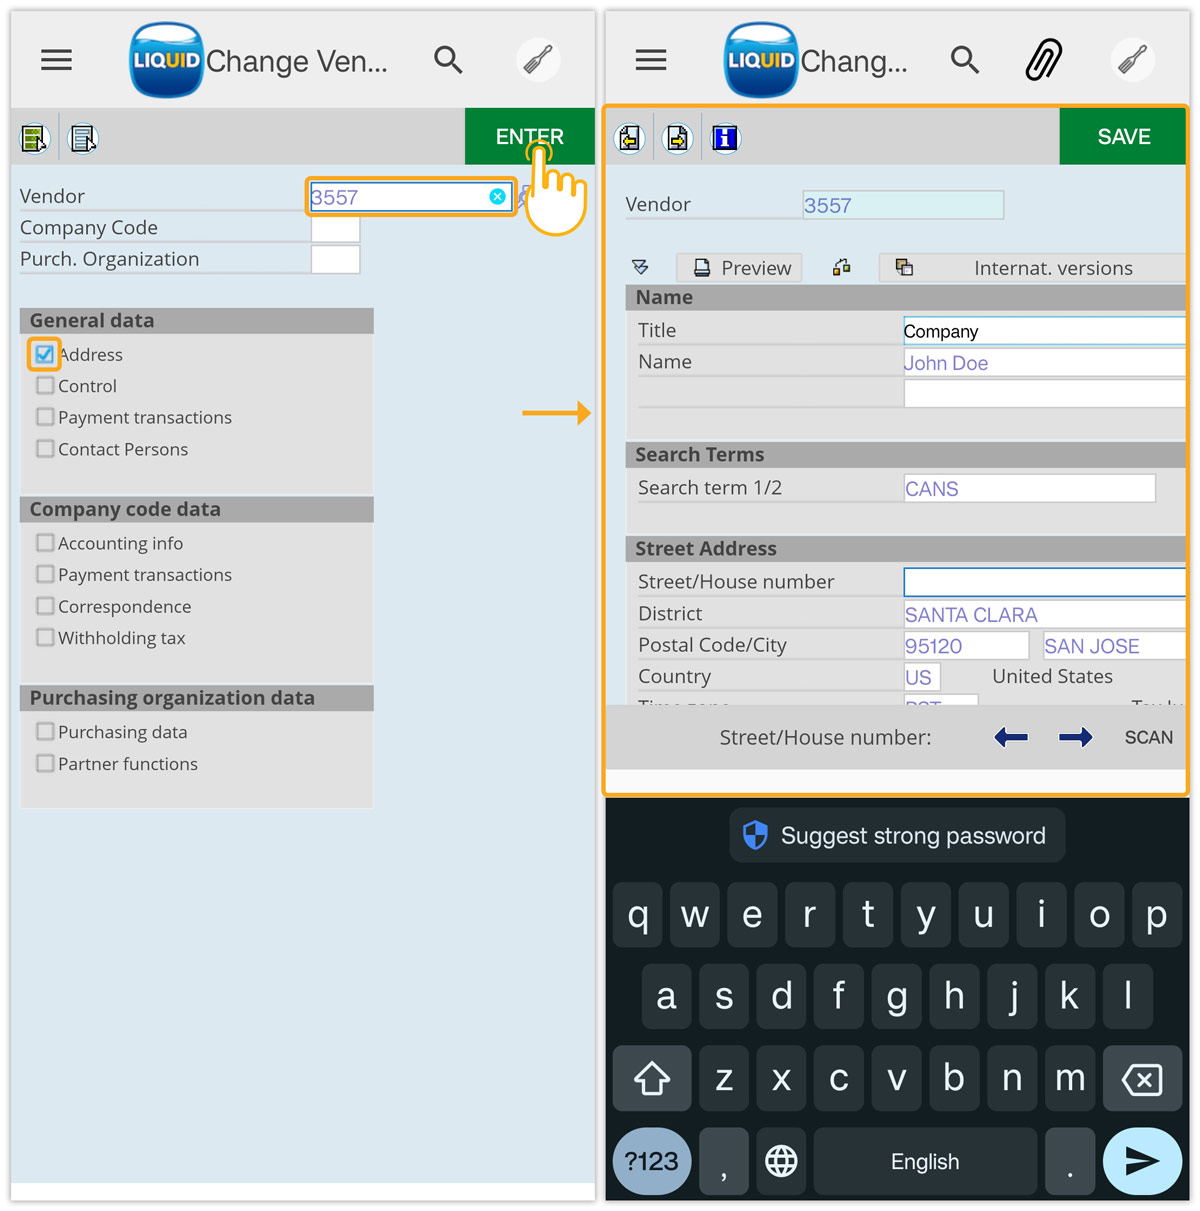
- Navigate to the Street/House number input field, long-press the field, and select SCAN.
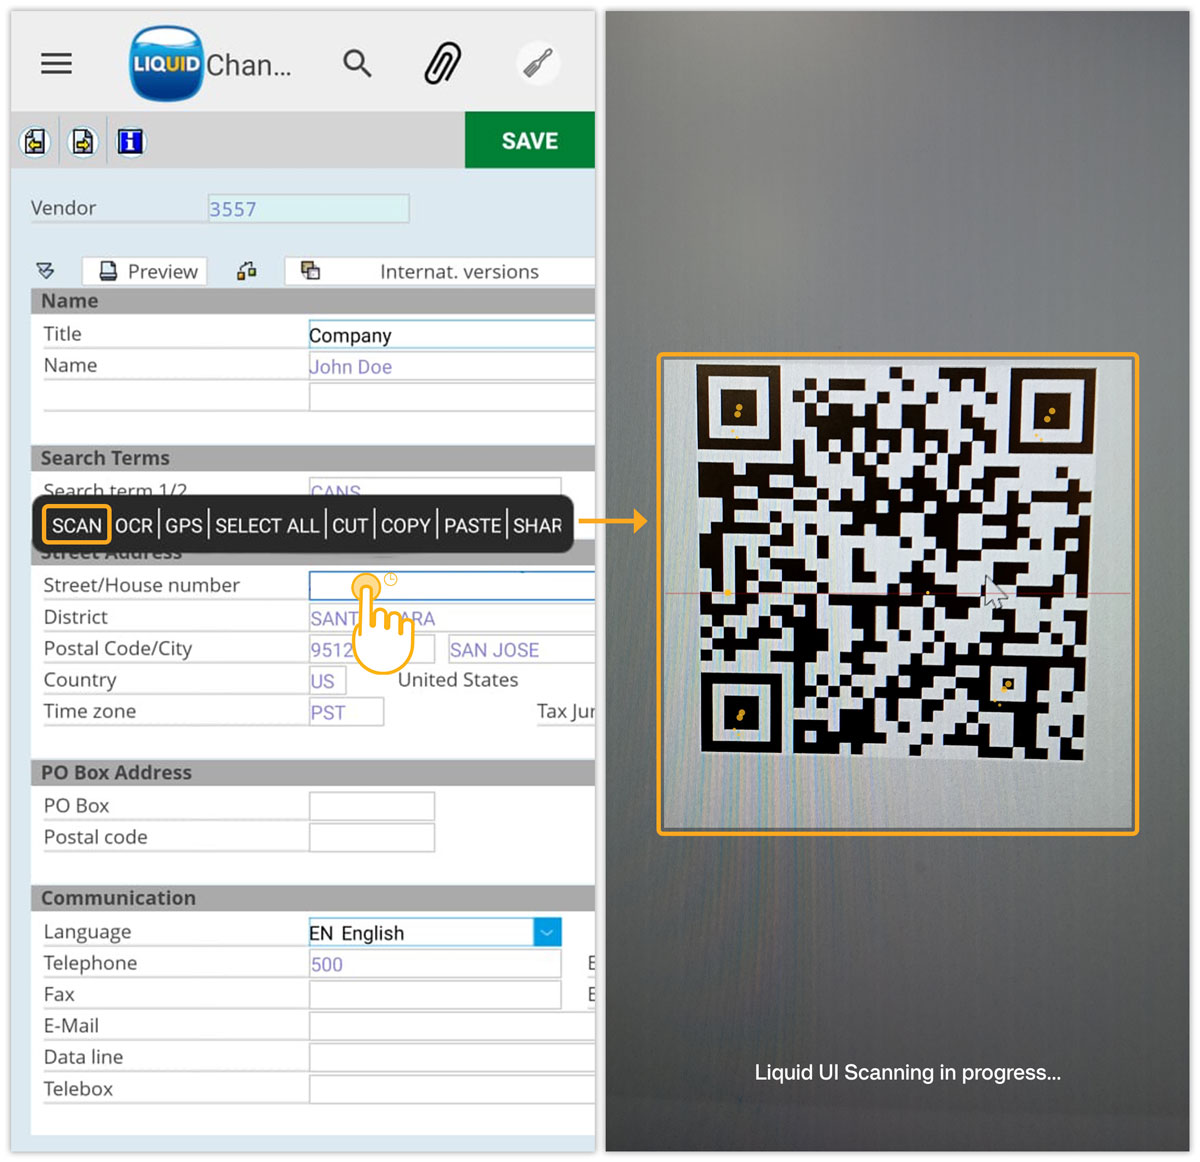
- Point the camera at the QR code. Once the QR code is scanned, review the scanned value and the available actions.

- Select DONE to populate the scanned value in the Street/House number field.
- Review the scanned value in the Street/House number field.
Scan Multiple Barcodes in One Continuous Session
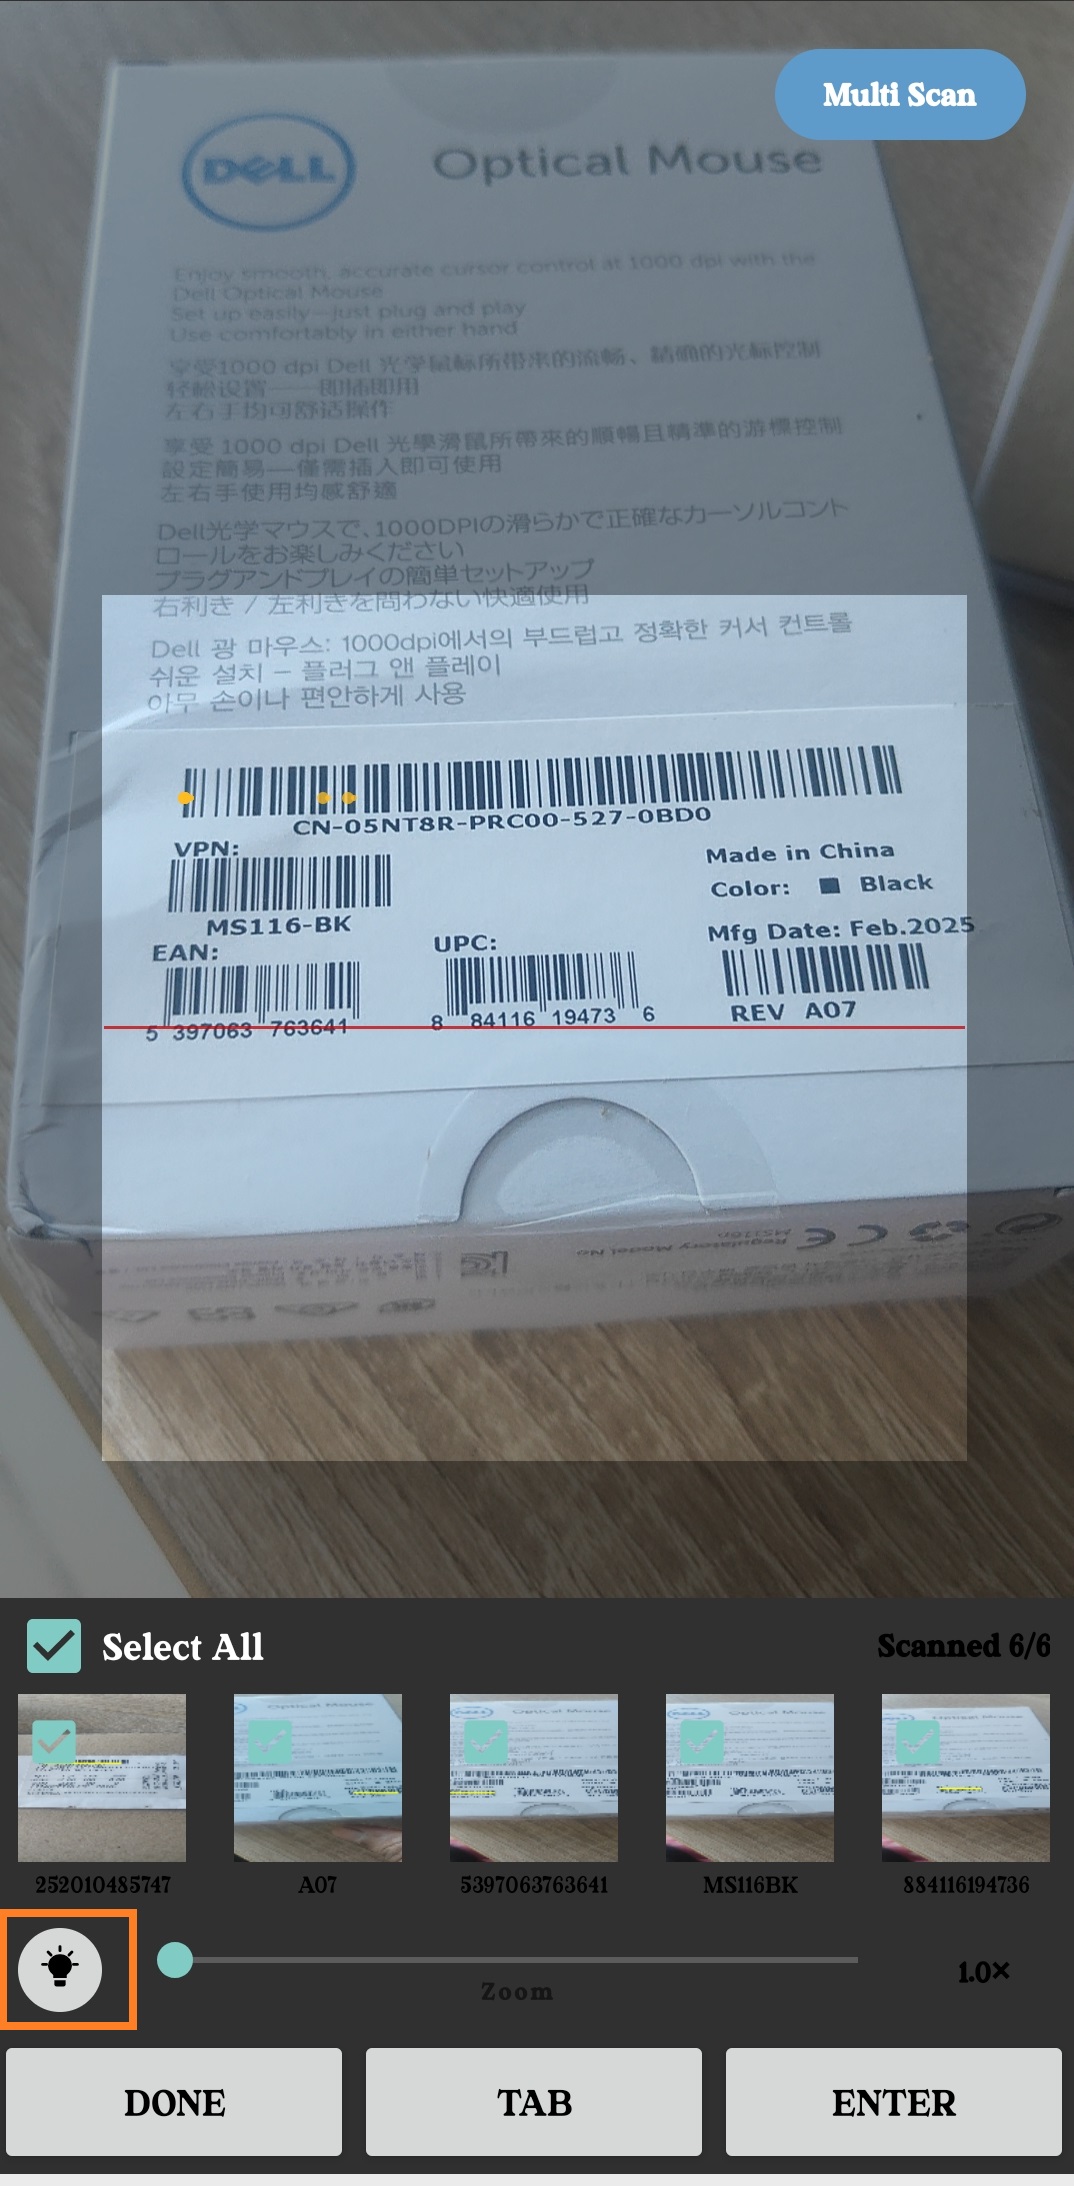
Liquid UI for Android supports continuous multi-scan from a long-text input field. You can scan multiple barcodes one after another without reopening the scanner. Each scanned value is added to the scan results, where you can review and select the values to retrieve.
- Open the SAP transaction that contains the long-text input field.
- Enter the required transaction values.
- Navigate to the long-text input field.
- Long-press the long-text input field.
- Select SCAN.
- Scan the first barcode.
- Scan additional barcodes one after another without reopening the scanner.
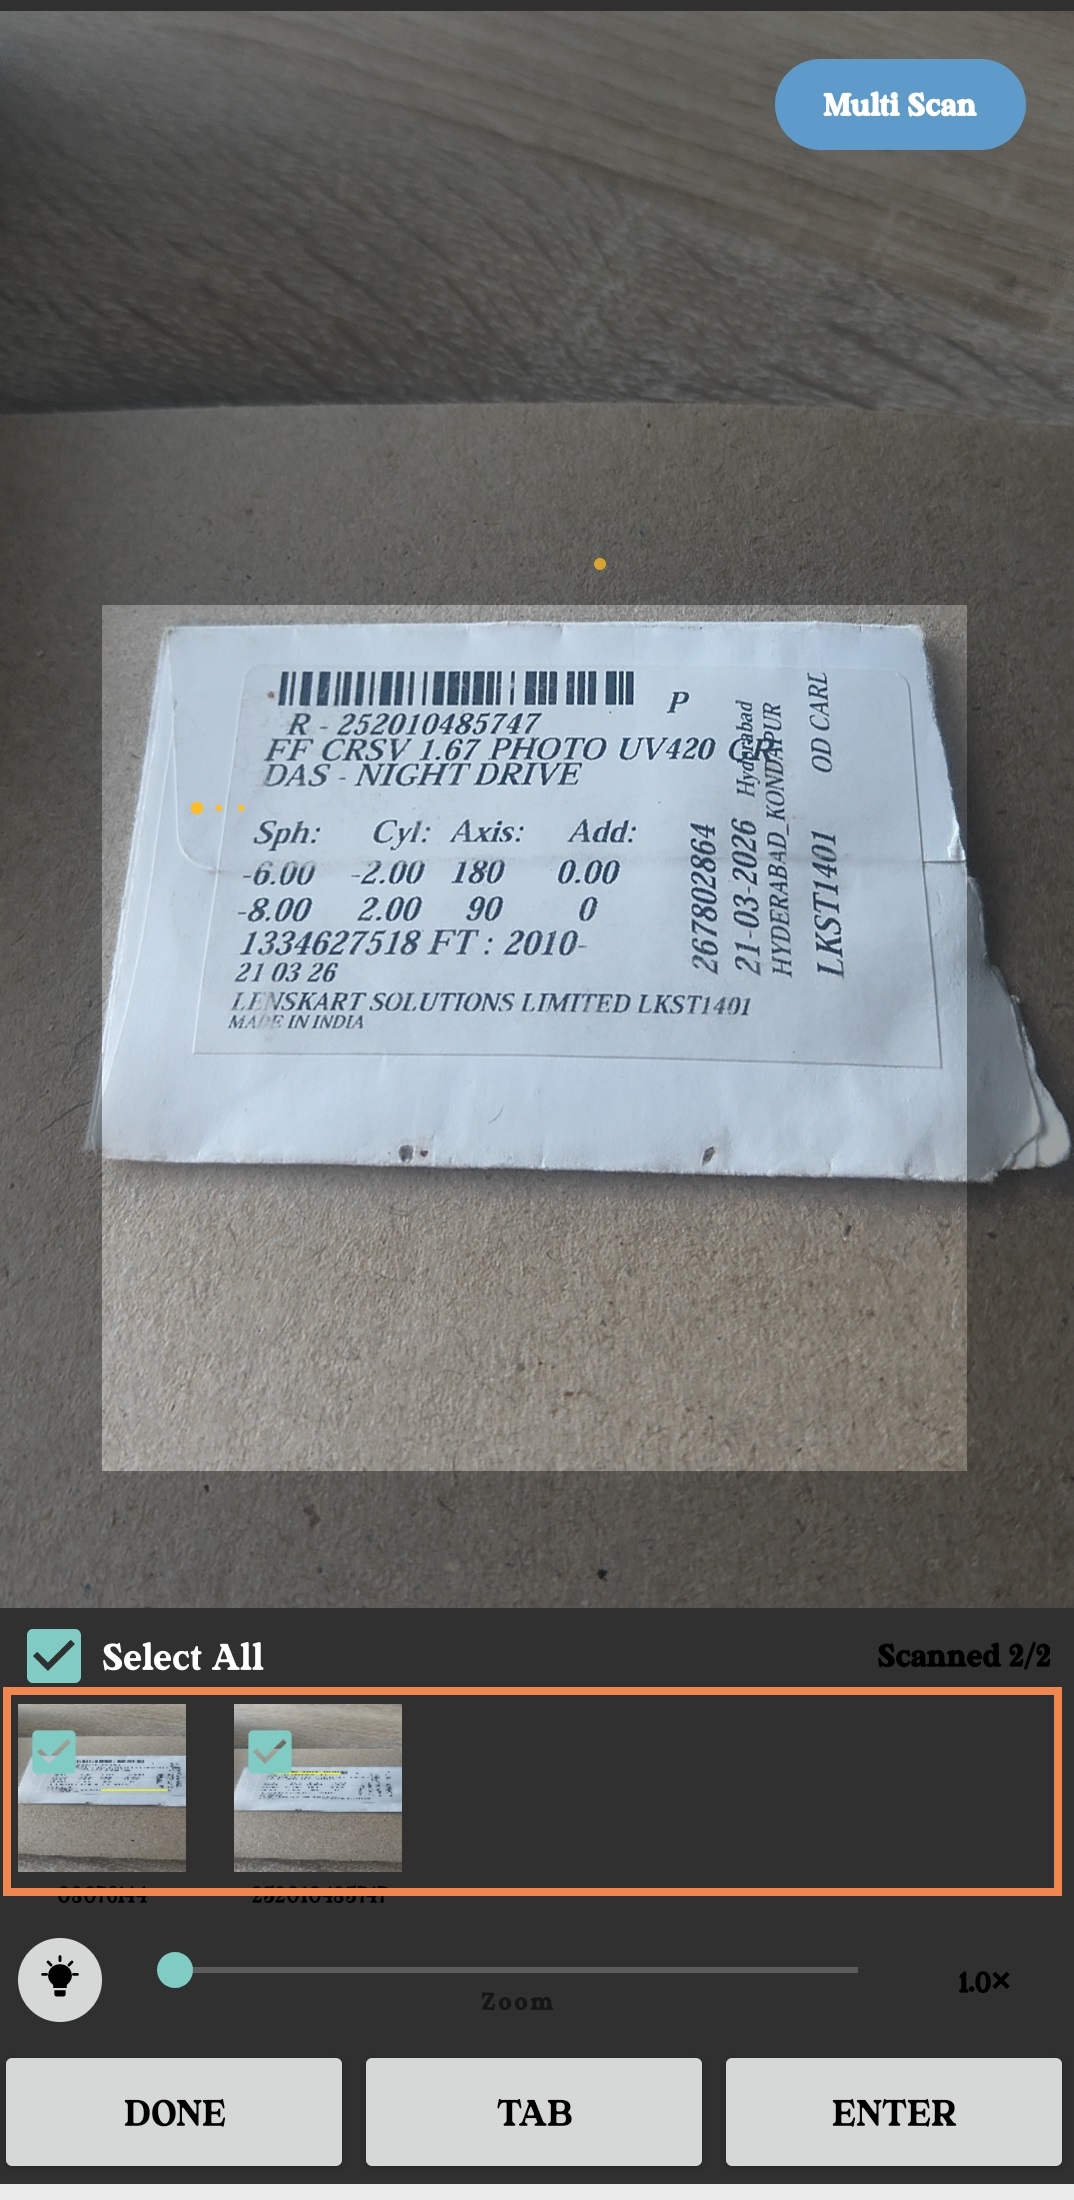
- Review the scanned barcode values displayed in the scanner.
- Select the checkbox for a barcode value to select or deselect it.
- Select Select All to select all scanned barcode values.
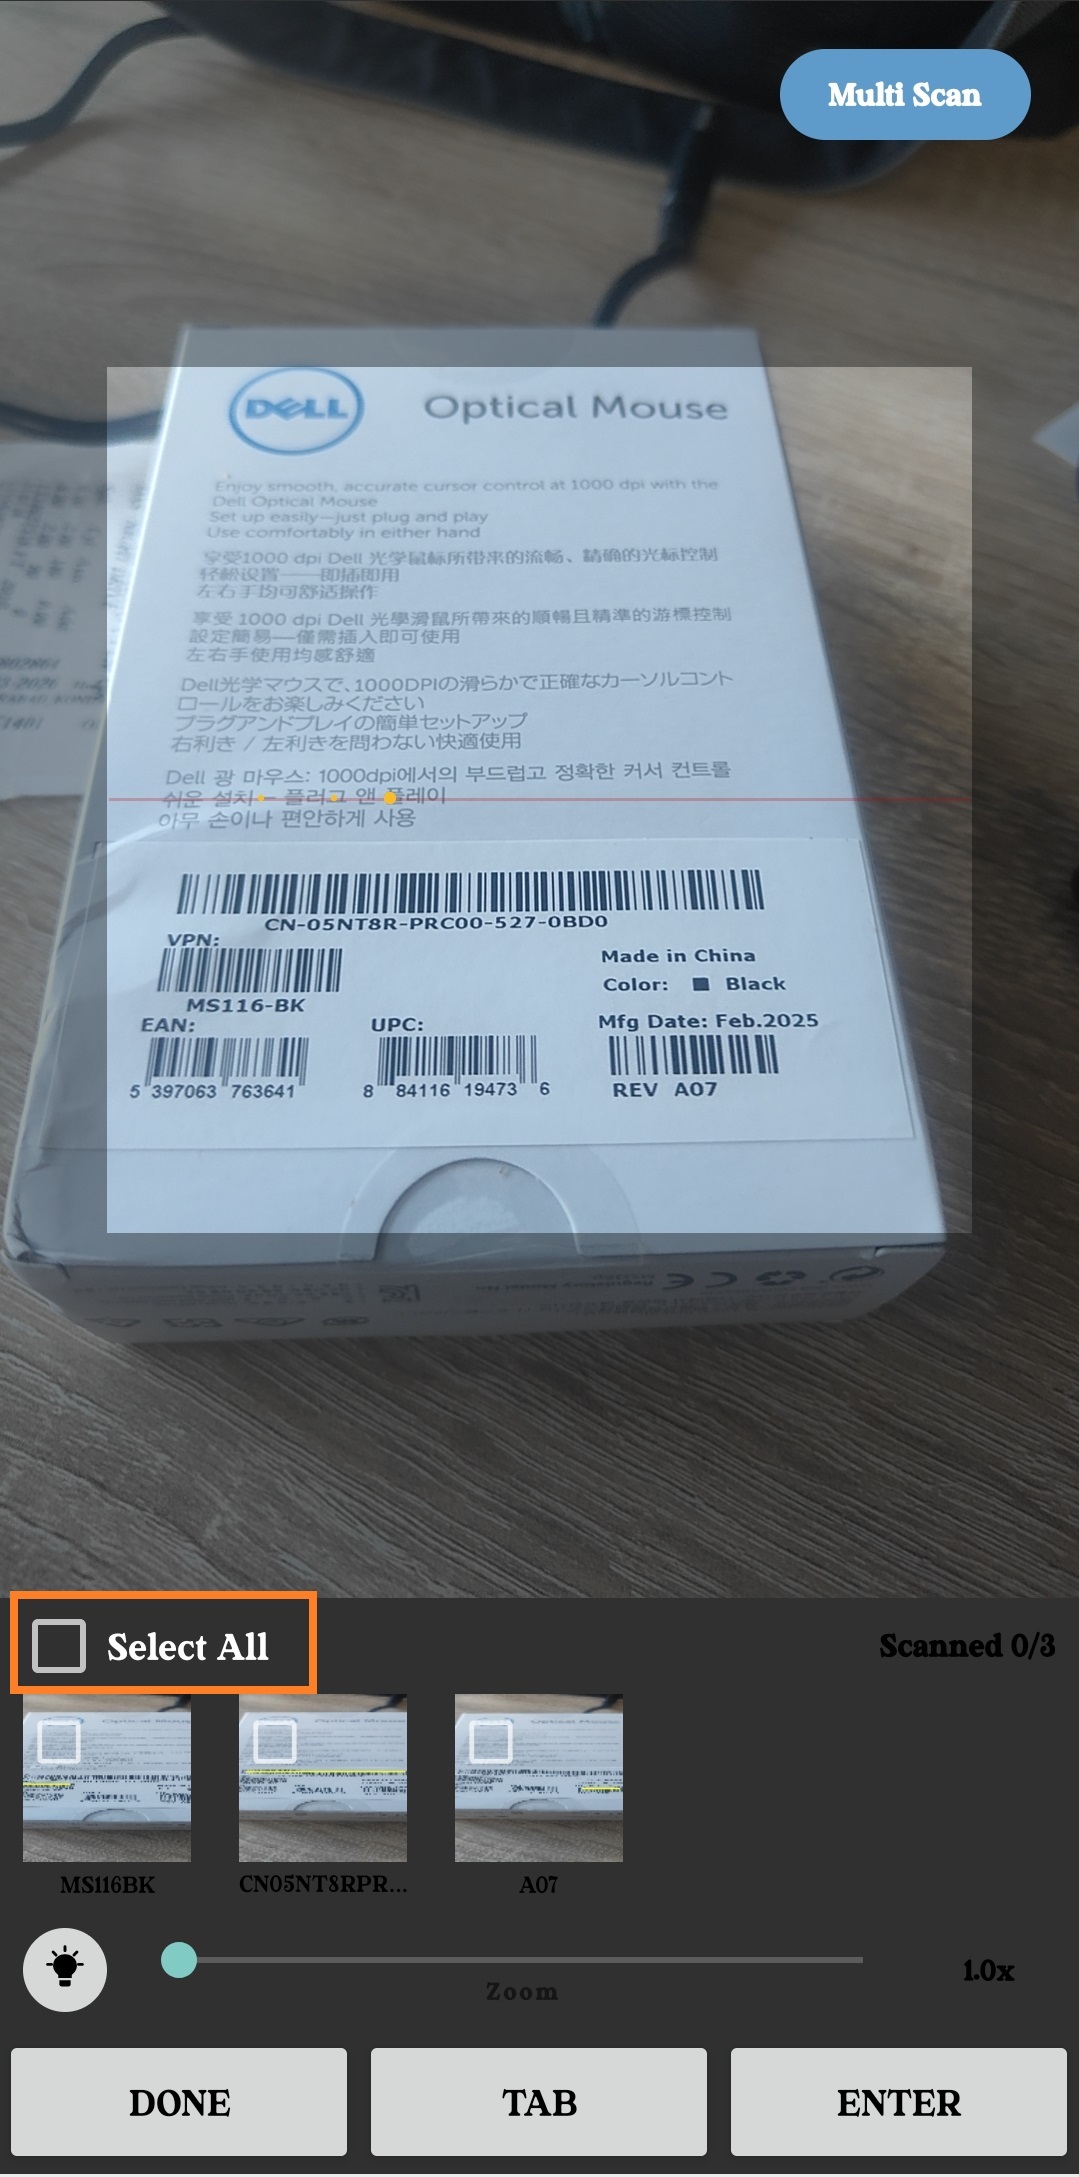
- Deselect the barcode values you do not want to retrieve.
- Select DONE to retrieve the selected barcode values.
- Select TAB to retrieve the selected barcode values and move to the next field.
- Select ENTER to retrieve the selected barcode values and perform the SAP Enter action.
- Review the retrieved barcode values in the long-text input field.
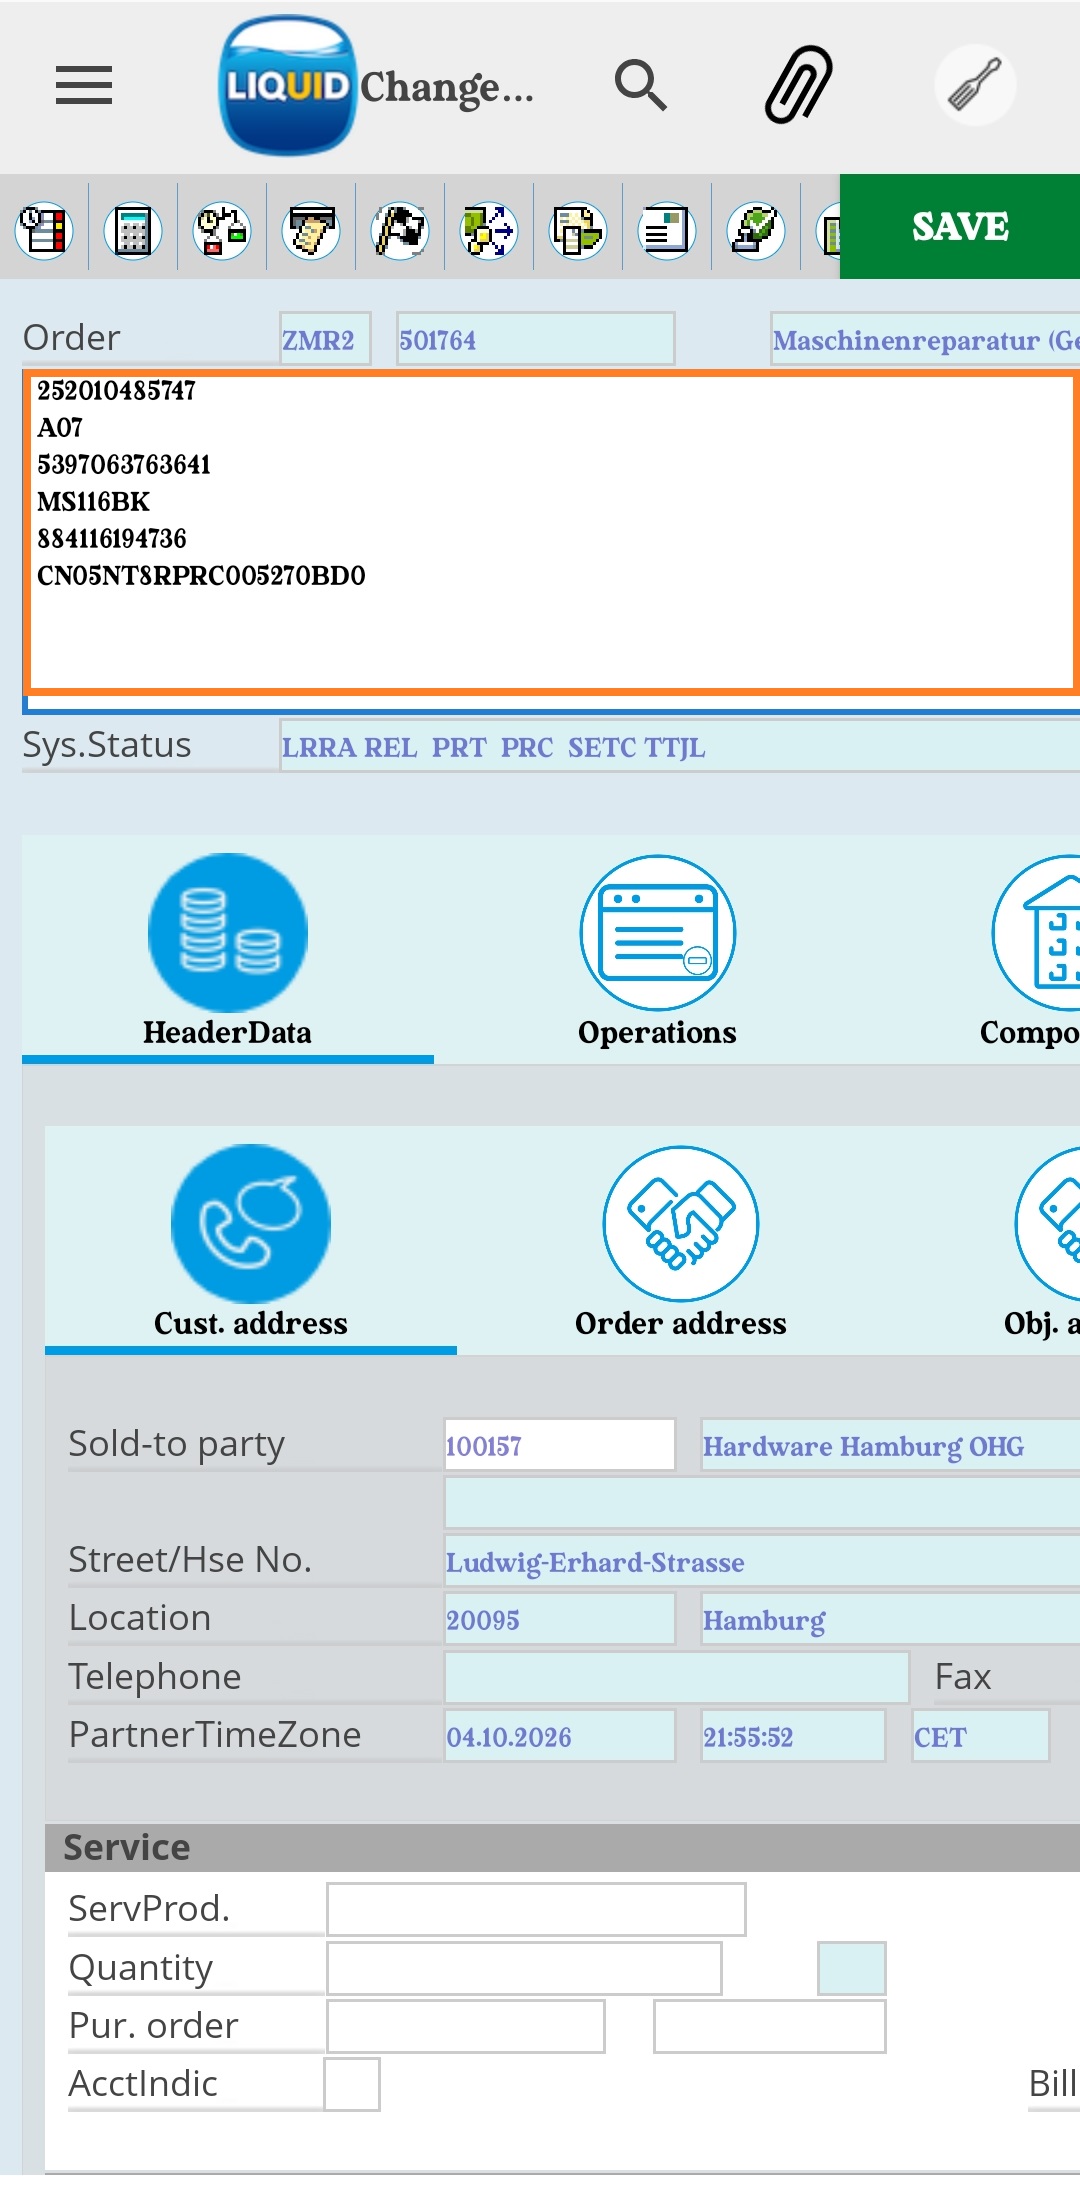
Only the selected barcode values are retrieved when you select DONE, TAB, or ENTER.
Zoom and Flash
The scanner provides controls for adjusting the camera while scanning.
- Zoom: Adjust the zoom level when supported by the device.
- Flash: Turn the device flash on or off using the flash control.