


Purpose
Liquid UI's OCR simplifies SAP operations and enhances data accuracy by extracting text from documents, images, and emails, and automatically populating fields.
Access OCR by long-pressing any input field. A flexible blue scan box allows users to adjust the scanning area, and the algorithm remembers box size changes. Users can edit captured text or directly populate it into the input field, eliminating manual data entry and speeding up SAP processes.
This article explains using OCR in the Liquid UI for Android app, covering activation, scanning a vehicle license plate, and displaying text in the PRMD transaction.
- Log in to SAP and navigate to the PRMD (Maintain HR Master Data) transaction.
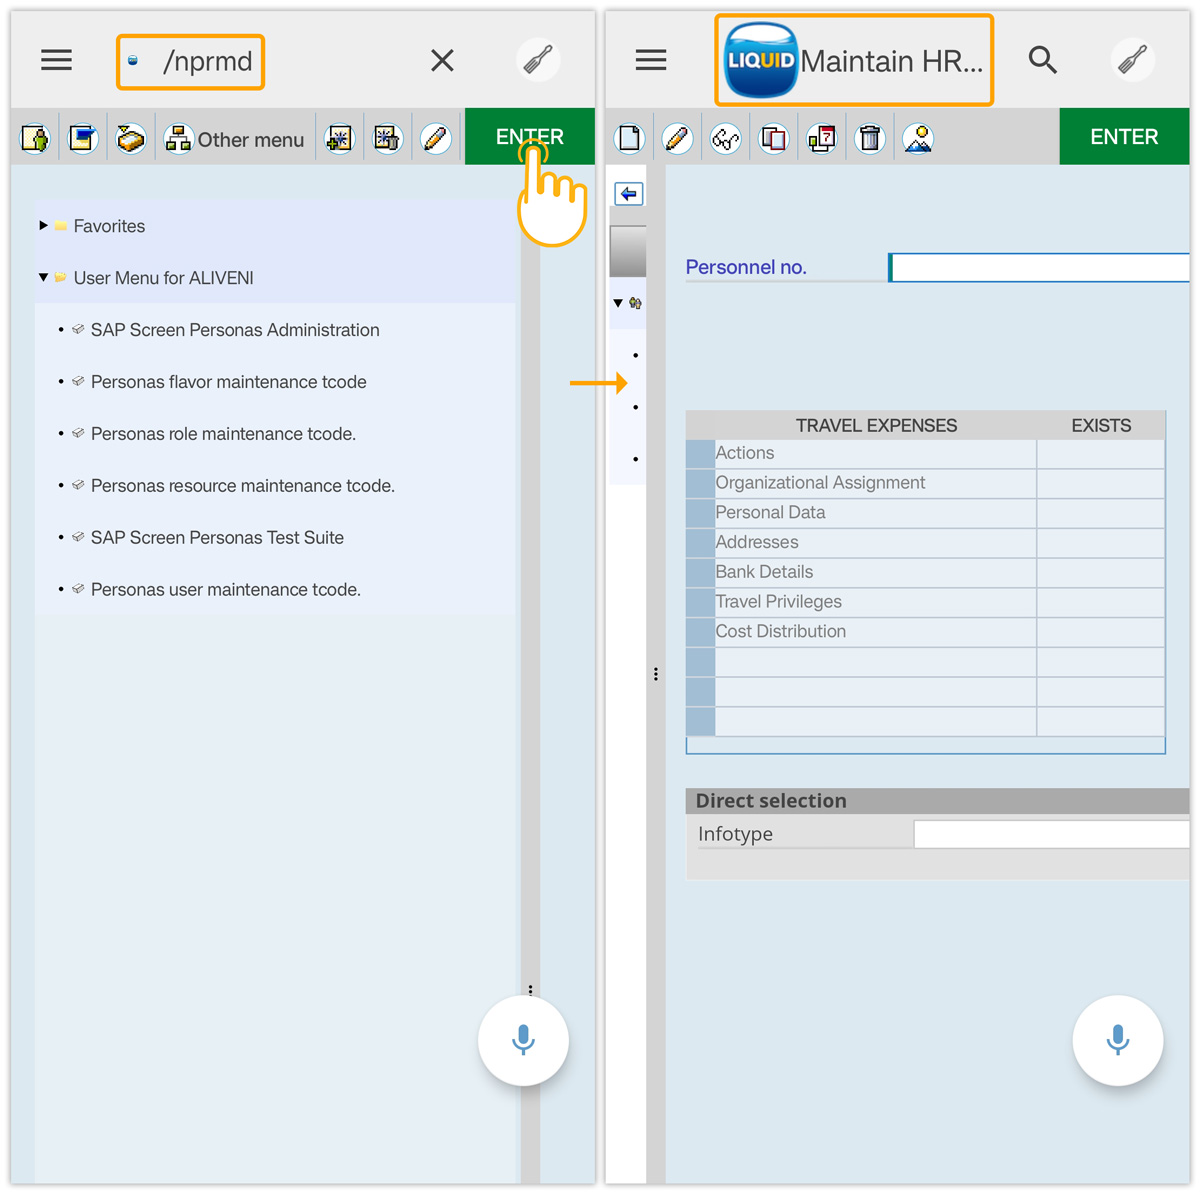
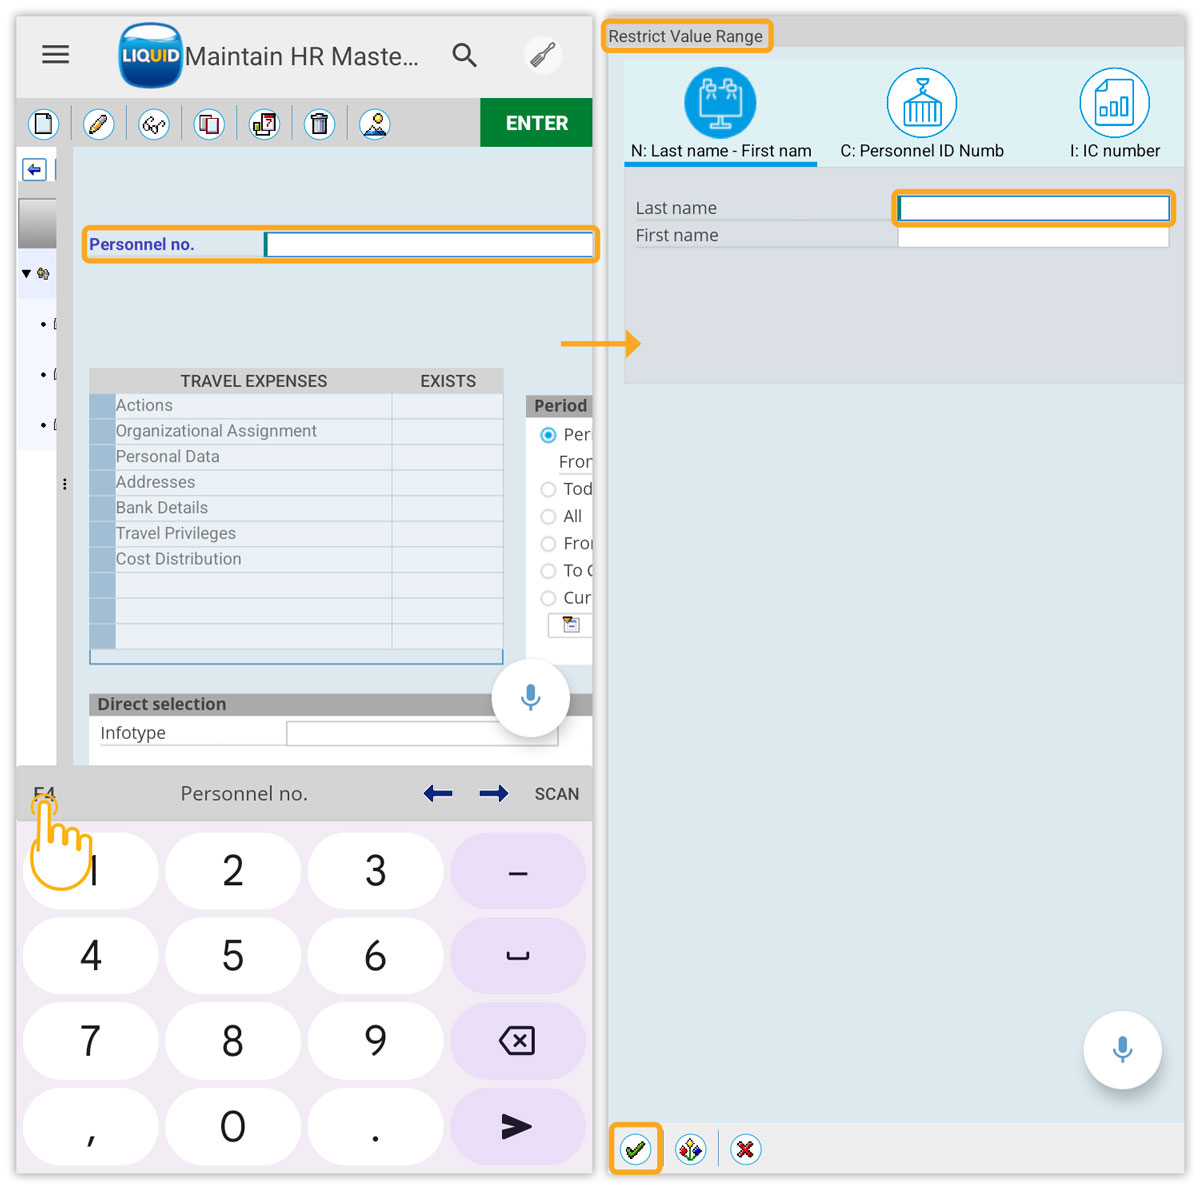
- To access the possible entries for the Personnel No. input field, position your cursor in the field and press F4. This action will lead you to the Restrict Value Range screen. On this screen, place your cursor in the Last Name input field and click continue, as depicted in the image below.
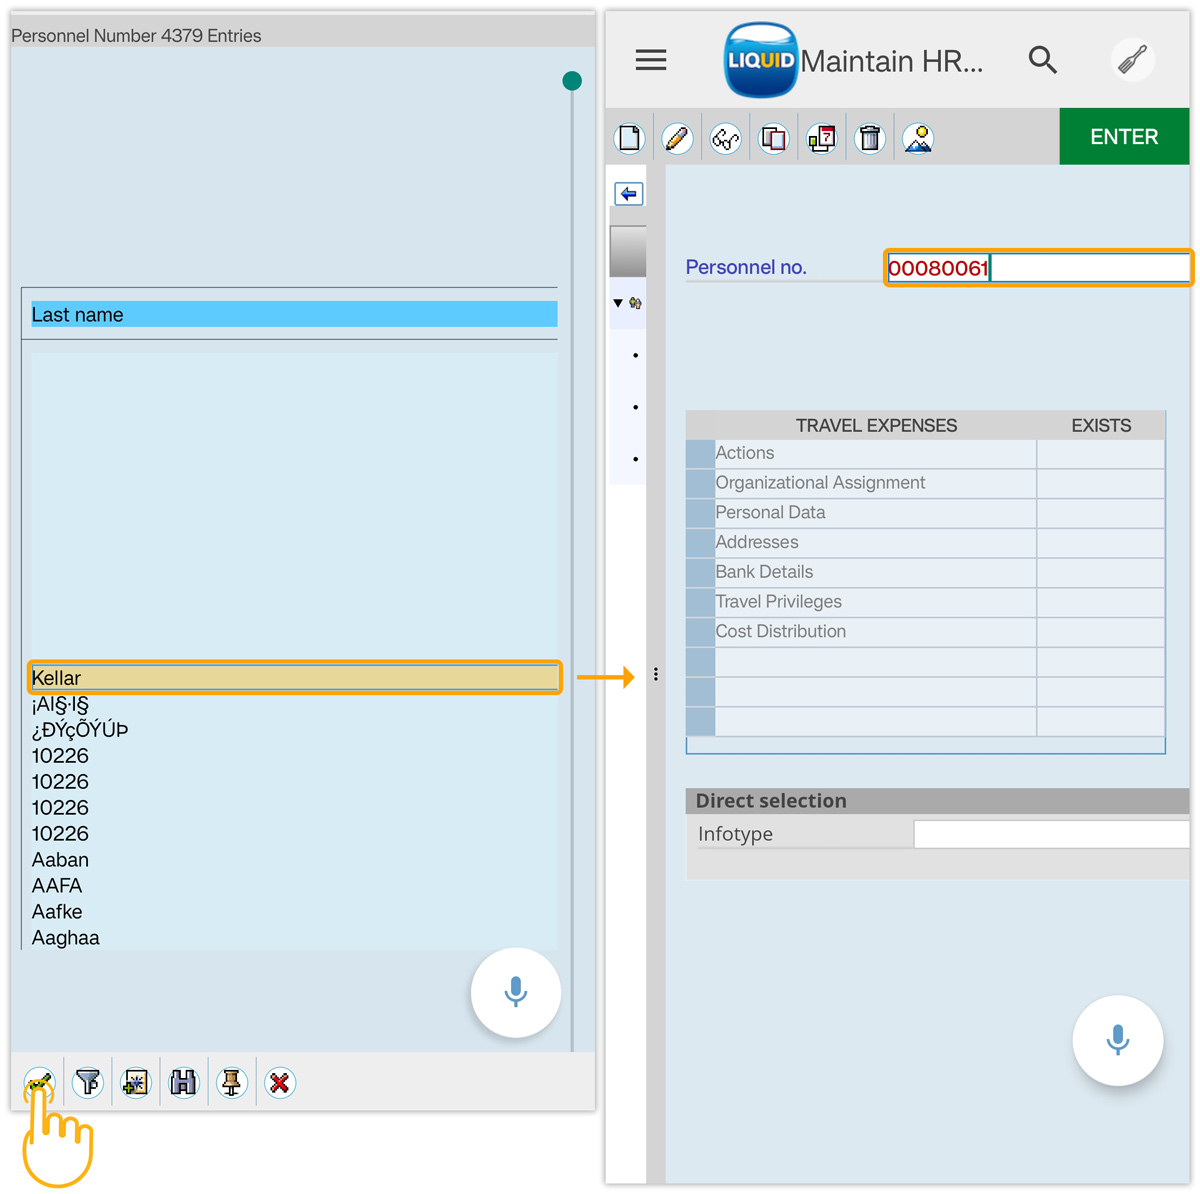
- View possible entries for the Personnel no. field. Select a user and click Continue to display their Personnel number.
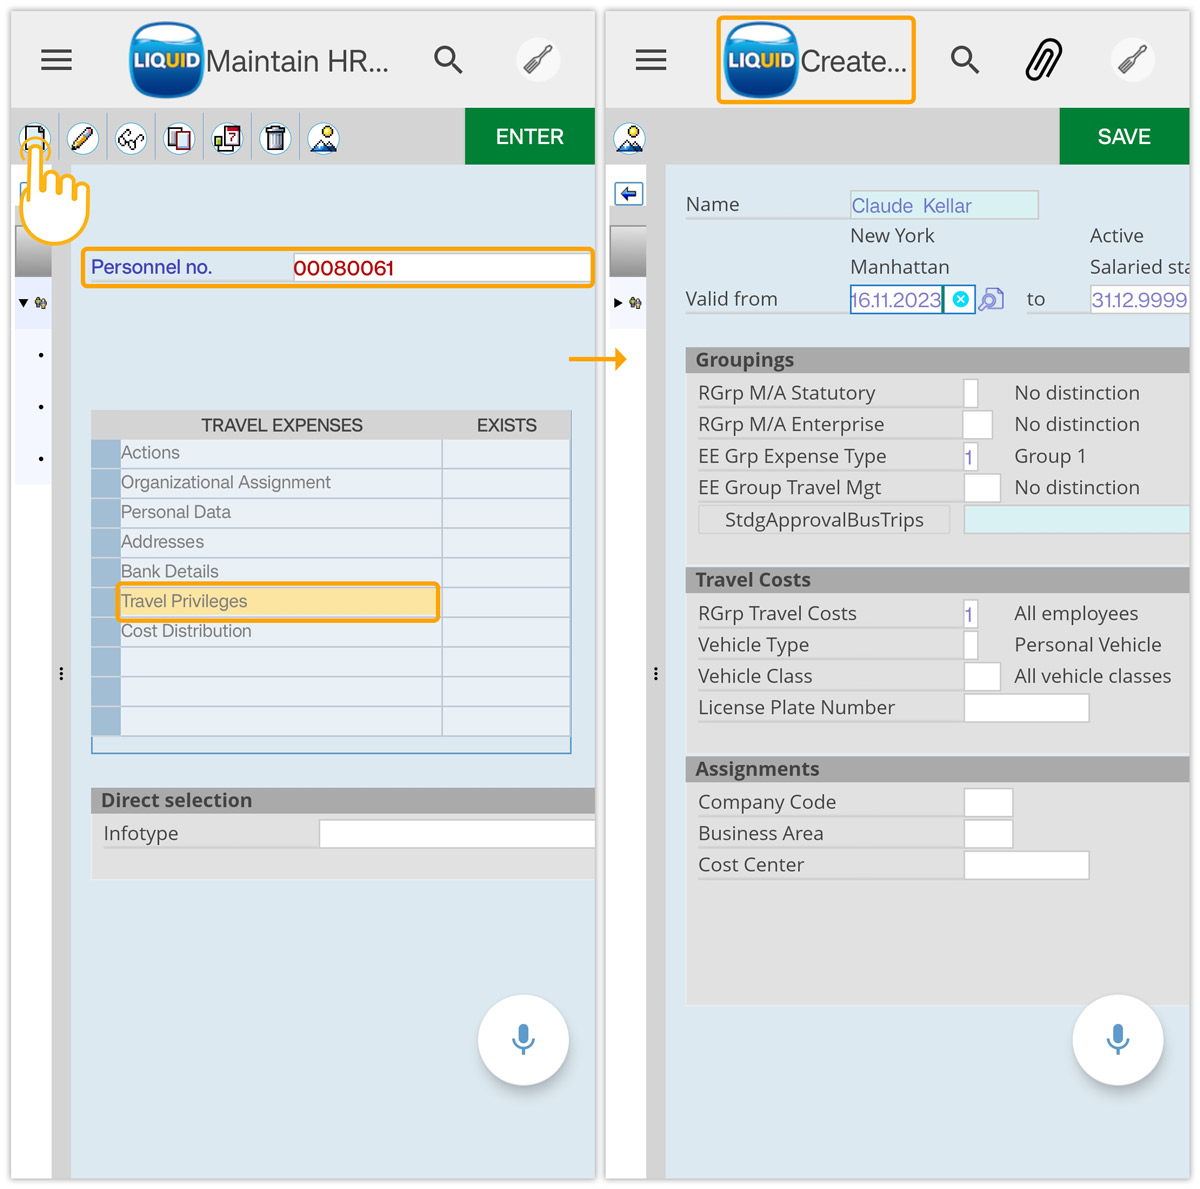
- On the TRAVEL EXPENSES tab, choose Travel Privileges. Then, click Create on the toolbar to open the Create Travel Privileges screen.
- To scan a vehicle's license plate number, long-press the License Plate Number field and select OCR. This will activate your device's camera. Adjust the blue rectangular scanning area as needed.
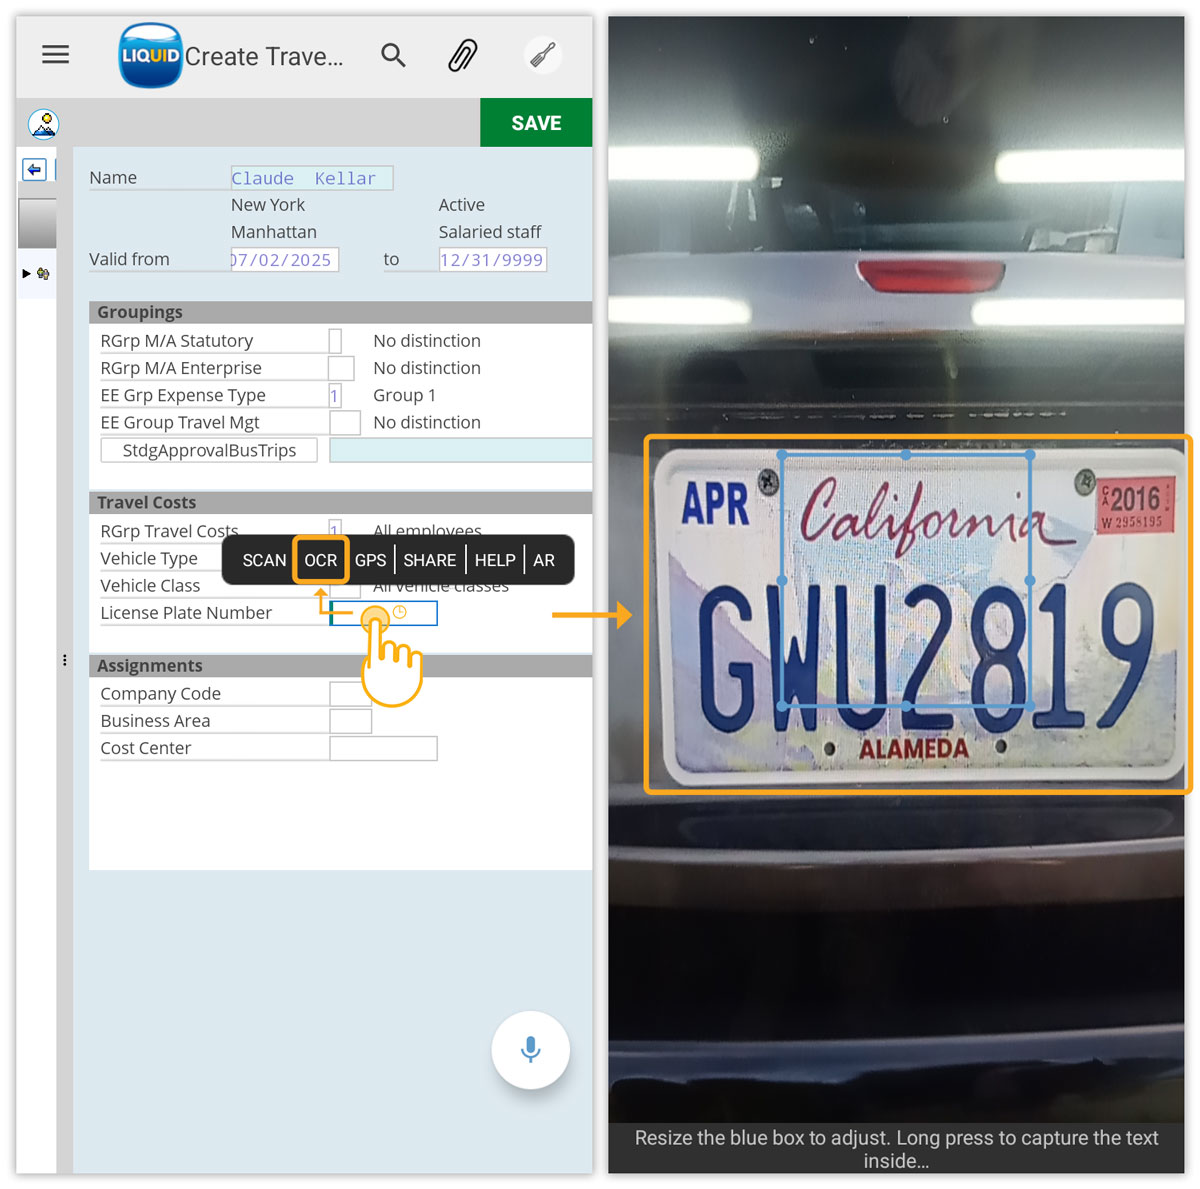

Note: Liquid UI for Android retains box size adjustments during scanning, ensuring consistent data capture.
- Long-press to scan selected text. The recognized text then displays with four options.
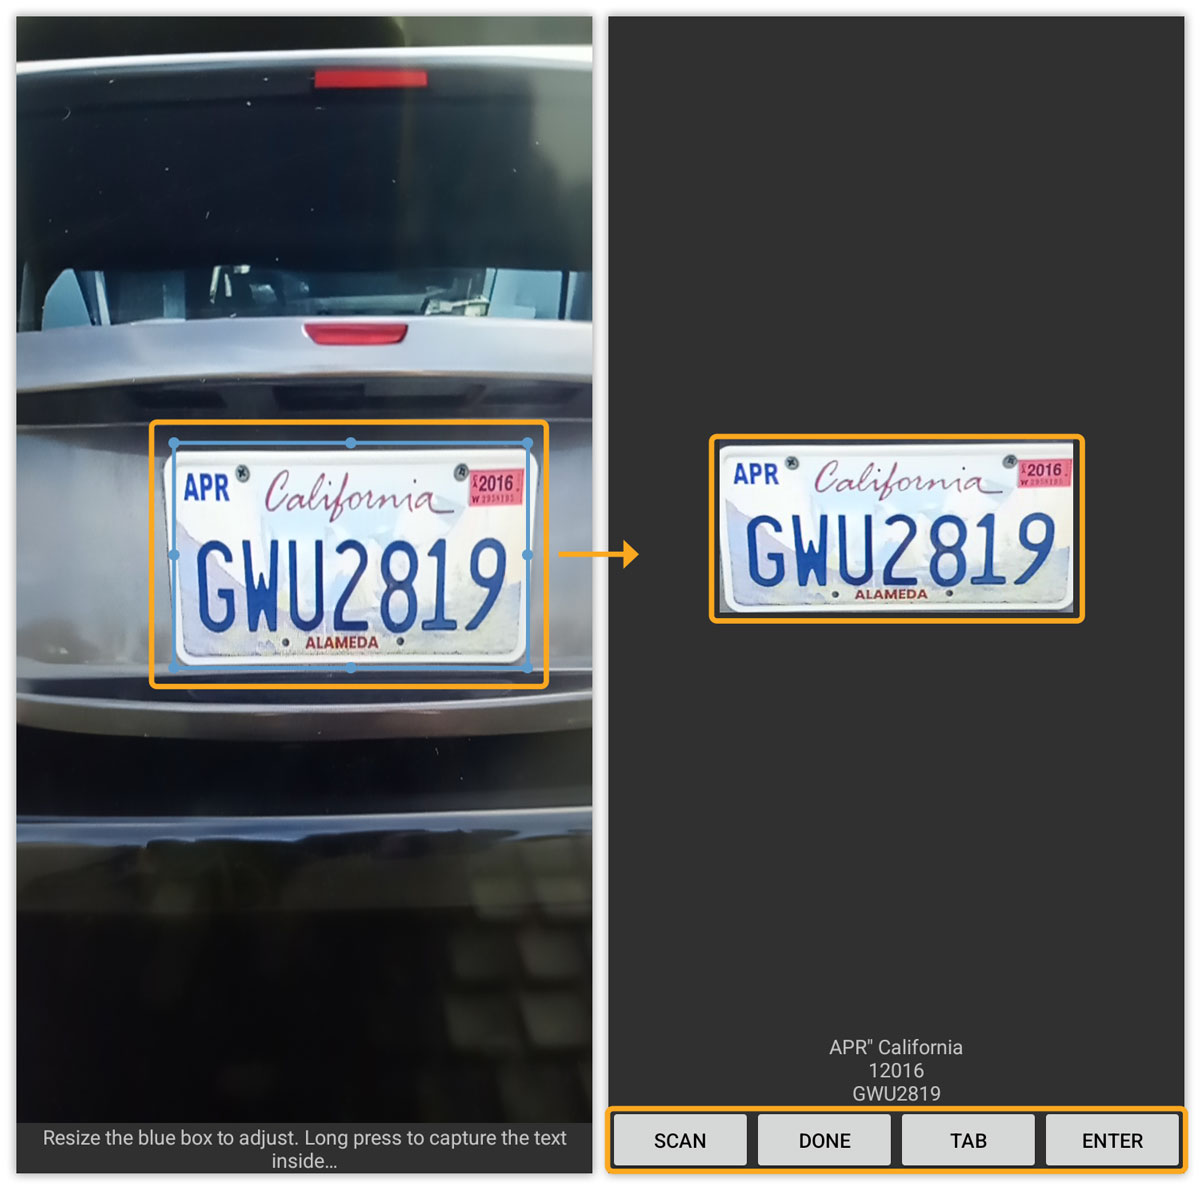
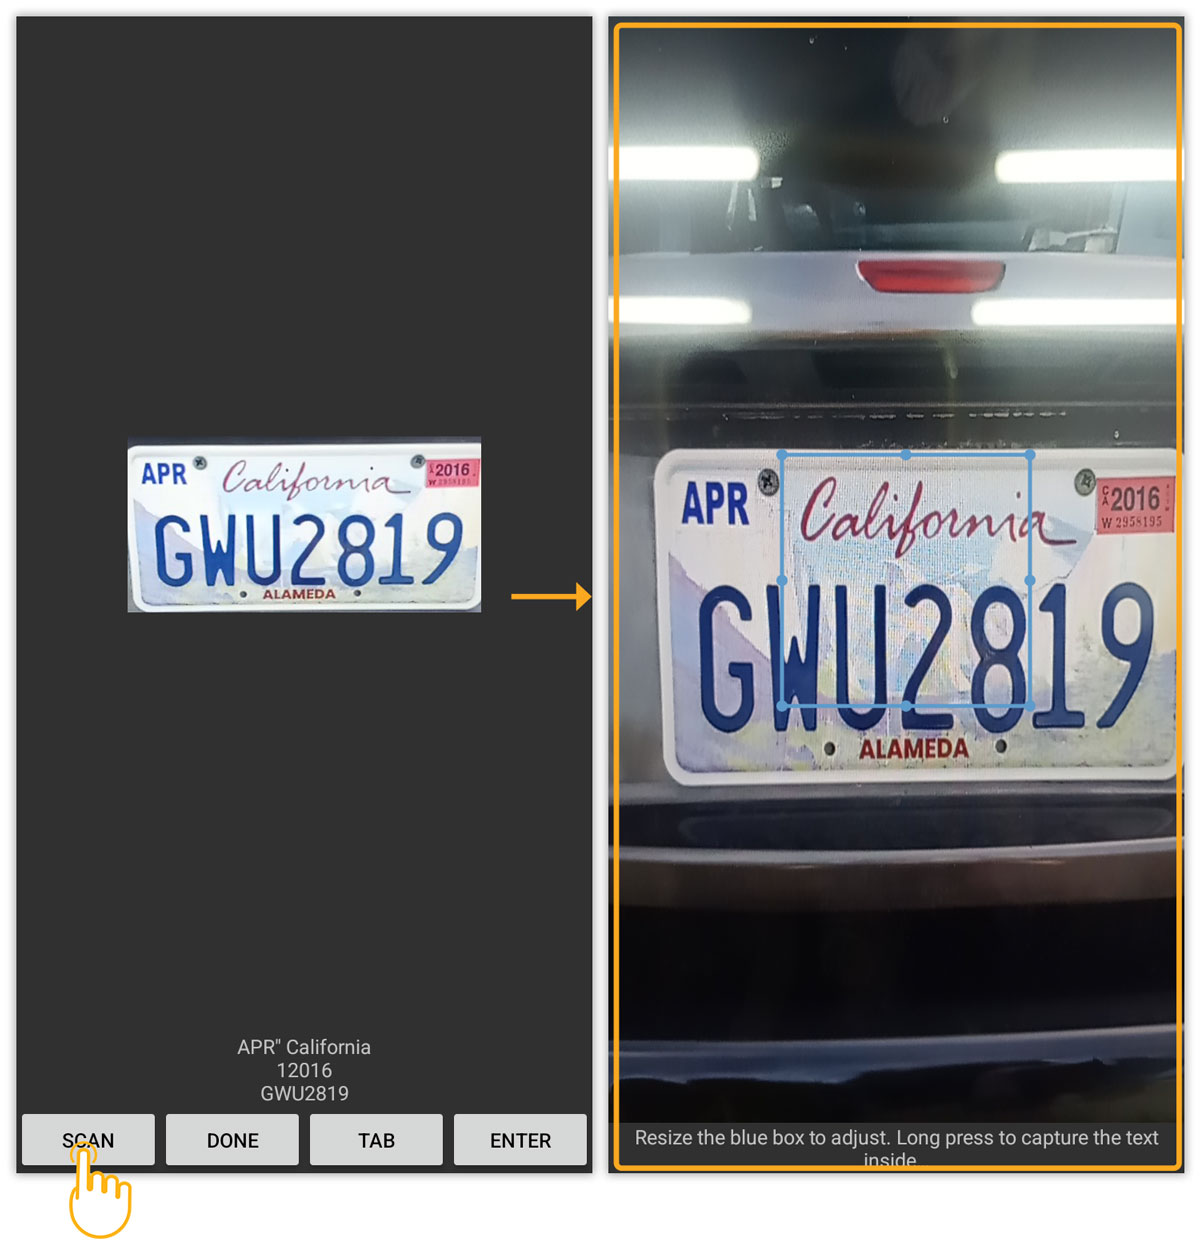
- Scan: Restarts the scanning process.
- Done: Fills the input field with the scanned value, as shown below.
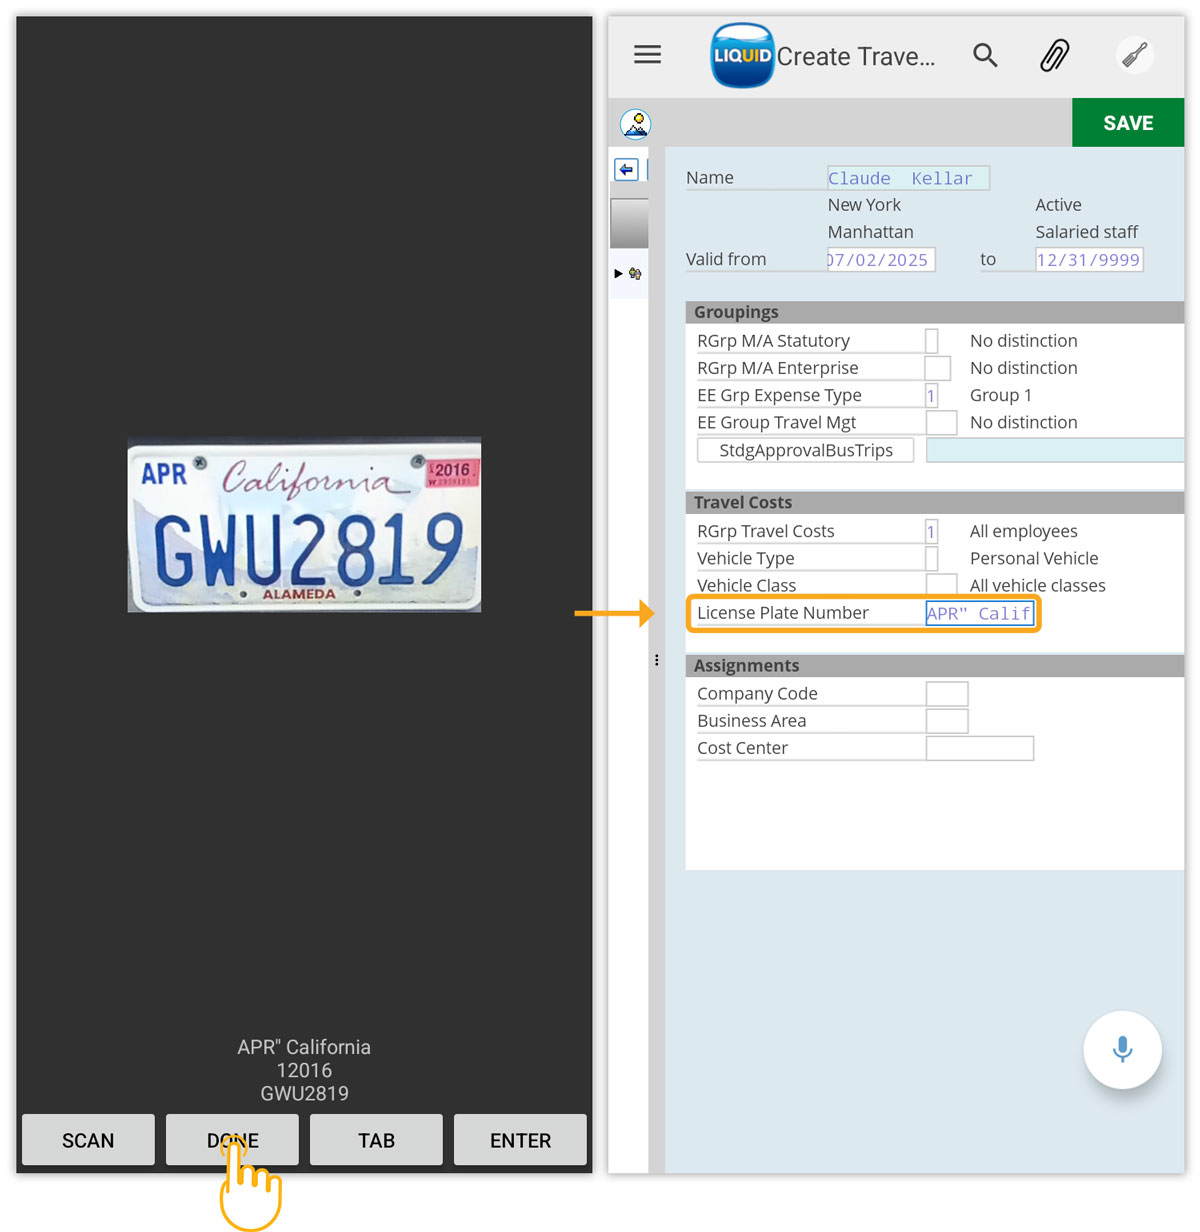
- Tab: Enables automatic navigation to the next input field.
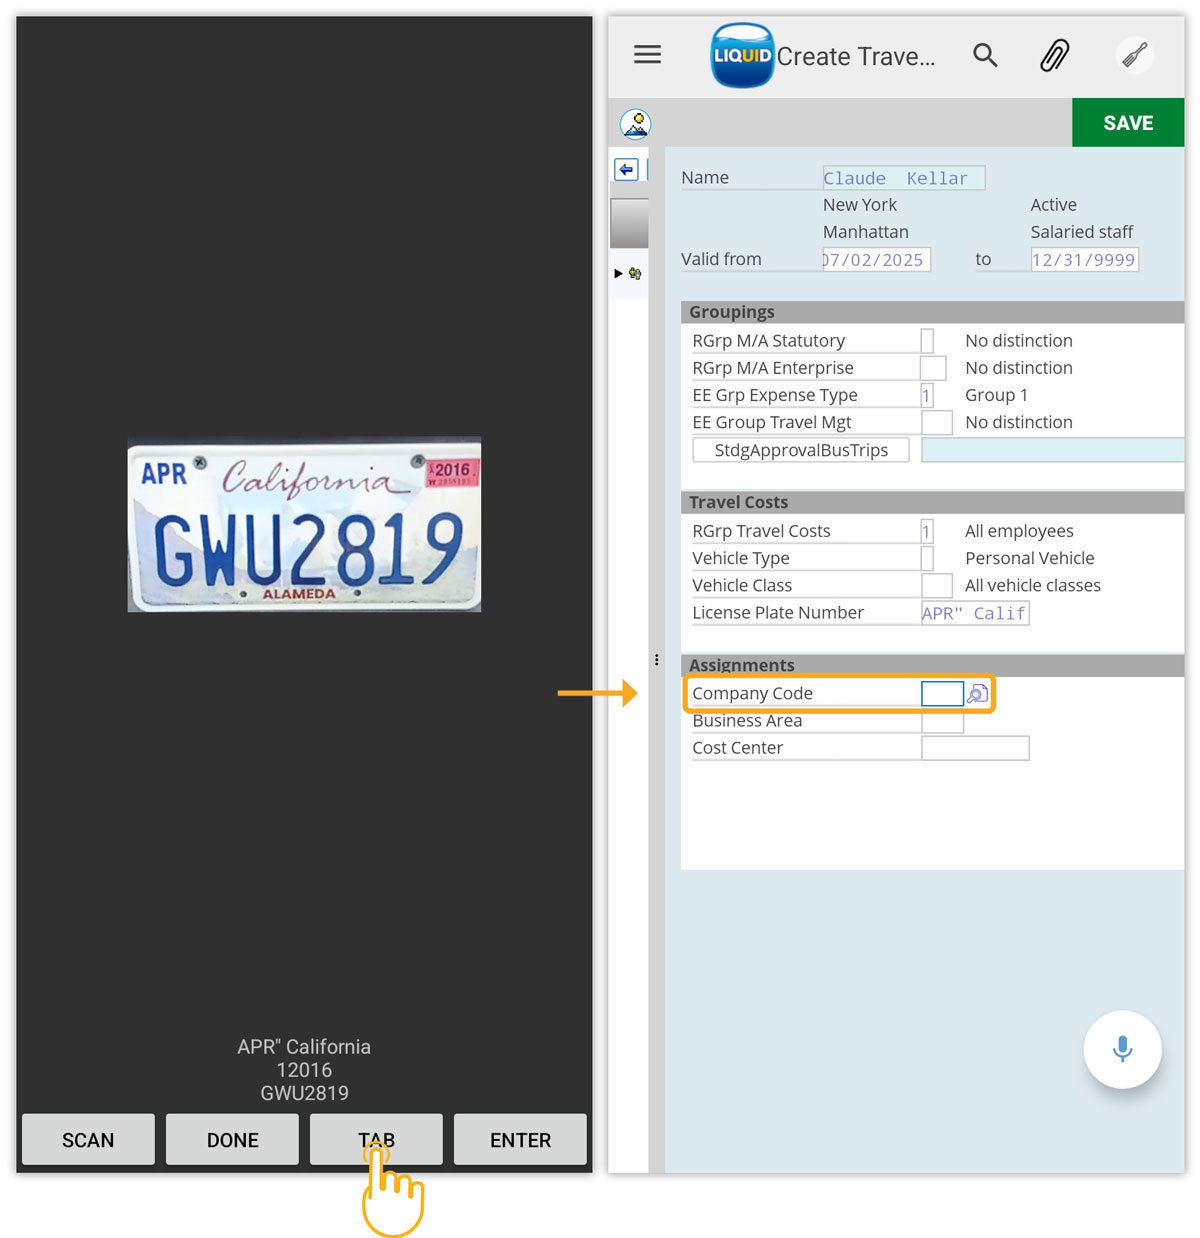
- Enter: Populates the input field with the scanned value and executes the Enter function, mimicking SAP GUI.
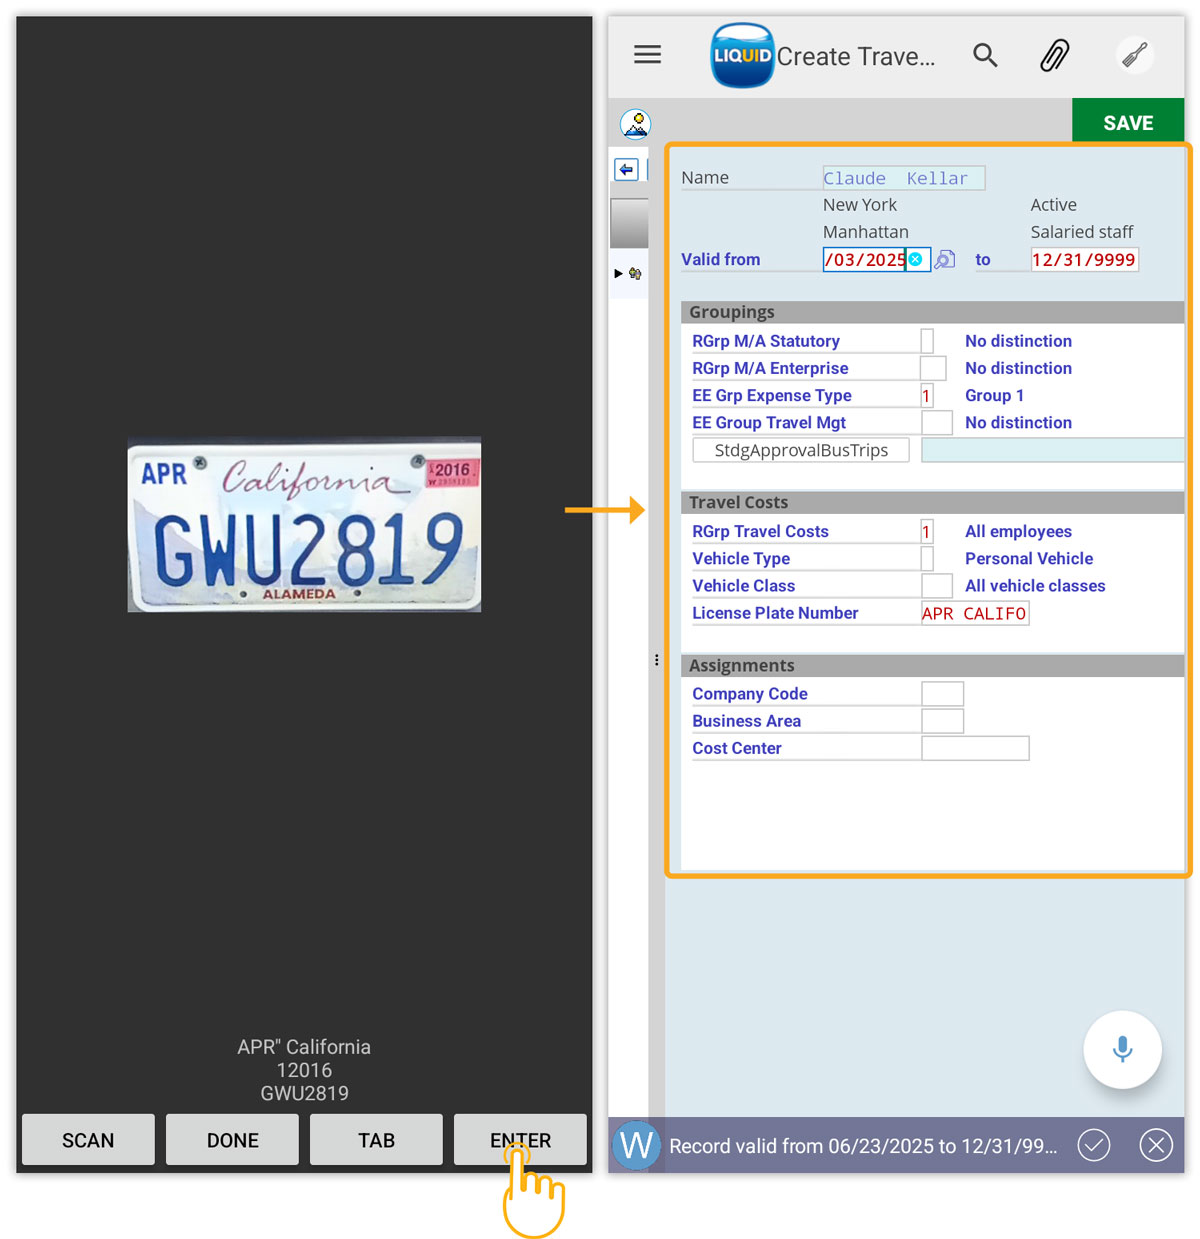
Note: Enable auto-rotate in device settings for optimal view.
- Scan: Restarts the scanning process.