

Liquid UI for iOS supports interactive grid controls, allowing users to swipe to navigate columns and rows, double-tap cells to view related data, and long-press to select multiple rows. Users can select all rows, sort columns via the toolbar, and access context menu options—such as sorting, filtering, and printing - by long-pressing outside the grid.
In this article, you will learn how to use the grid control with all standard list functionalities in the Liquid UI for iOS.
- Navigate to the IE05 transaction screen and tap Execute. You’ll be directed to the Change Equipment: Equipment List screen, where you will see the following components:
- Toolbar
- Screen title
- Grid table

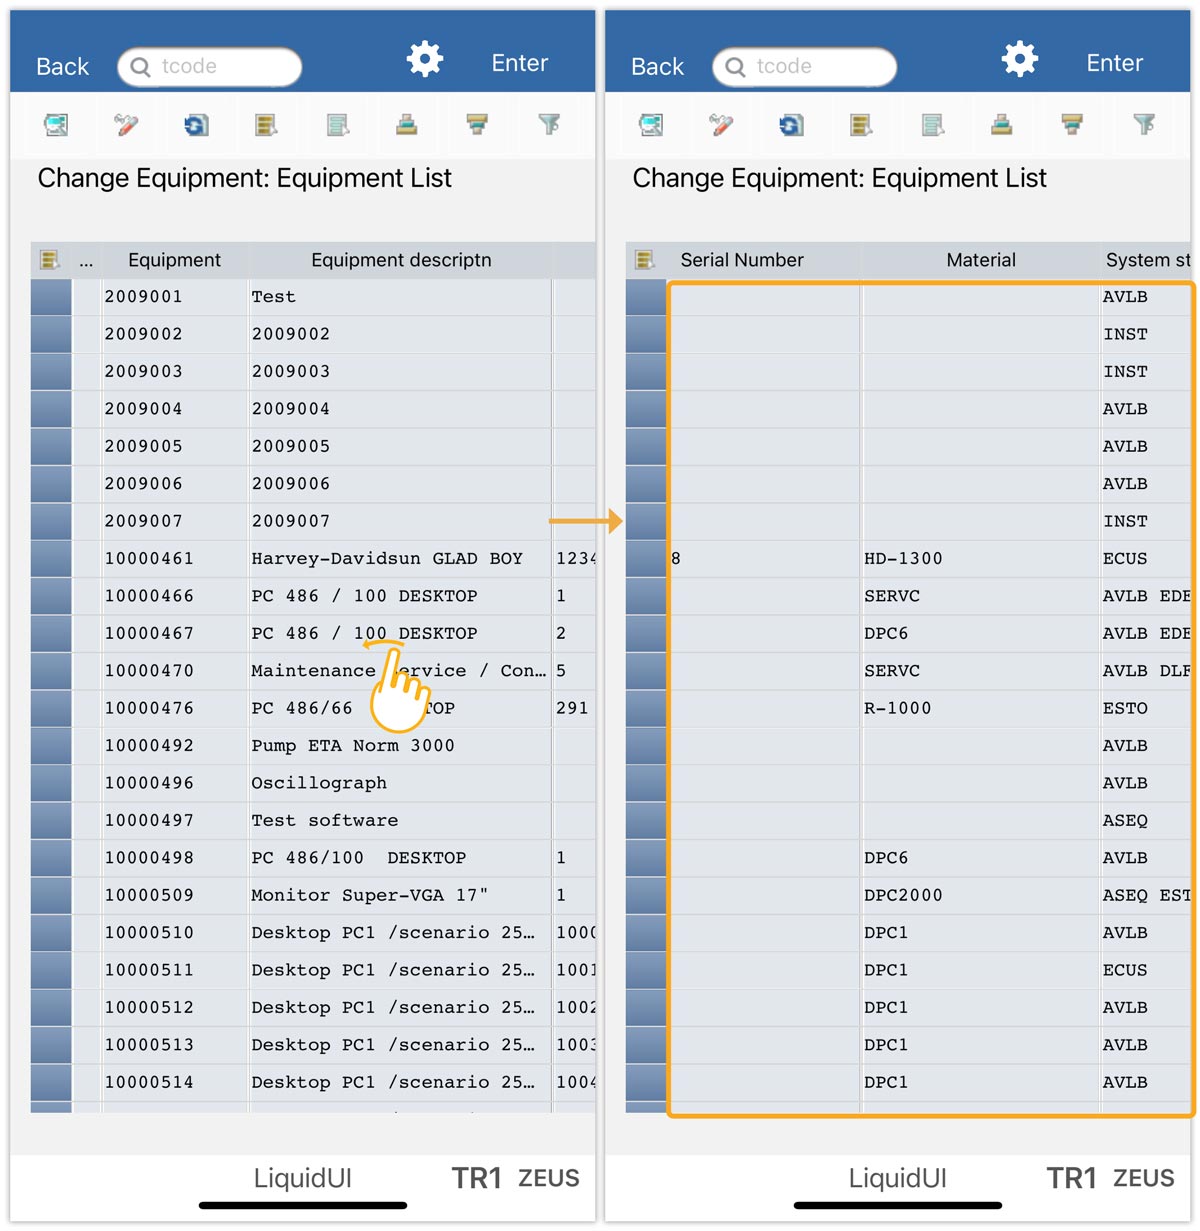
- Swipe left to view all the columns in the table, as shown below.
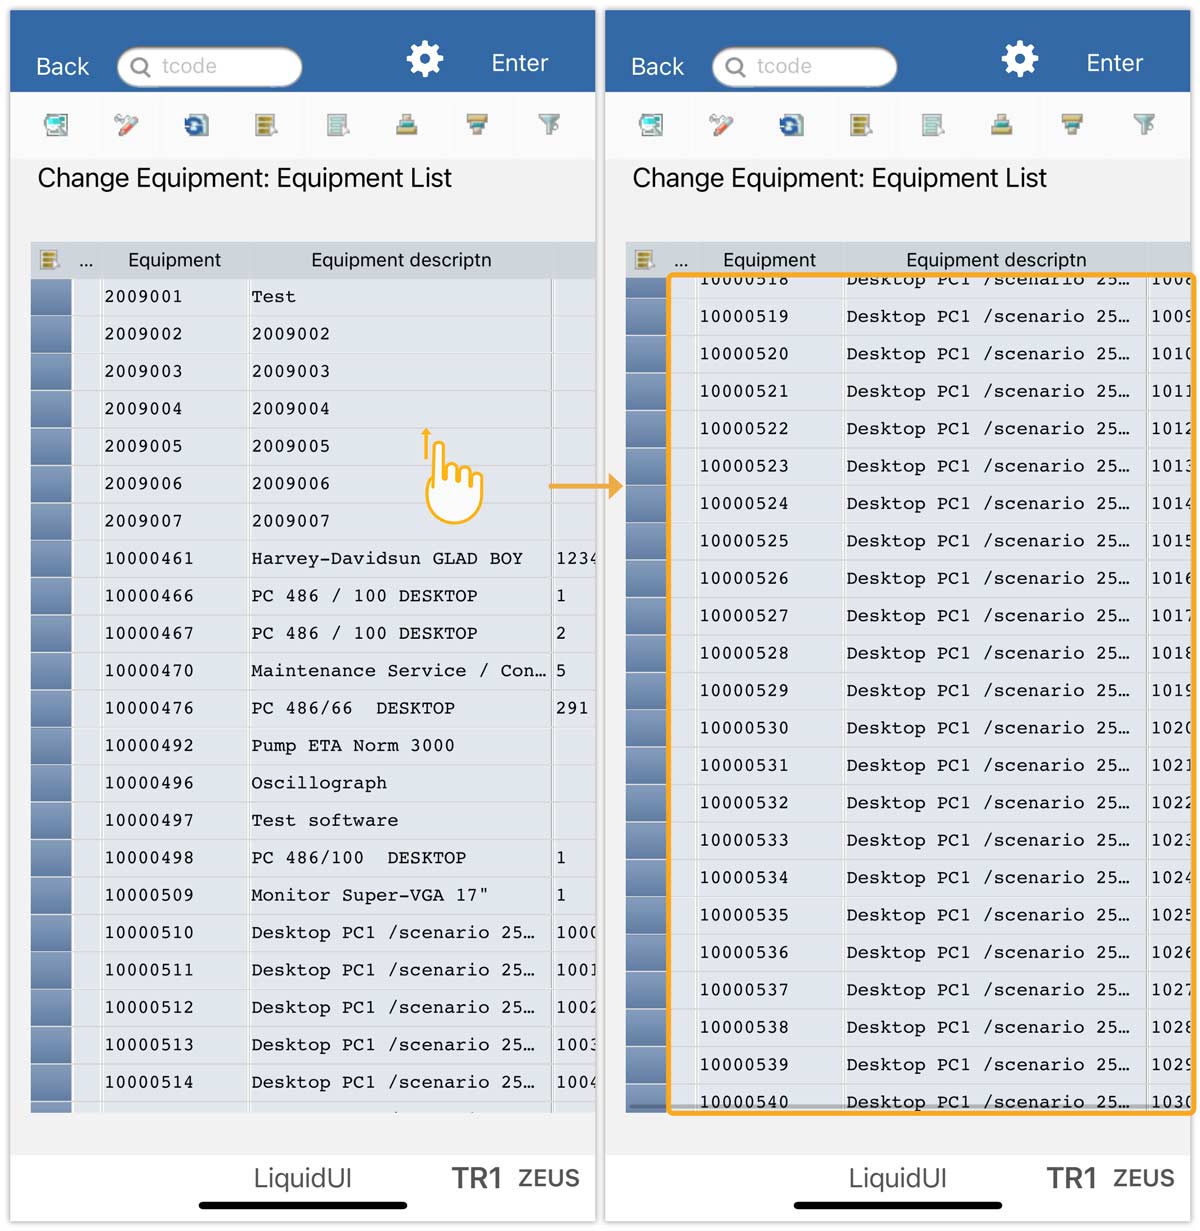
- Similarly, swipe up to scroll through all rows in the table.
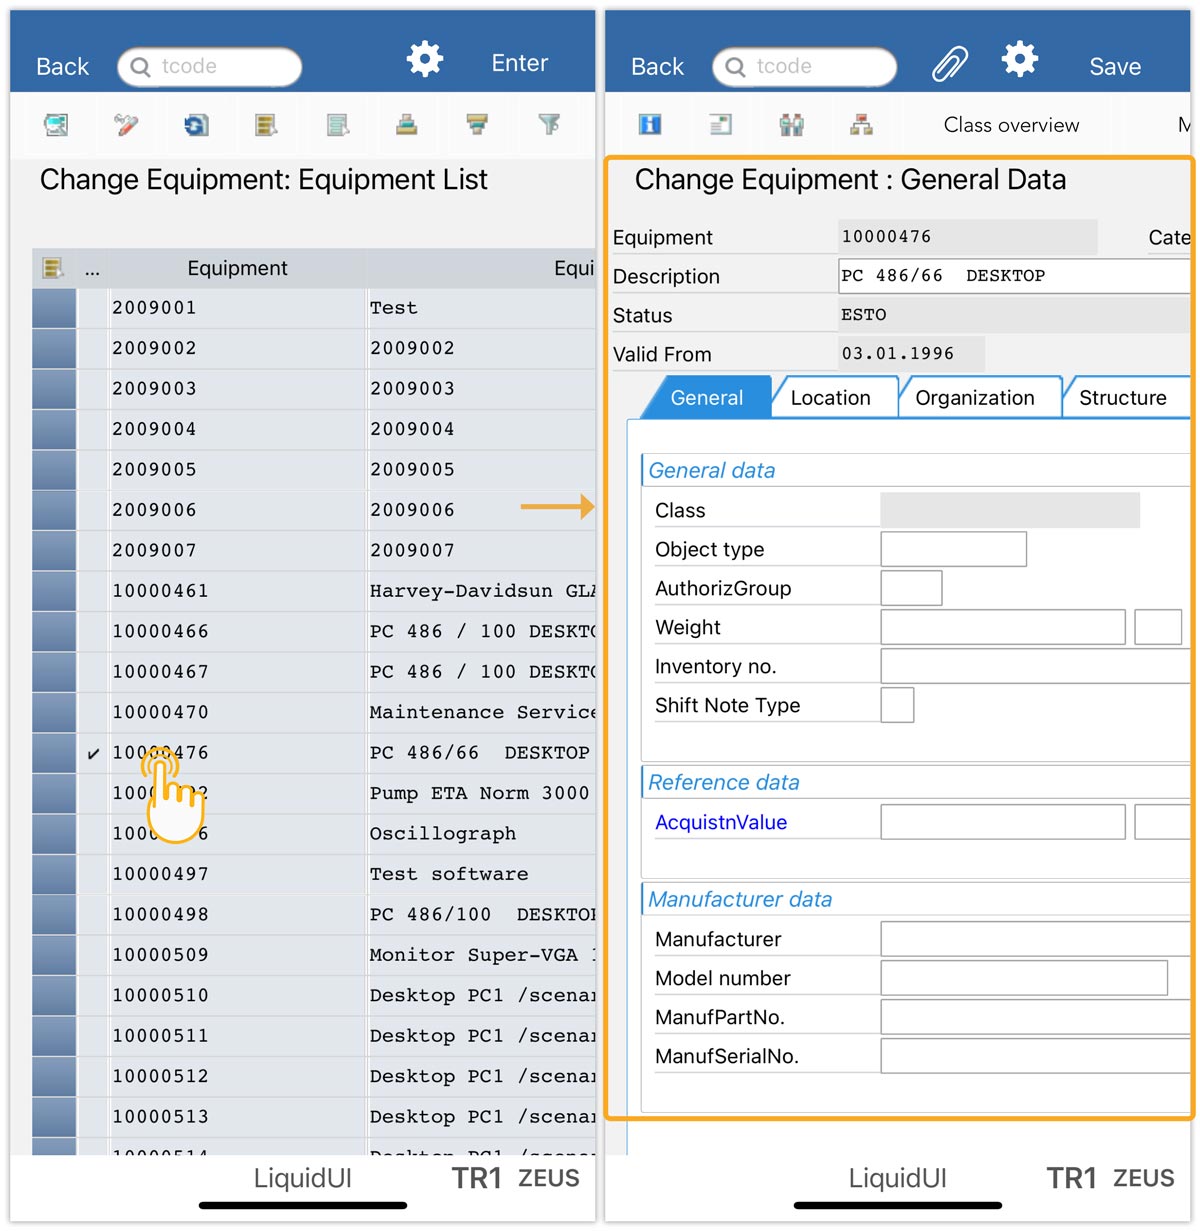
- Double-tap any grid cell to access the General Data screen for that entry. For example, double-tapping a cell in the Equipment column will navigate you to the Change Equipment: General Data screen, as shown in the image below.
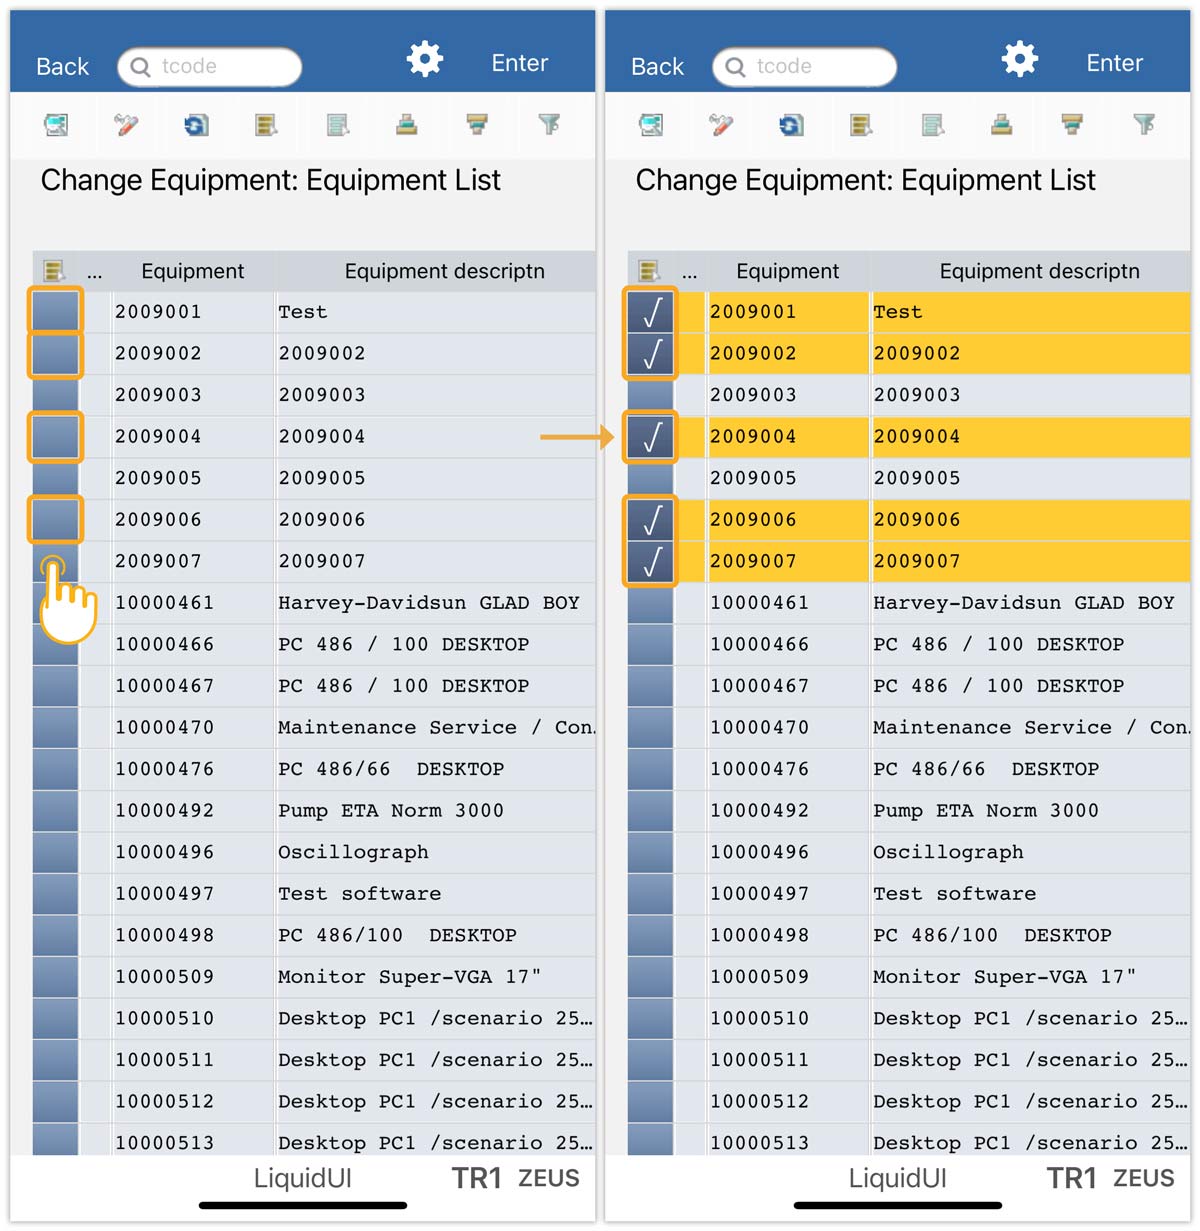
- Long-press on the required rows to select multiple rows on the grid, as shown below.
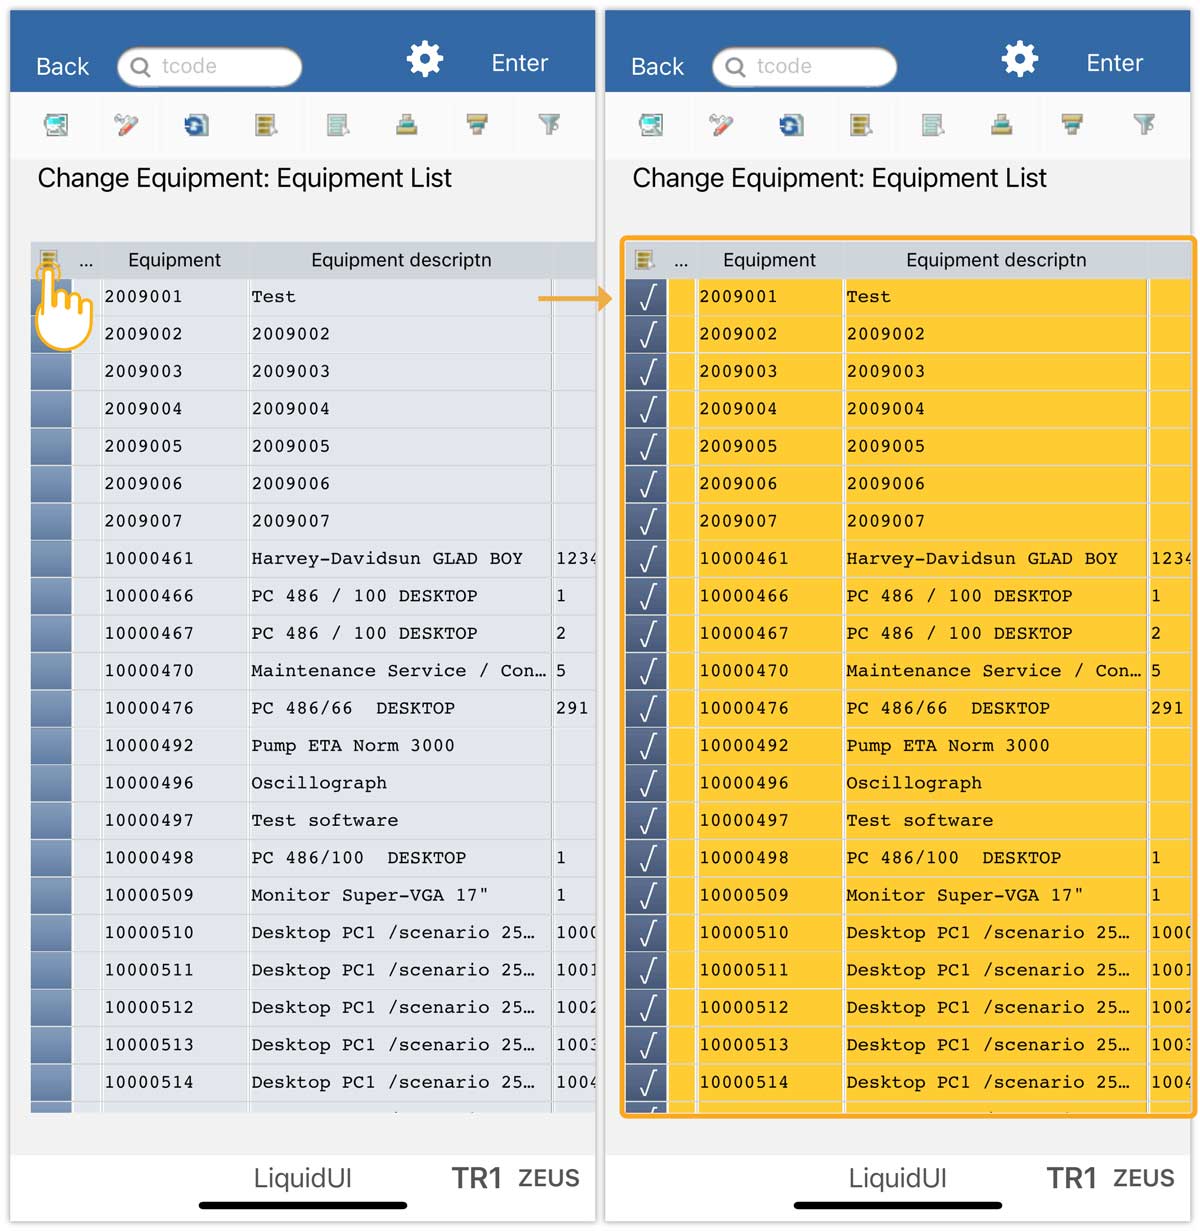
- To select all of the grid data, click the Select All button in the left corner of the grid control.
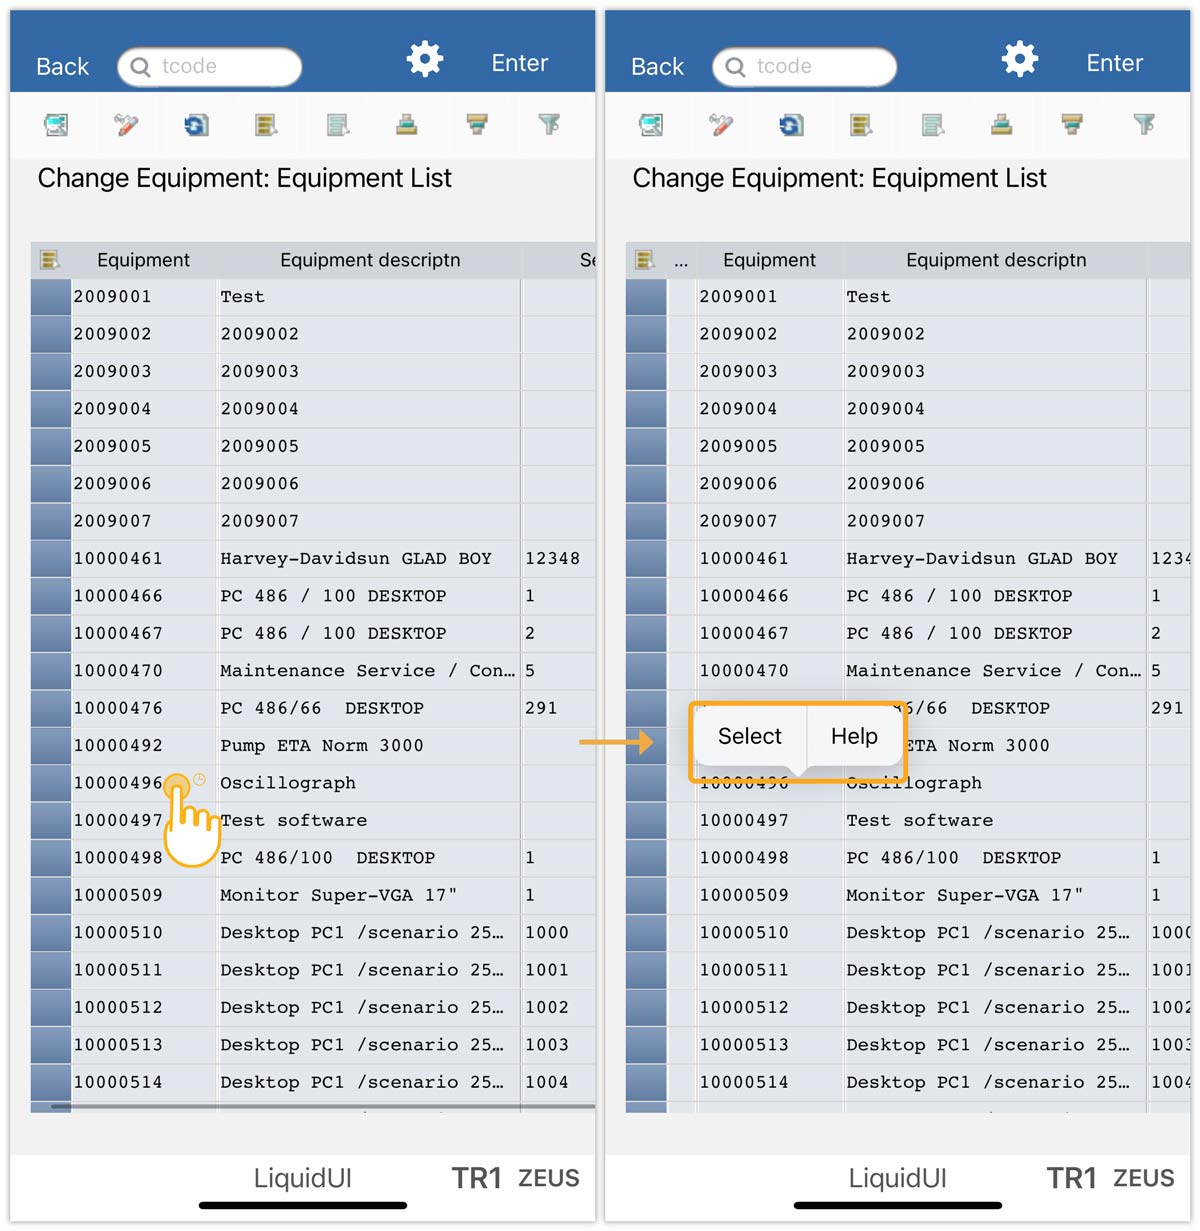
- Long pressing any grid cell brings up the Select and Help menus. The Select option allows you to select a specific grid cell, and the Help option corresponds to the F1 function key.

Note: You can sort the grid columns using the sort icon on the toolbar.
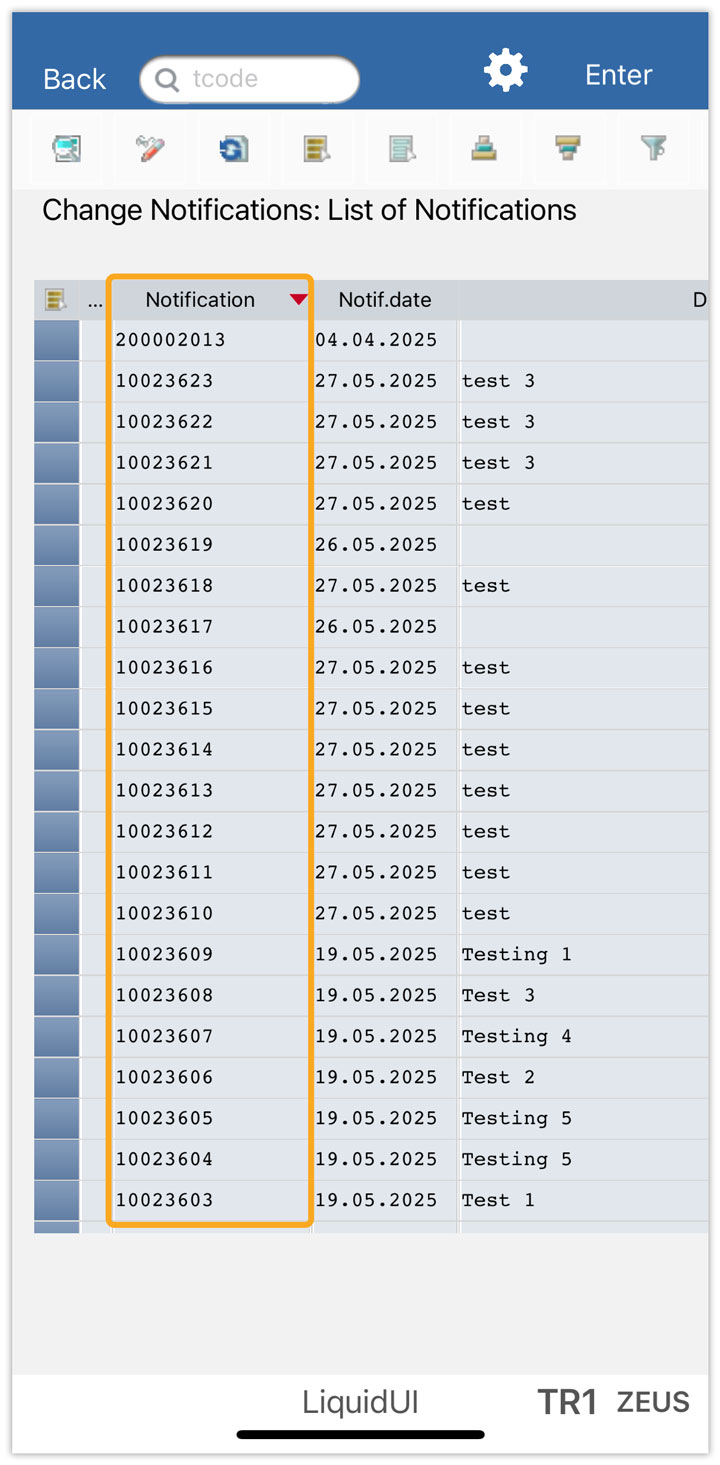
- Navigate to the IW28 screen and click the Execute button. On the screen that appears, select the Notification column, and click the Sort icon on the toolbar, as shown in the following image.
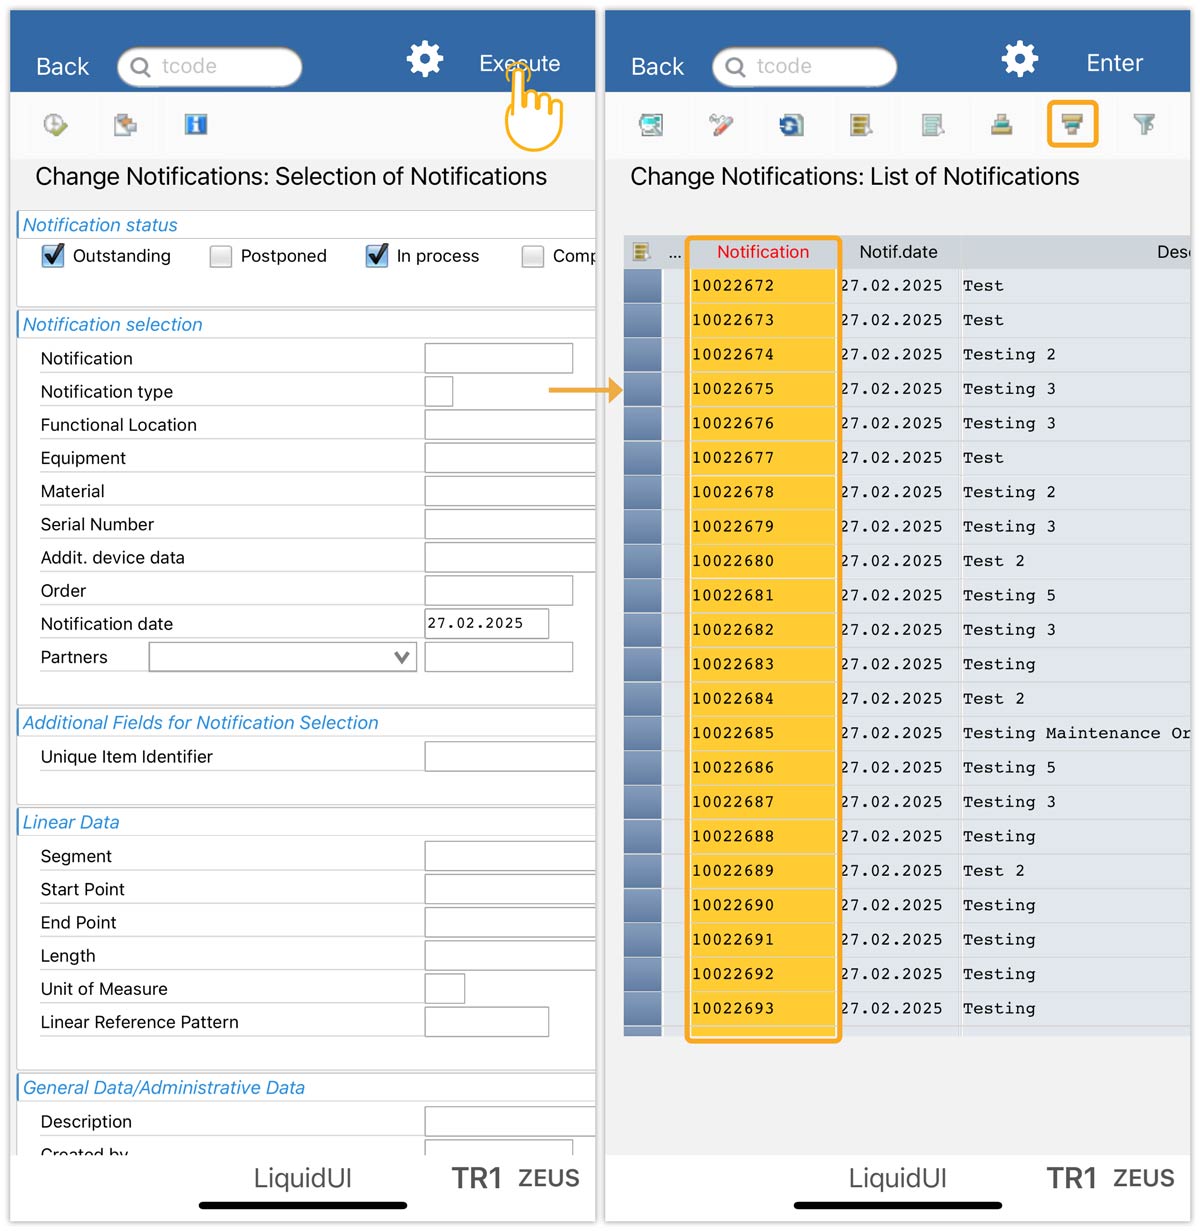
- Now, the Notification column data gets sorted, and the column header will display a sort icon, as shown in the image below.
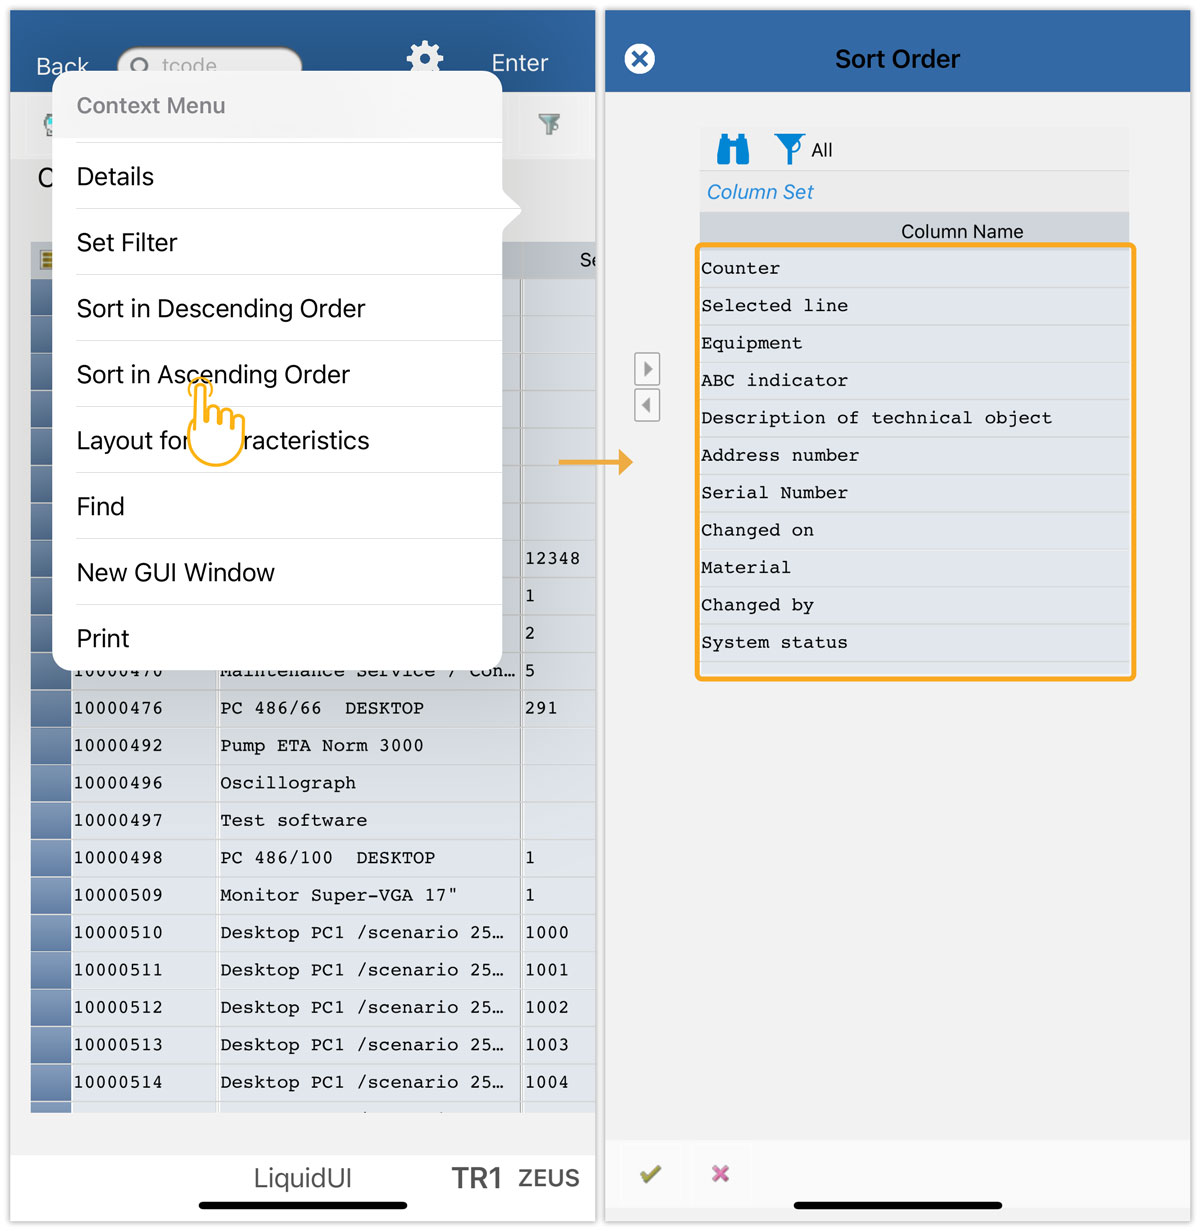
- Long pressing anywhere other than the grid displays a context menu that helps you customize and simplify the process, with functions like sorting, filtering, and printing on the grid control screen, as shown below.
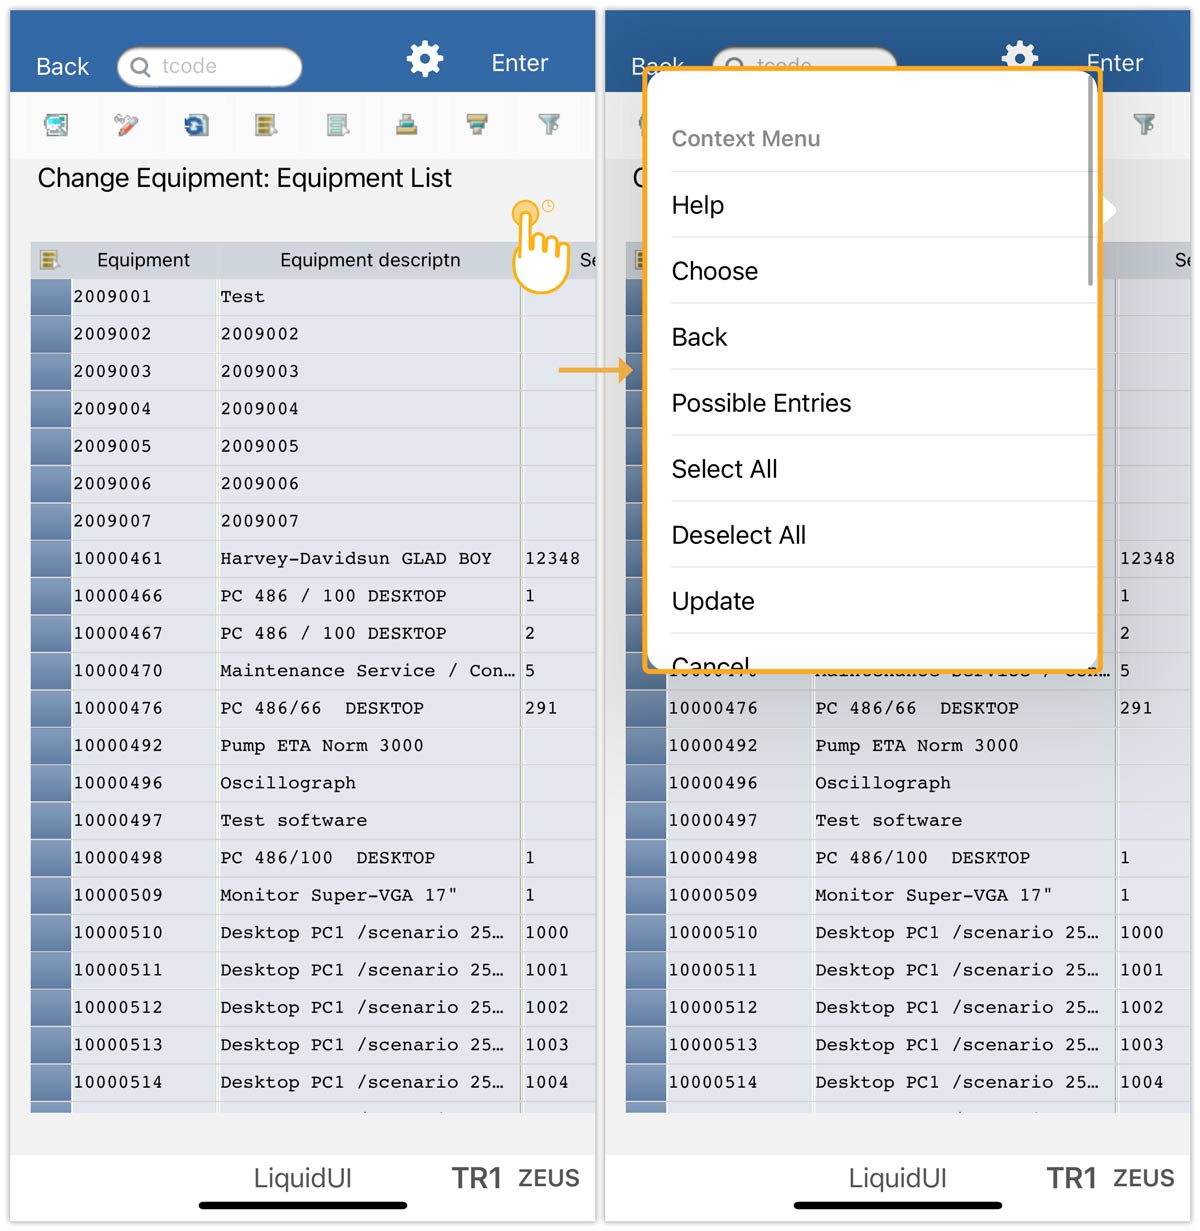
- For instance, to sort a column in ascending order, select the Sort in Ascending Order option and then select the desired column to sort. The values in the selected column would then be sorted in ascending order.