


Purpose
Liquid UI for iOS allows you to easily attach files, such as address proof, photos, or emergency contact details, directly to SAP transactions from your iOS device. It supports various file formats, including .doc, .docx, .jpg, .pdf, and more. You can use three options to attach files or view existing attachments within the SAP transactions.
- Create Attachment: Upload a new file of any type, such as a document, image, video, or signature, to the transaction.
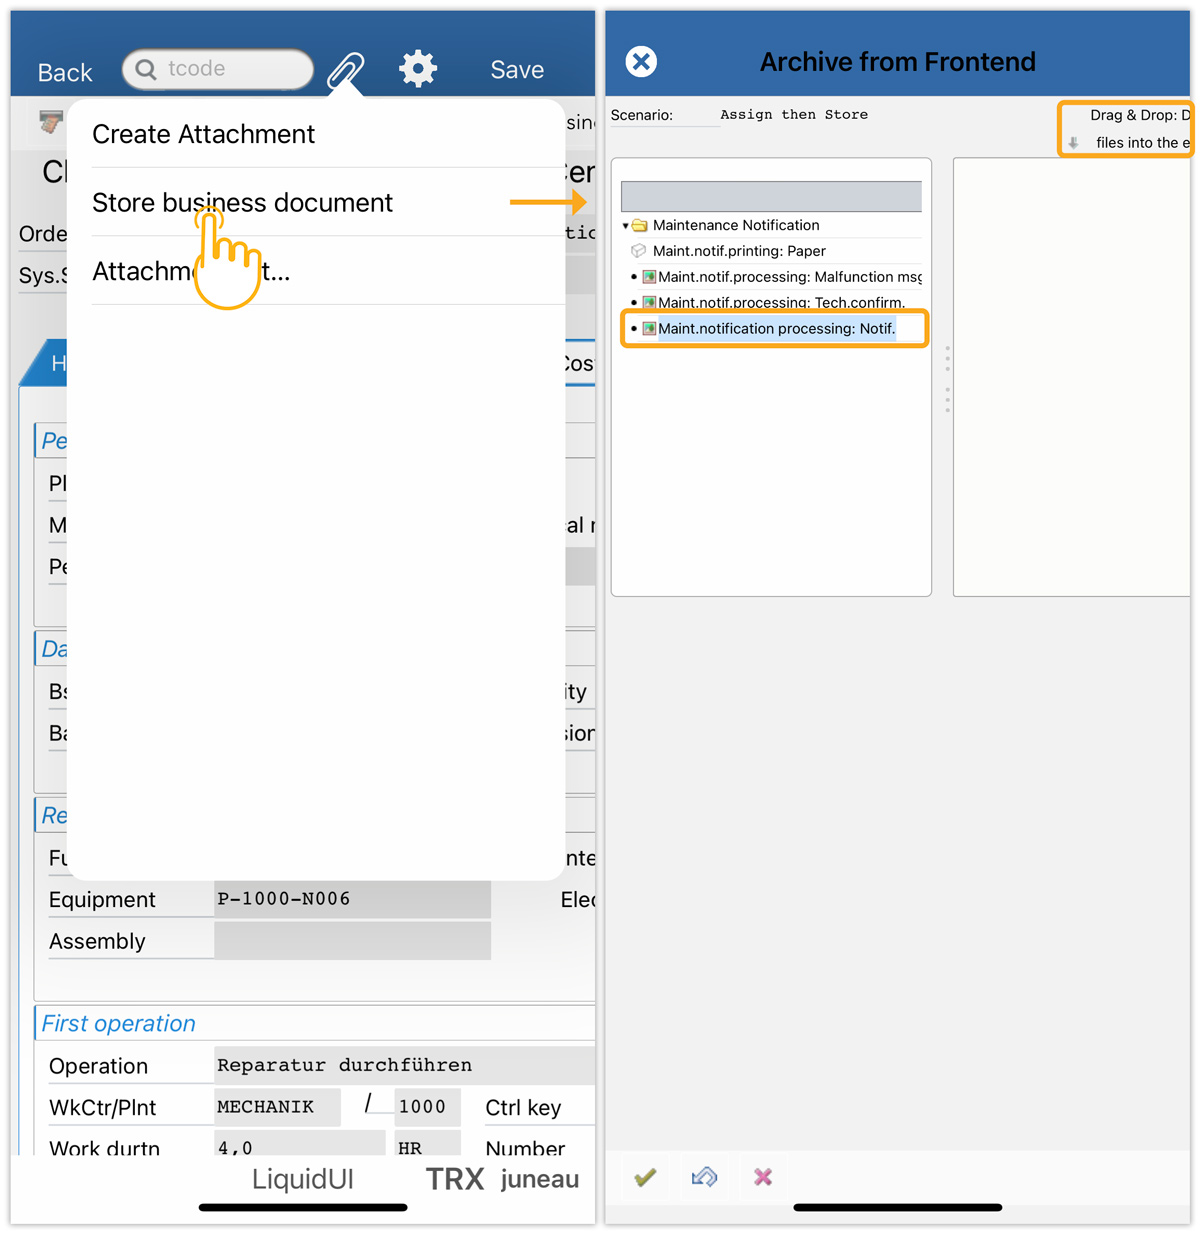
- Store business document: Attach or drag and drop a document to the transaction and save it as a BDS document in SAP.
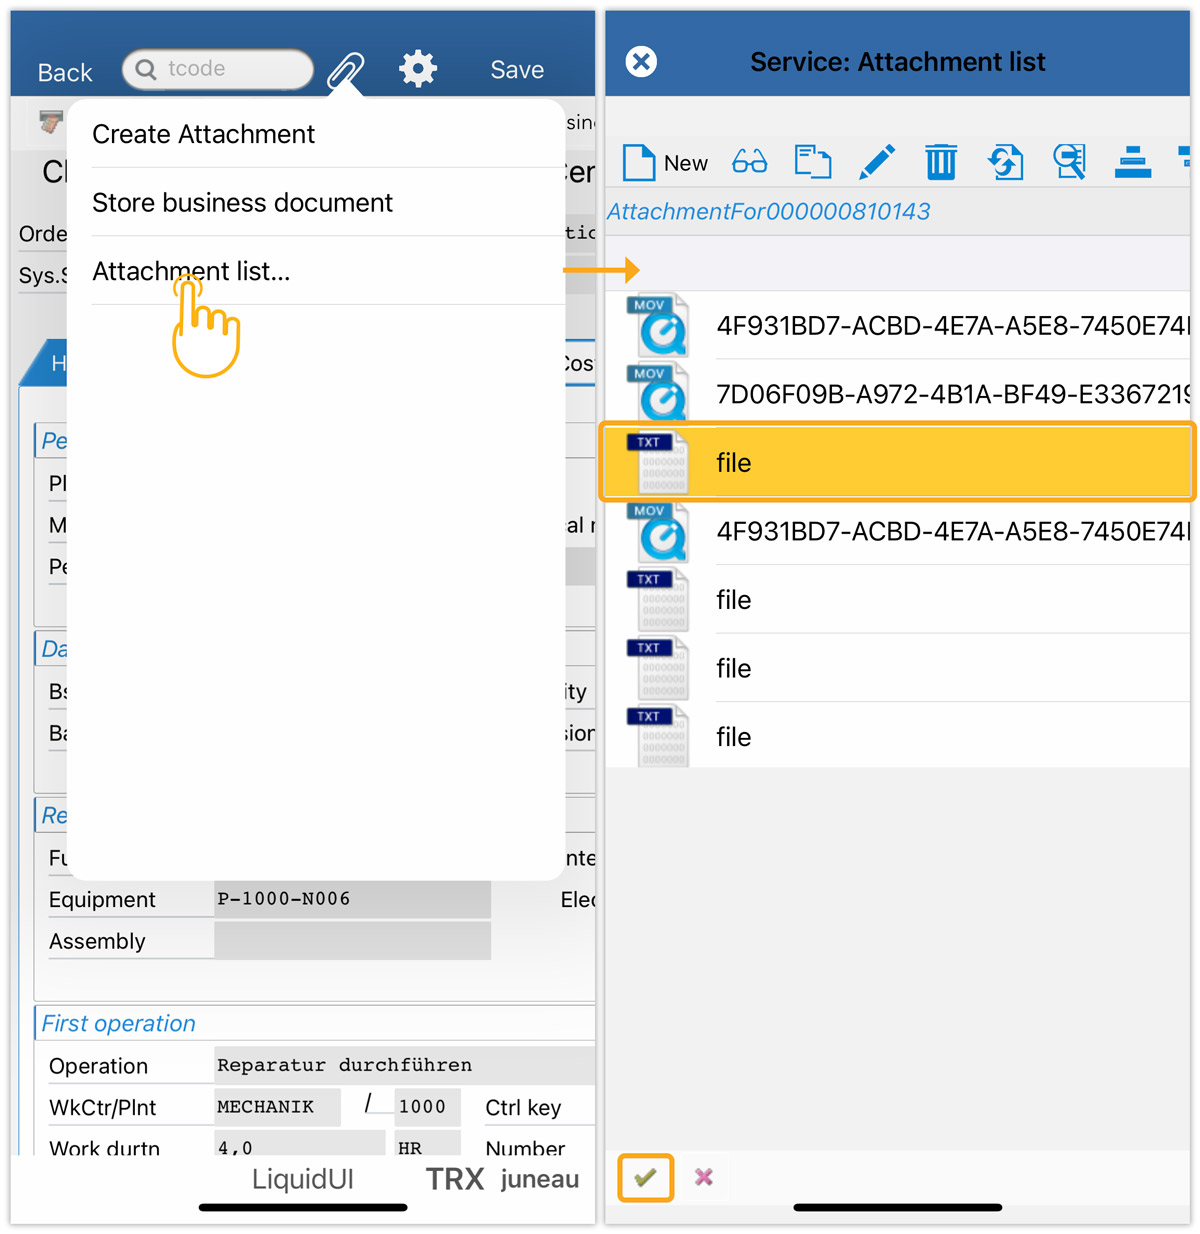
- Attachment list: View and manage existing attachments.
In this article, we’ll demonstrate how to attach, view, and download different types of files within an SAP transaction, considering the IW32 transaction.
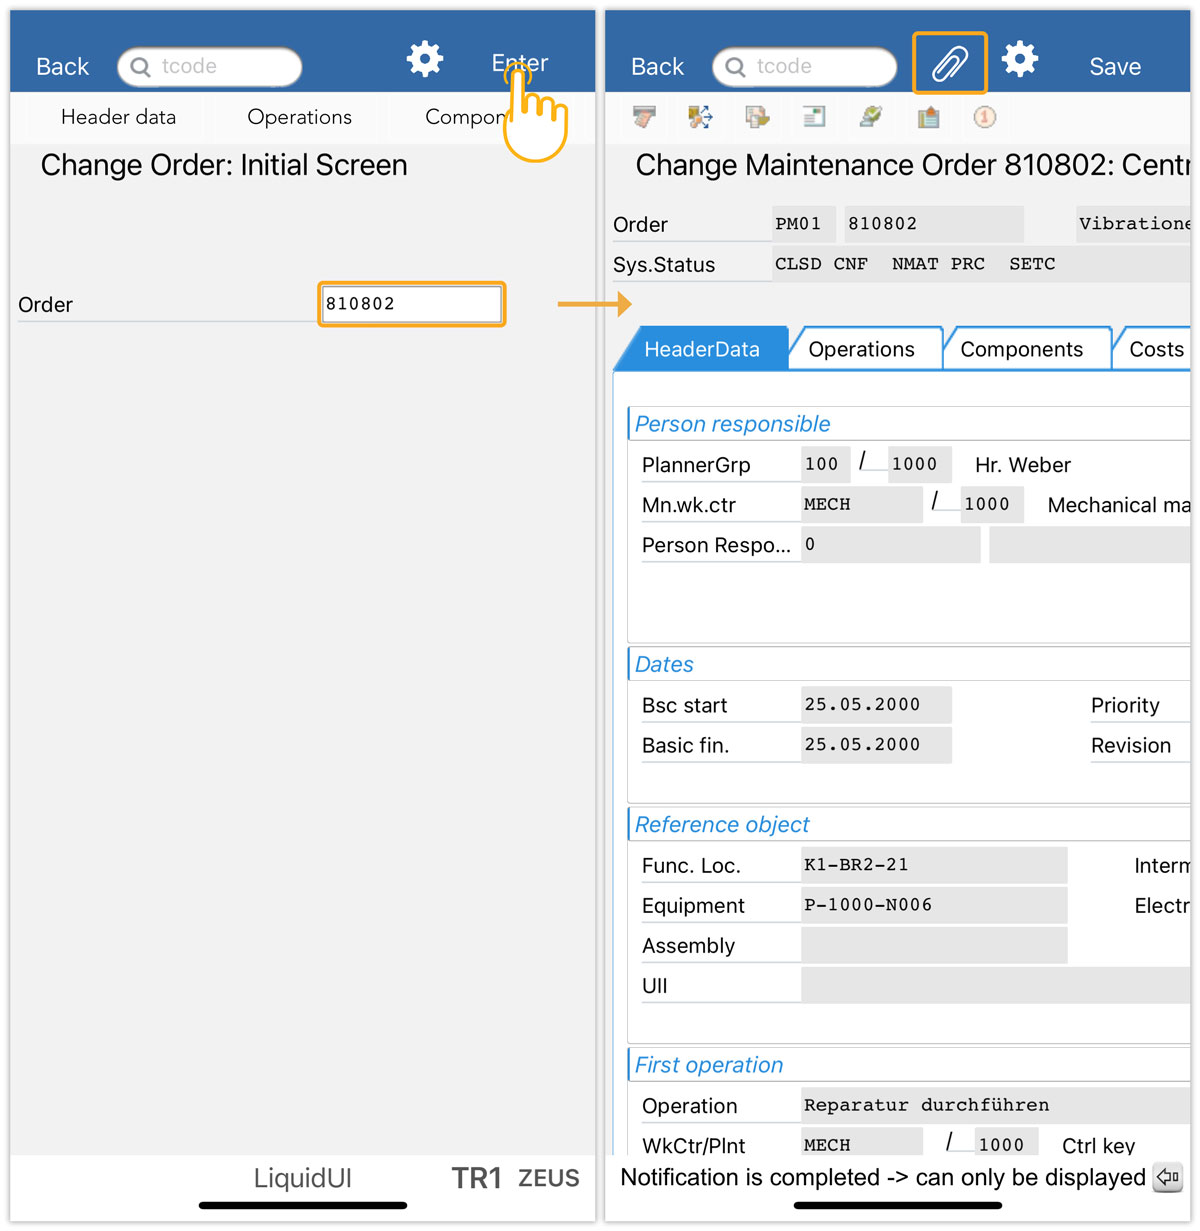
- Navigate to the IW32 transaction, enter 810802 in the Order input field, and click Enter. Then, you will be navigated to the Change Maintenance screen. Click the Attachment icon, as shown in the image below.
- Now, select the object and click Continue. Then, you will see the attachment options, as shown in the image below.
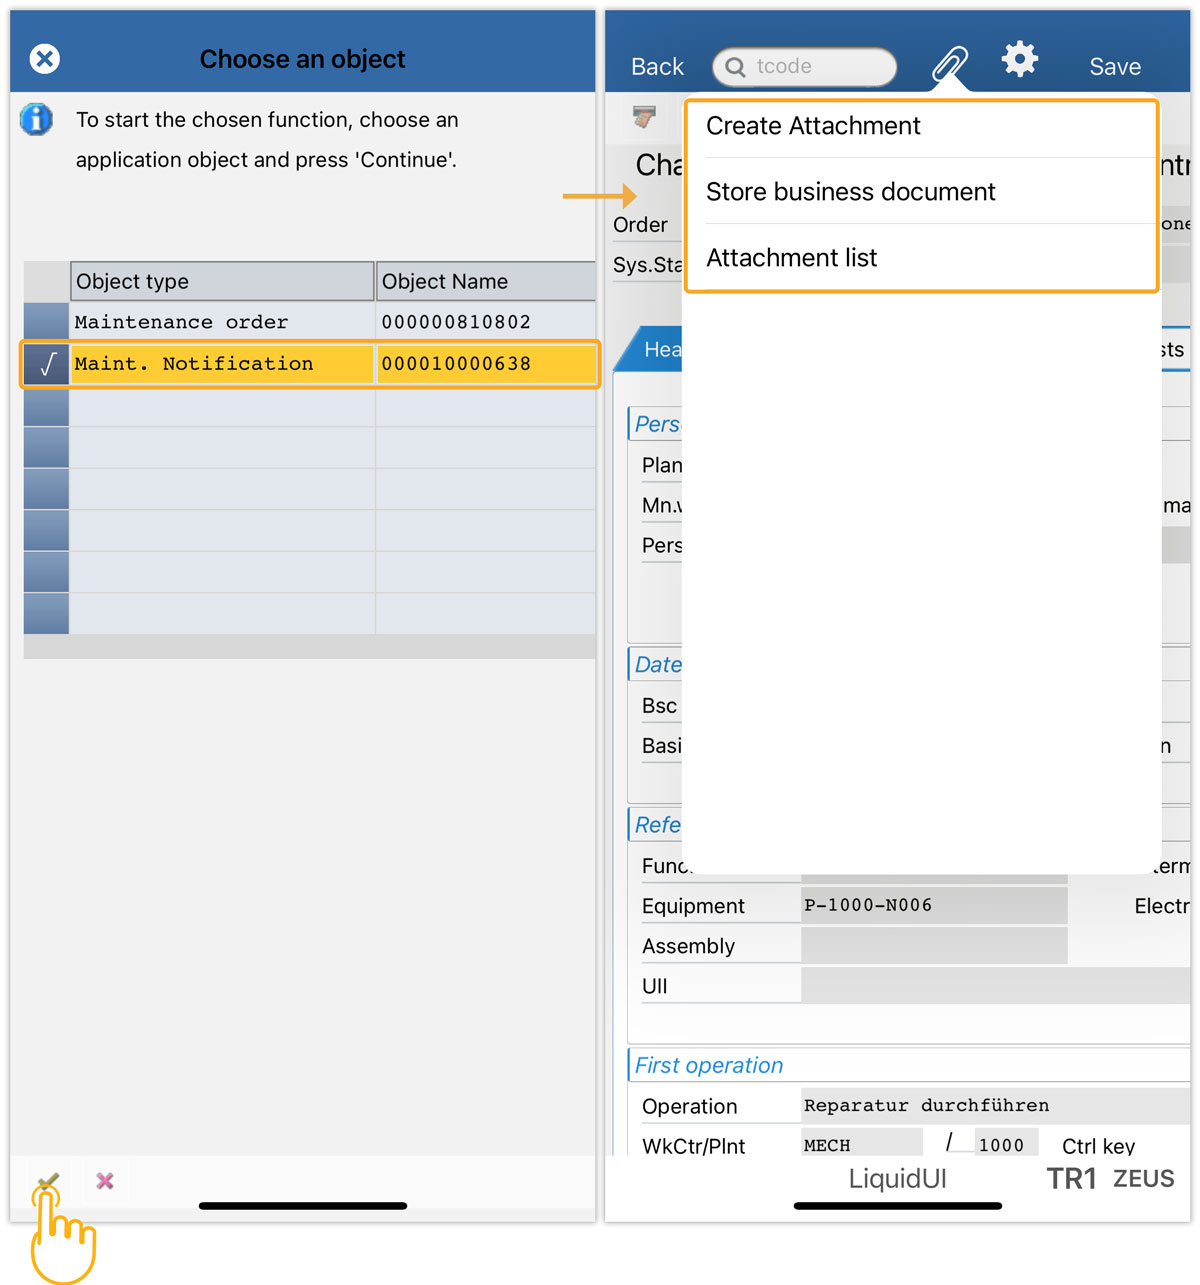
Create Attachment
Click Create Attachment to upload the files from the device. A context menu will appear with the following options:
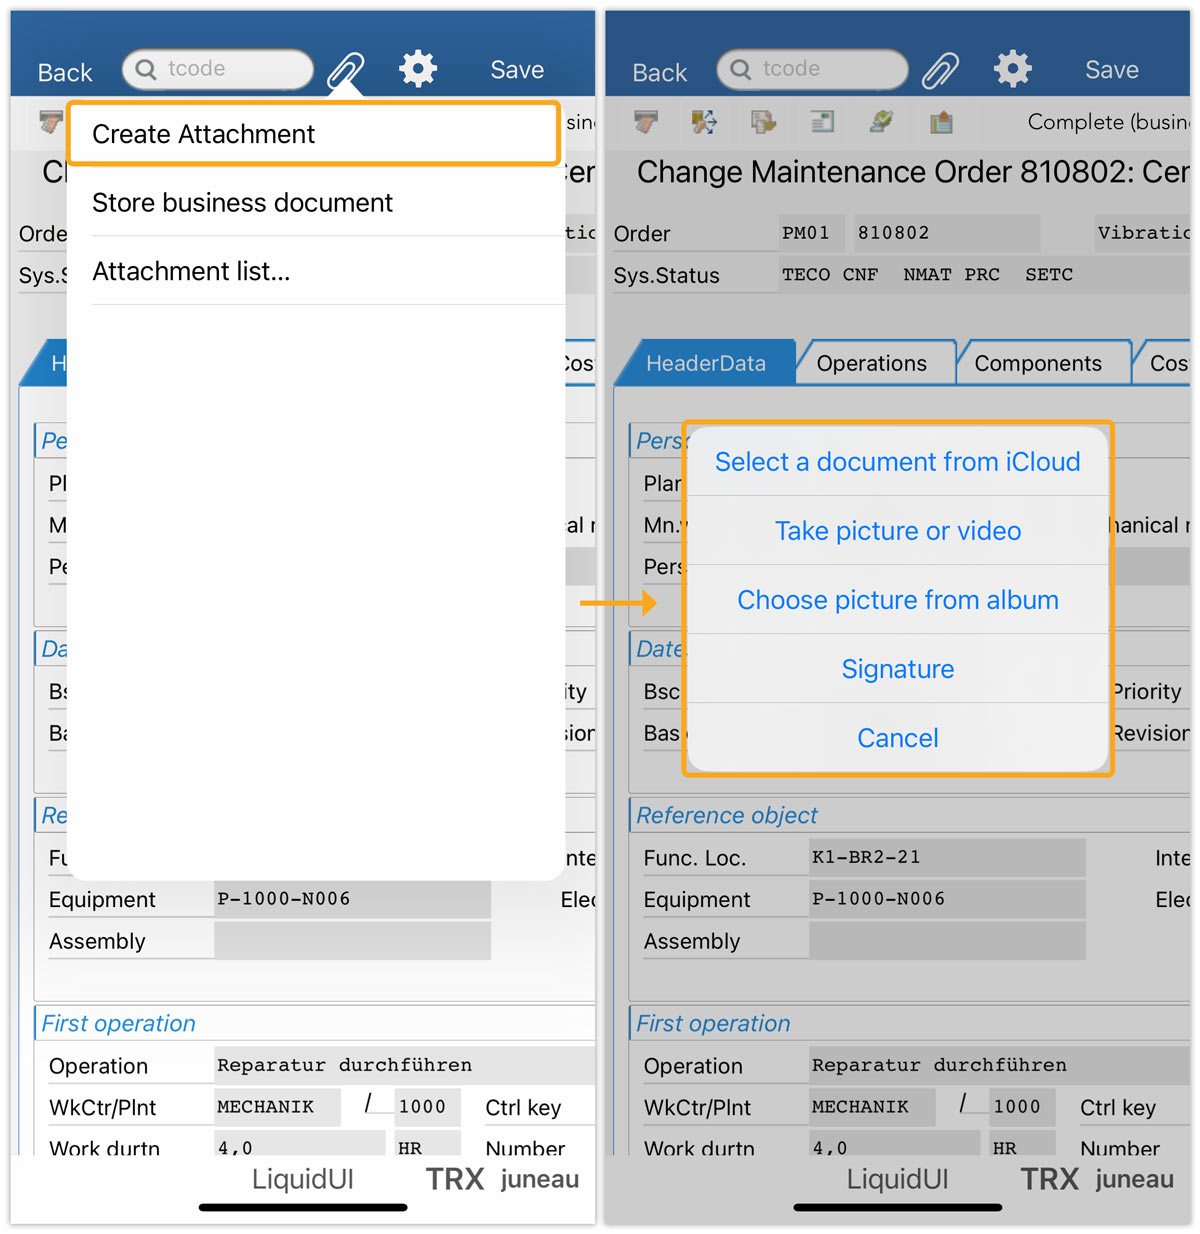
- Select a document from iCloud
Choose Select a document from iCloud to upload the files from iCloud Drive.
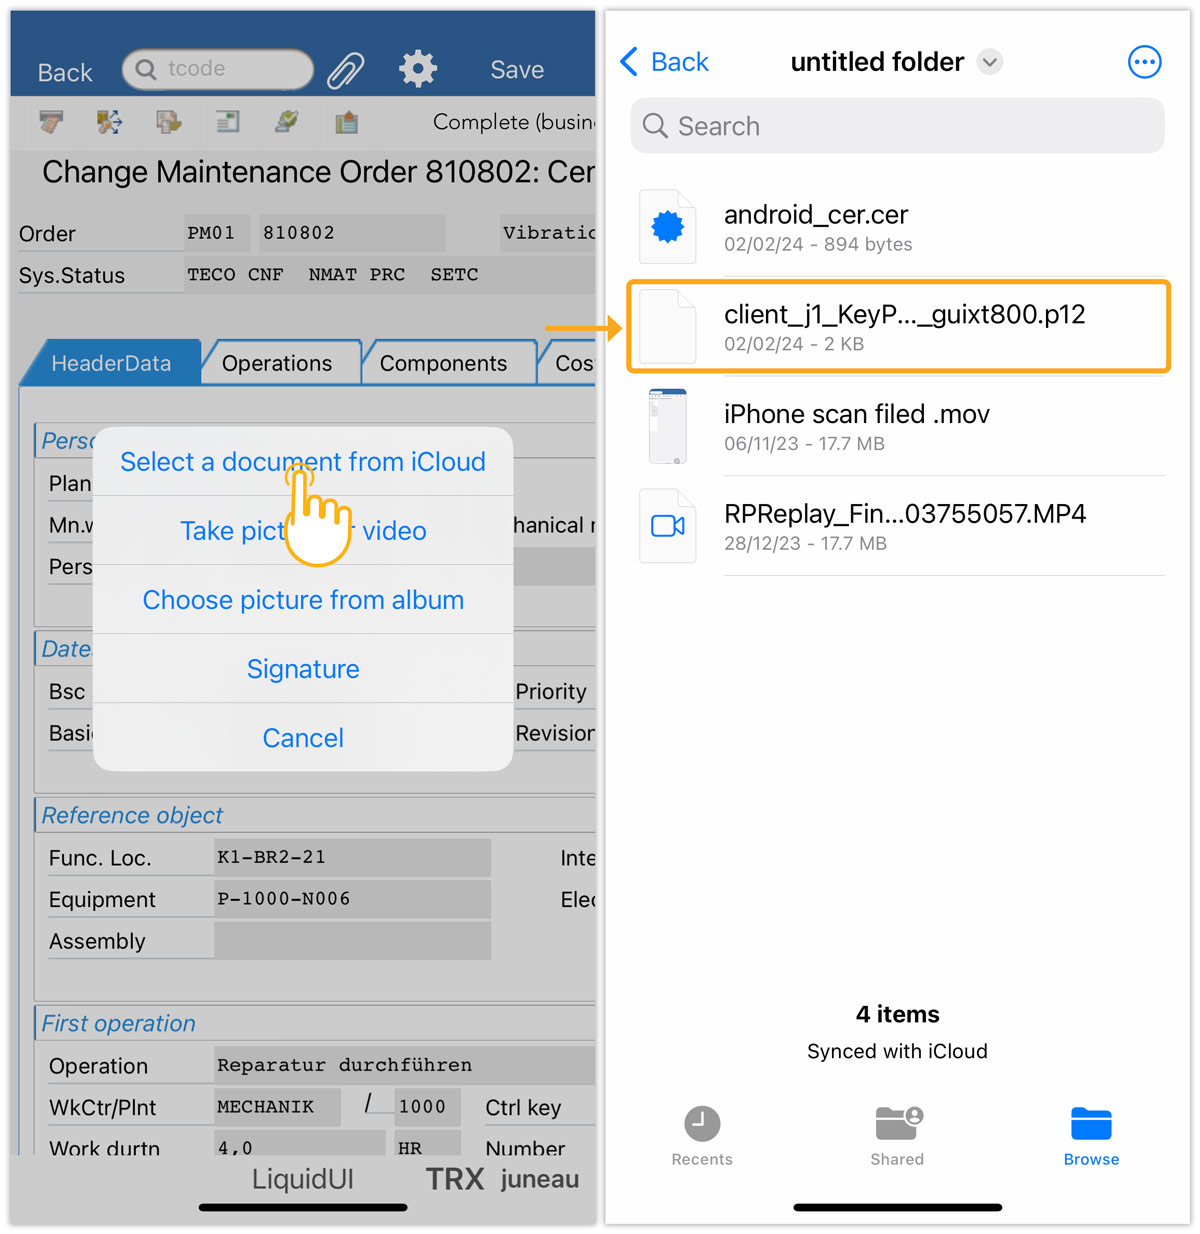
- Take a picture or video
- Choose the Take picture or video option to capture an image or video using your device’s built-in camera. After capturing, the file is instantly uploaded.

- Select the image size as per the requirements, and modify the file name according to the established naming convention.
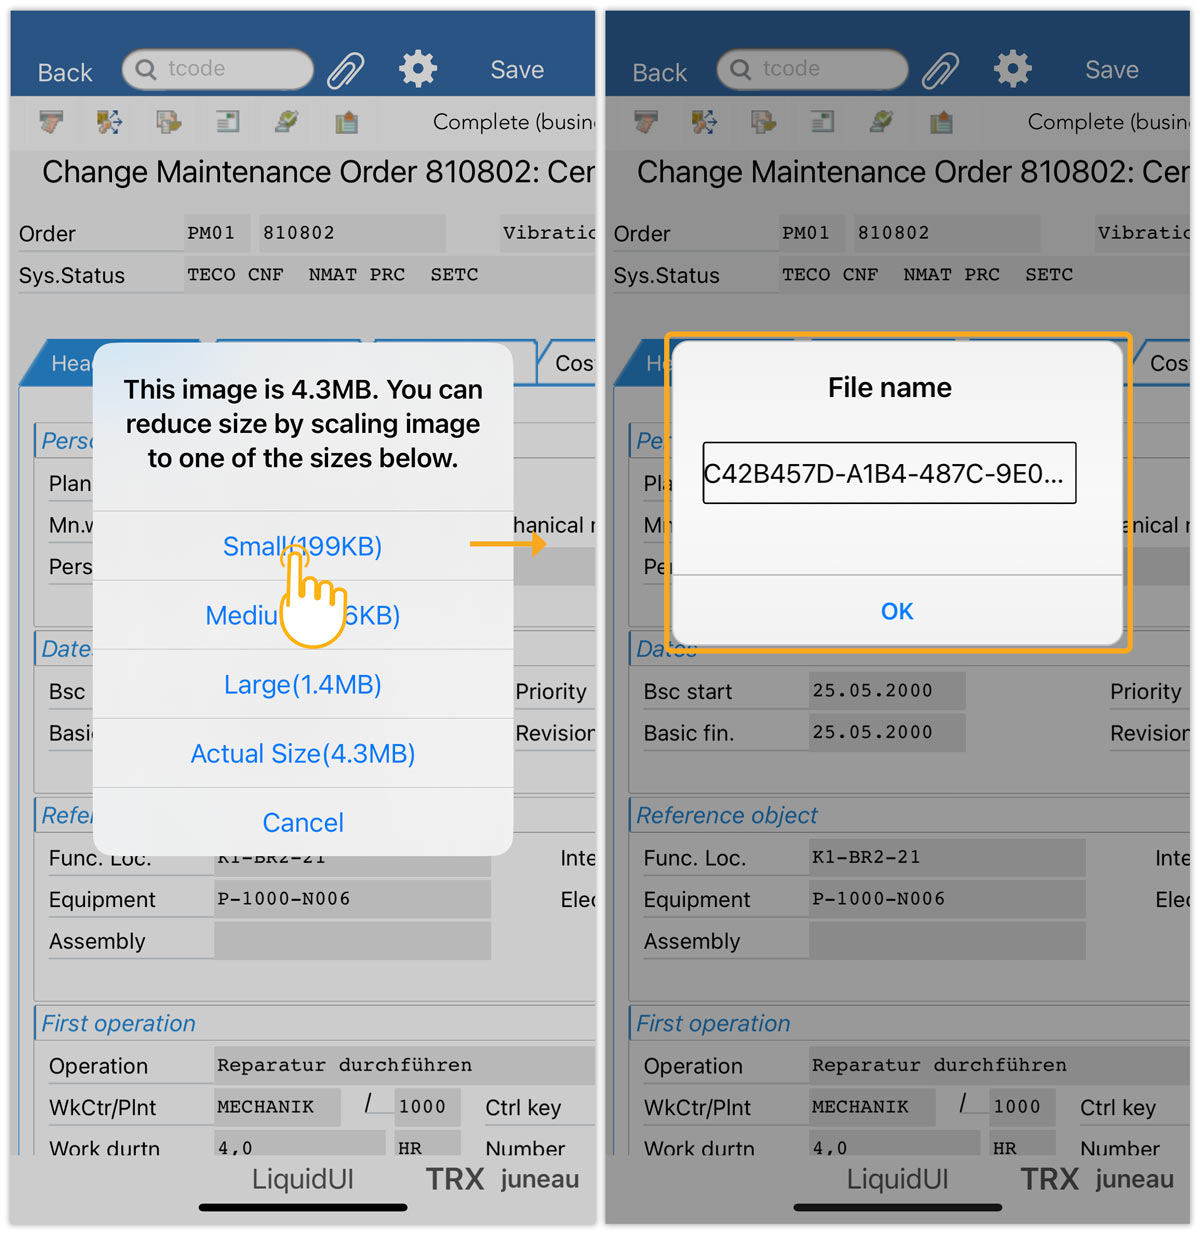
- Choose the Take picture or video option to capture an image or video using your device’s built-in camera. After capturing, the file is instantly uploaded.
- Choose picture from album
- Select Choose picture from album to upload an image from the album. Select the required image.
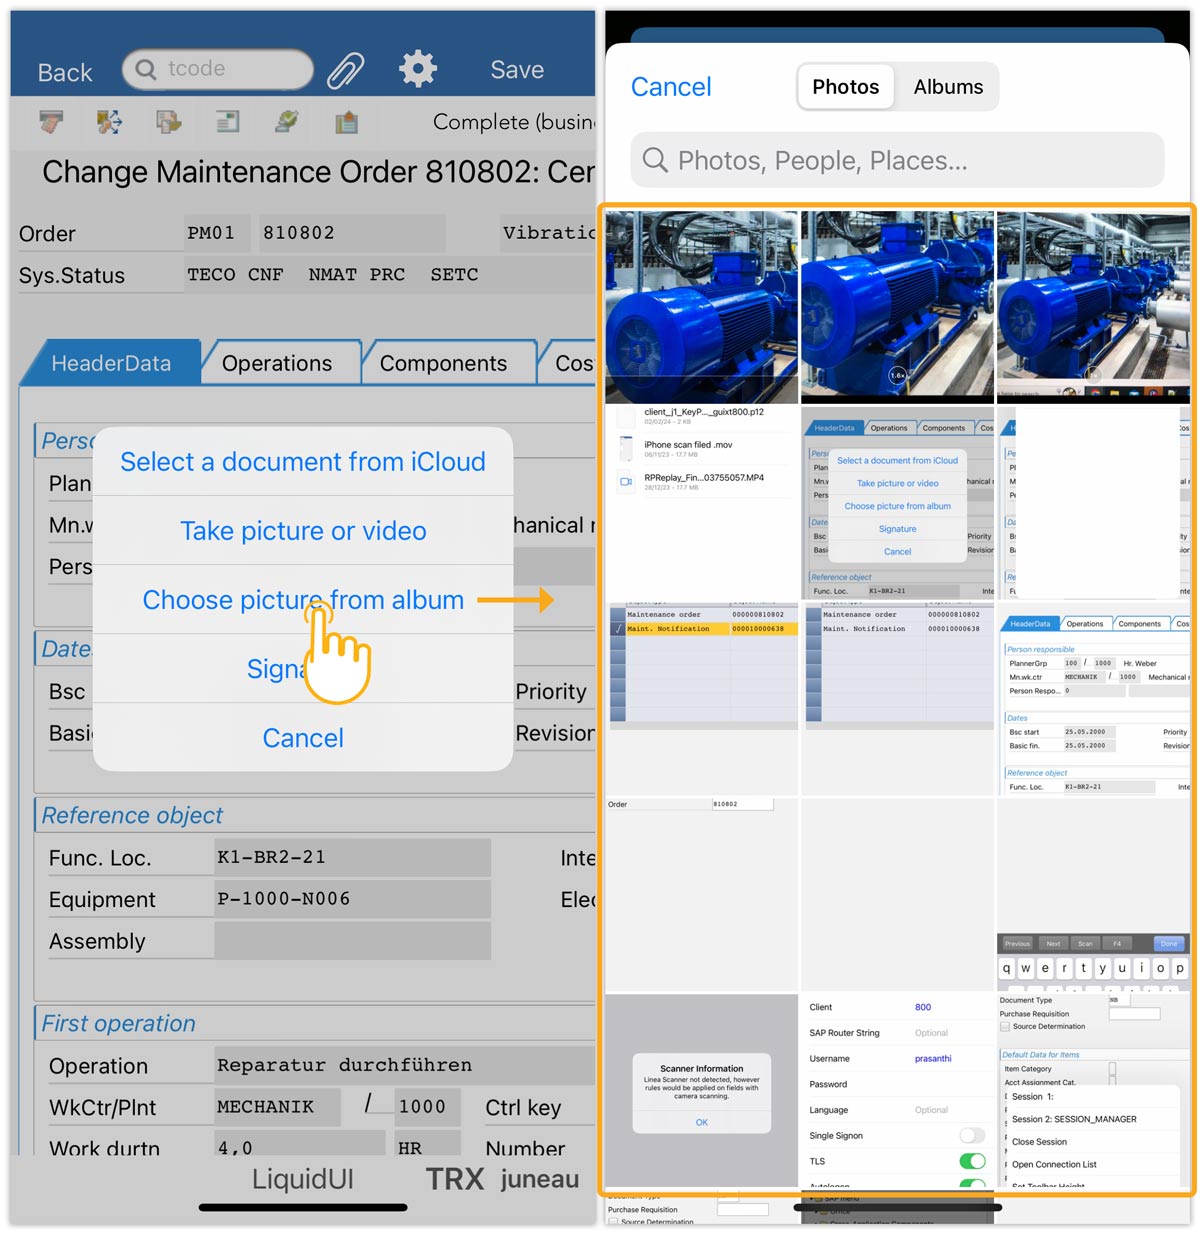
- Choose the image size using the size options according to the requirement, as shown below. Then, a pop-up appears asking you to confirm the file name (you can edit it if necessary) and click OK to save.
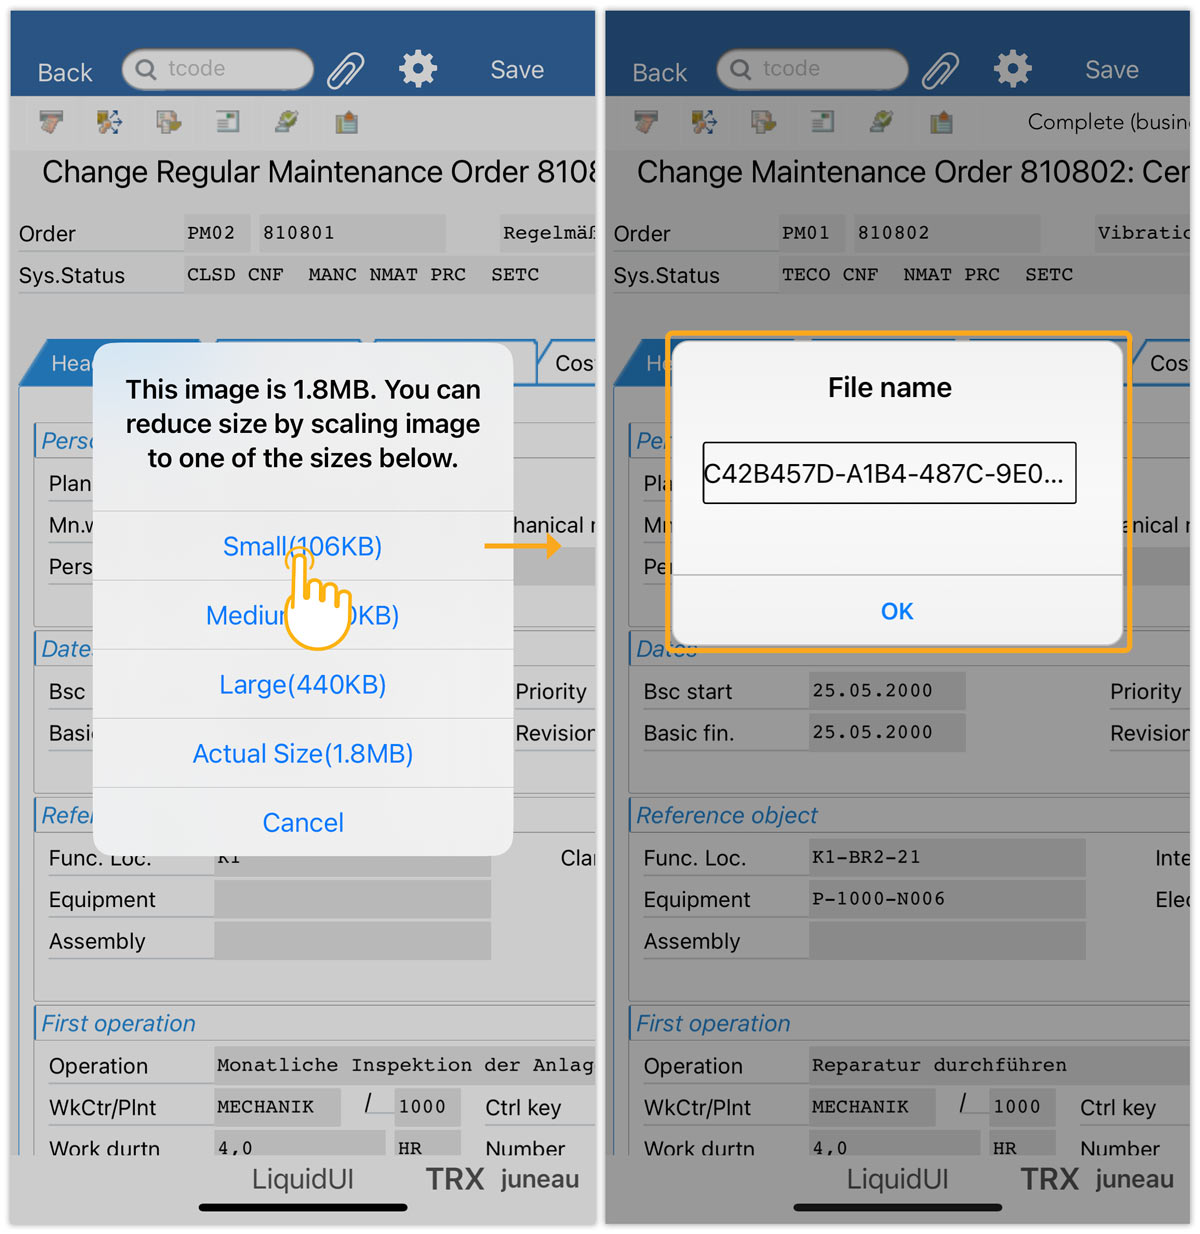
 Note: All files created and uploaded will be stored in the service attachment list for future utilization.
- Select Choose picture from album to upload an image from the album. Select the required image.
- Signature
Choose the Signature option to record and attach your signature as a file. Sign in on the device’s screen, then click Done to save it.
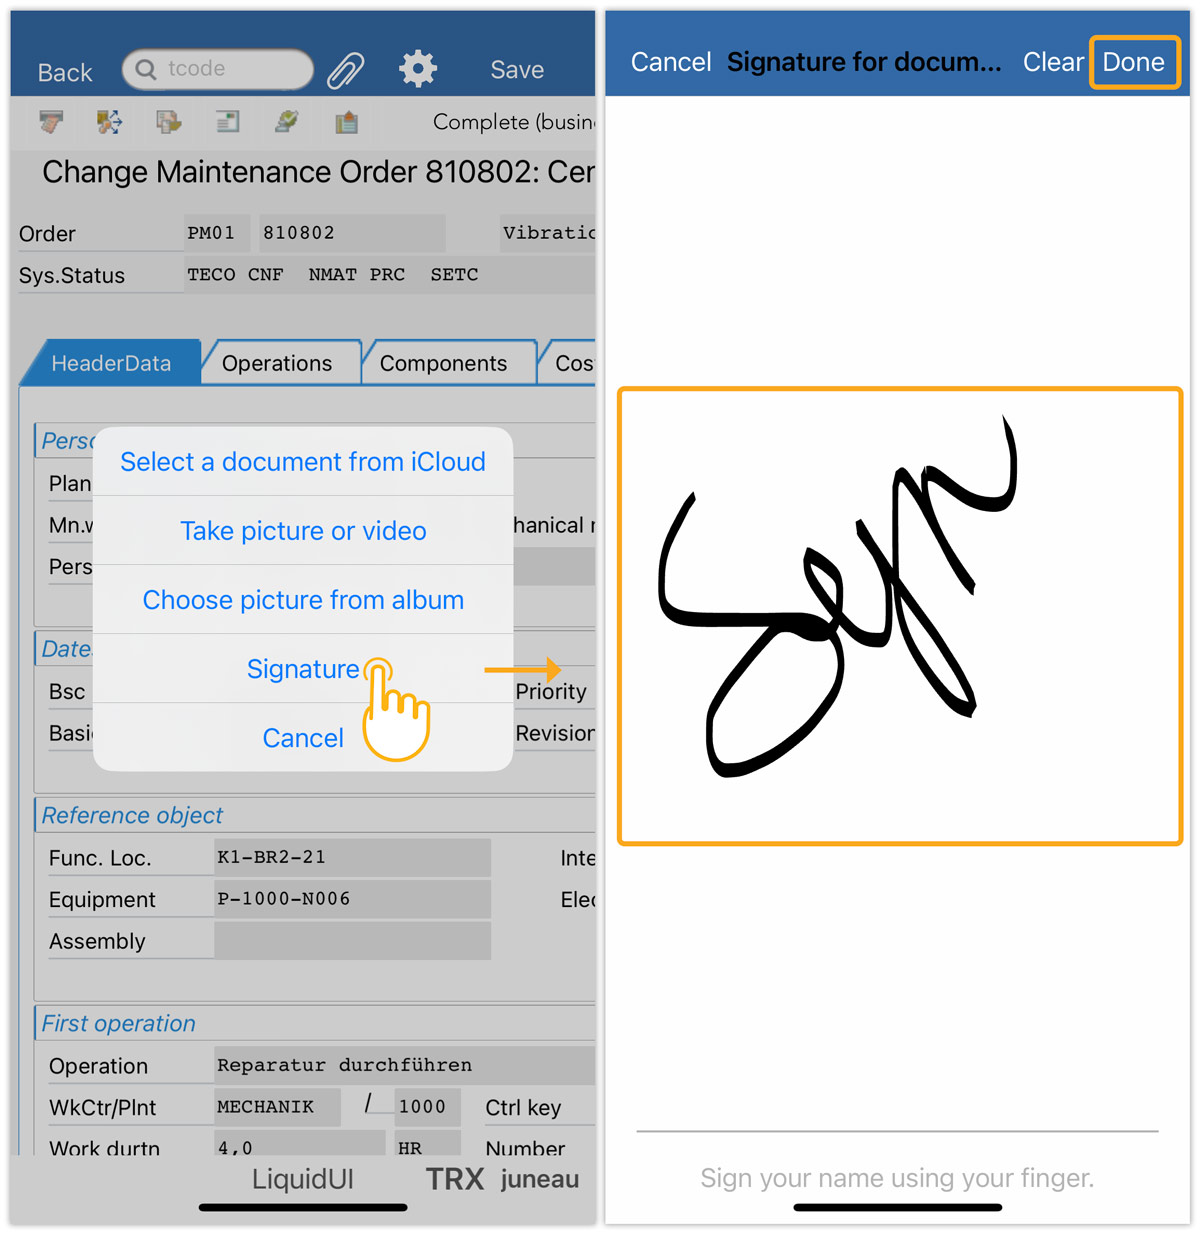
Click here for details on Electronic Signature Support.
Store business document
- Click the Store business document, choose the required document, and press continue to add it. You can also drag and drop a file into the empty field by clicking on it.
Attachment list
- Selecting the Attachment list option displays the Service: Attachment list screen, which contains a list of accessible attachments. Select the desired file from the list and click Continue to attach the file to the transaction.
- In the case of an empty list, accessing the Attachment list will prompt a message indicating the unavailability of the Attachment list service.
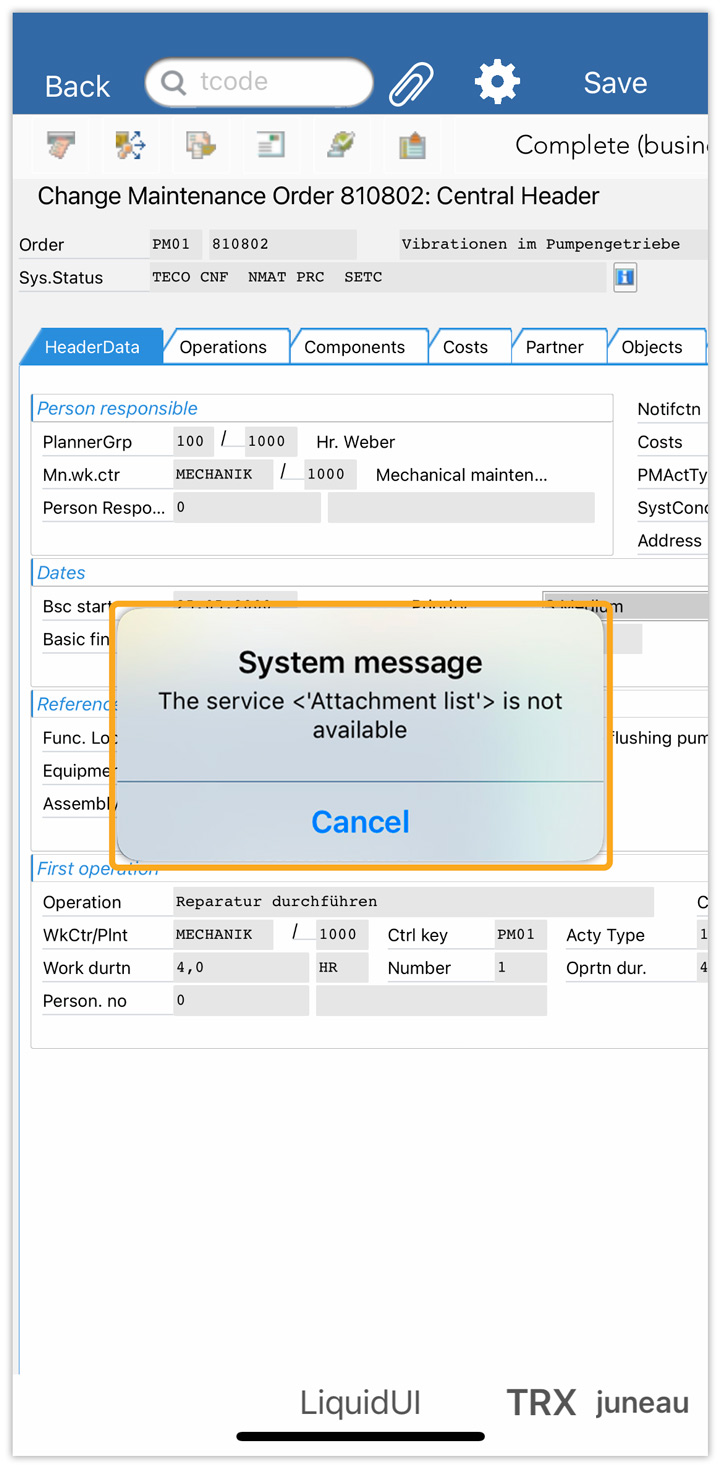
Note: To avoid such system messages, make sure to upload the file through the Create Attachment option, and then attach the file from the Attachment list