

Purpose
Liquid UI for iOS supports barcode scanning using a built-in camera or third-party devices like Linea Pro. Liquid UI supports both 1D and 2D barcode scanning.
This feature allows you to quickly populate data into any SAP input field with a single click. Additionally, you can edit the scanned data or program actions after scanning to trigger events such as auto-population, auto-entry, or auto-tabbing.
For instance, you can use barcode scanning to auto-populate fields like PO Number, Line Item, and Quantity for your PO Receipts process, reducing data entry errors and enabling automated data capture.
This barcode integration is rule-based, allowing you to configure the barcode scanner based on the selected barcode type in your app.
- Rule 1: You can add or remove prefixes and suffixes from the scanned value based on a barcode type.
- Rule 2: You can program scanned data to trigger actions like auto-populate or auto-enter after scanning data.
- Rule 3: The default configuration is applied to all the barcode scans if the rule-based barcode type is not defined.
- Rule 4: You can also determine actions like SCAN, DONE, TAB, or ENTER later, at the time of barcode scanning.

Note: You can view the created account and license details only after the License Assistance team approves them.
- Minimum Requirements
- Supporting barcode formats
- Pre-configuring barcode scanner
- Scanning 1D barcode
- Scanning 2D barcode
Minimum Requirements
- This feature requires an active Liquid UI for iOS license. (Click here for details about Liquid UI for iOS licensing.)
Supporting barcode formats
- Using the built-in camera: Liquid UI supports the following barcode types when you use the built-in camera;
- Code 39, Code 93, Code 128, DataBar, DataBar Expanded, EAN-8, EAN-13, Interleaved 2 of 5, QR Code, UPC-A, and UPC-E
- Using a third-party scanner: Liquid UI supports the following barcode types when you use a third-party scanner;
- Linea Pro 4, Aztec code, Code 11, Code 39, Code 93, Code 128, Codebar, Data Matrix, EAN 8, EAN 13, UCC/EAN 128, UPC A, UPC E, UPC E1, GS1, IATA, ISBN, ISMN, ISSN, Industrial 2 of 5, Interleaved 2 of 5, Matrix 2 to 5, Maxi code, MicroPDF417, Micro QR code, MSI/Plessey, UK/Plessey, PDF417, QR code, RSS 14, RSS Limited, RSS-Expanded, S-code, and Telepen
Pre-configuring barcode scanner
Liquid UI for iOS offers complete native scanner configuration capability, allowing users to execute various functions based on their specific needs.
- Add new Barcode types
- Edit default Barcode types
- Add prefixes under Barcode types
- Add suffixes under Barcode types
Refer to the Barcode Scanner Settings article to configure the scanner in Liquid UI for iOS.
Scanning 1D barcode
The Liquid UI Scan feature eliminates manual data entry, allowing users to populate details with a single tap and modify the scanned data within the input field. Follow the steps below to scan the 1D barcode.
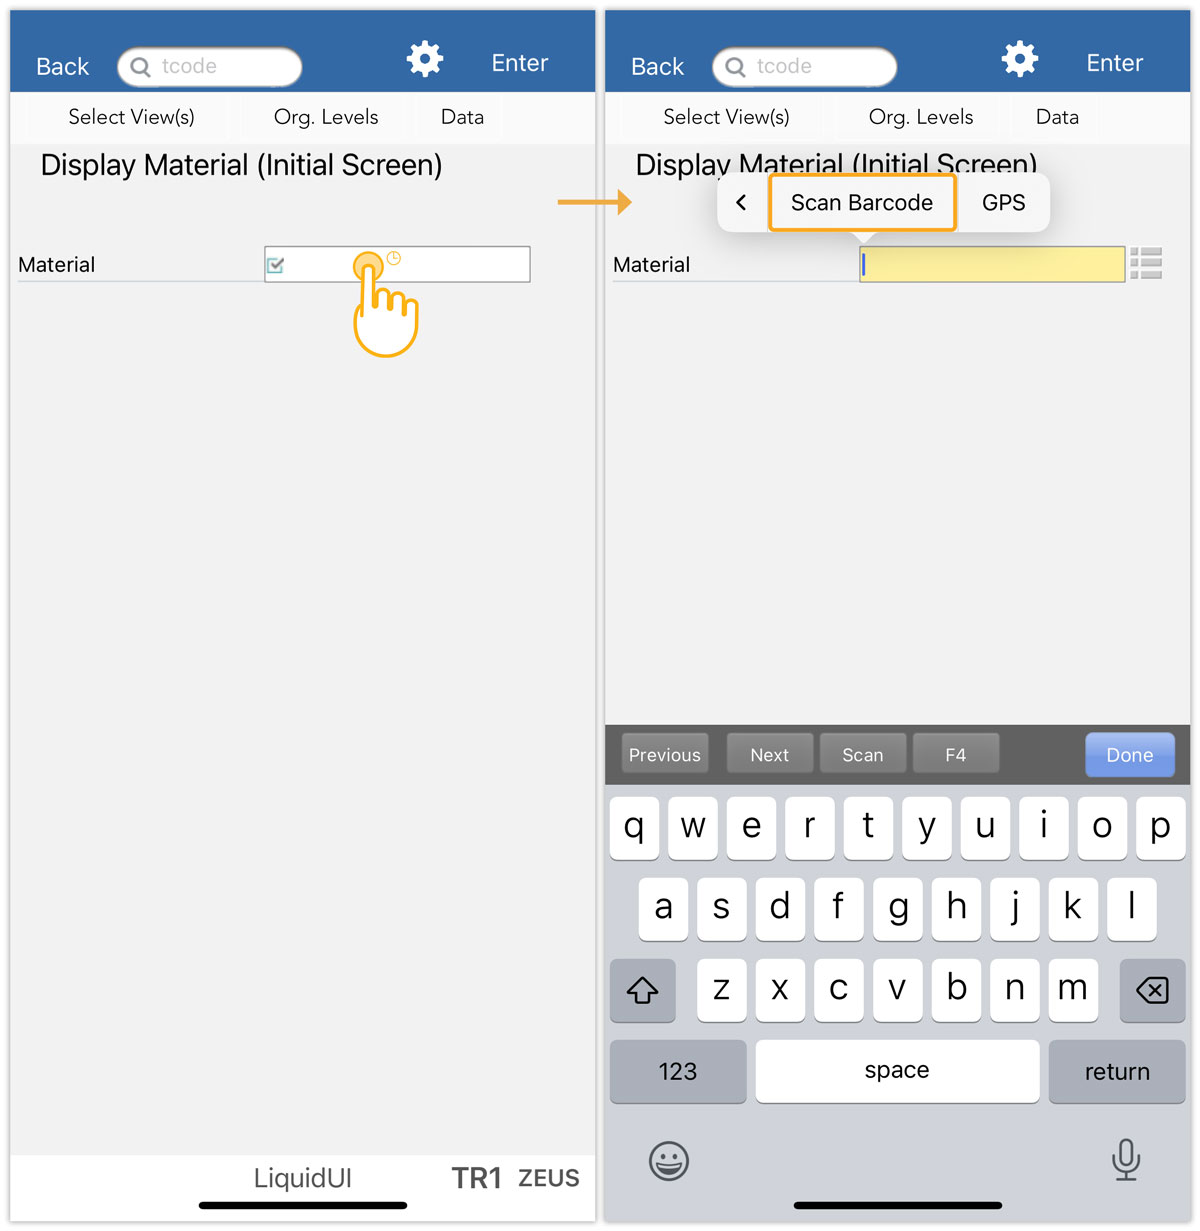
- Navigate to MM03 transaction. Long-press on Material, and select Scan Barcode.
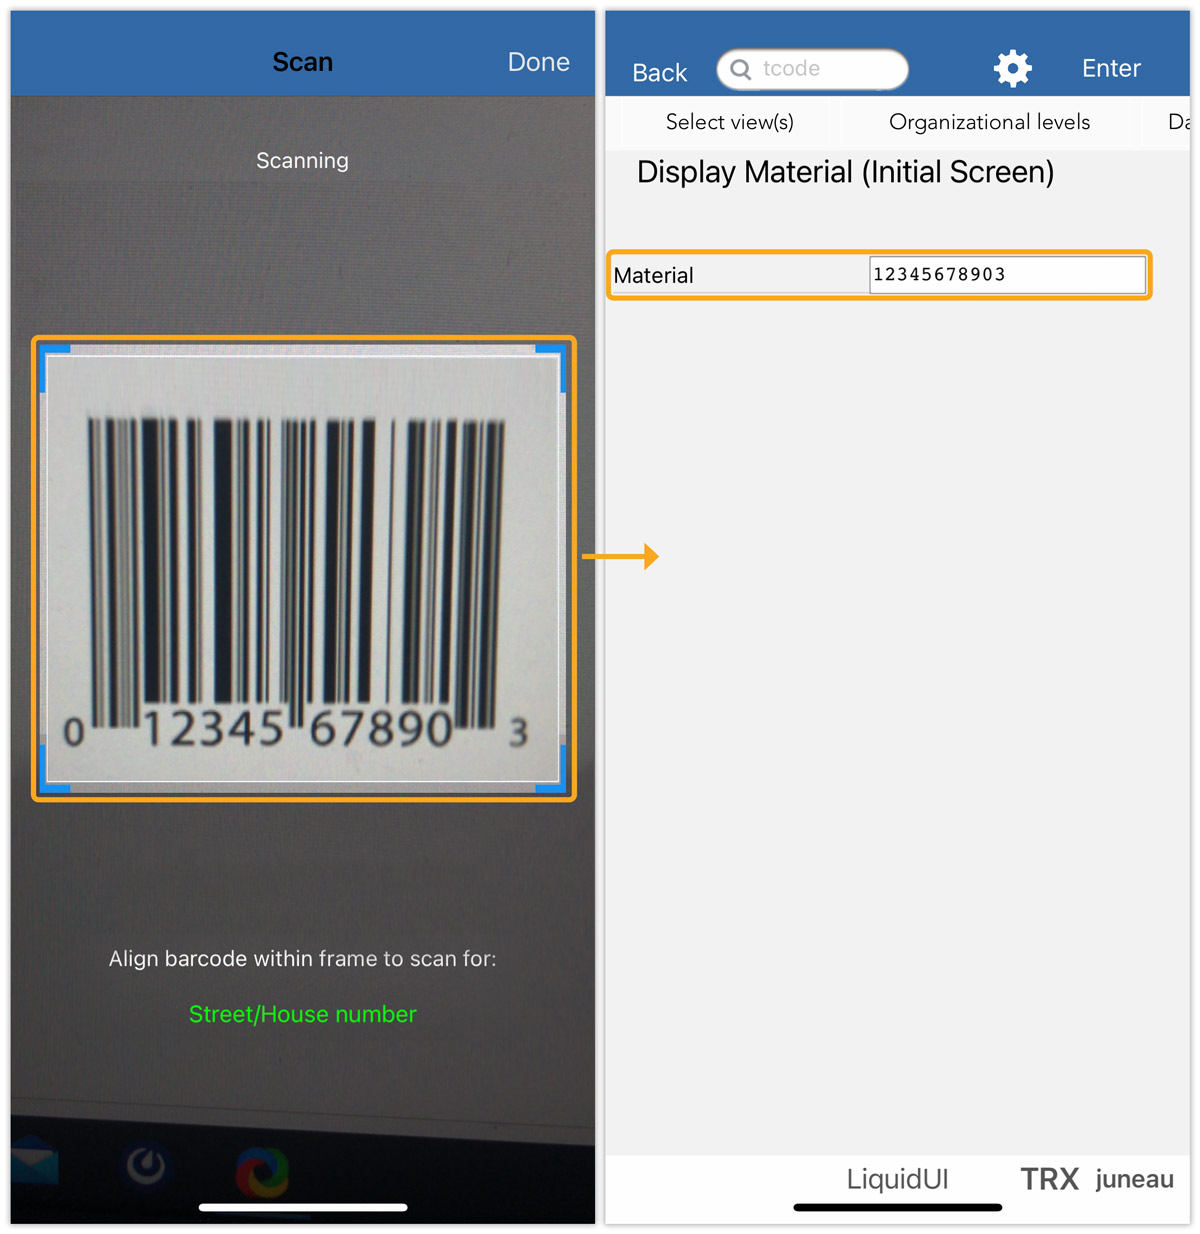
- Now, scan the barcode using a built-in camera. The barcode will be automatically scanned, and the value will auto-populate into the input field, as shown in the image below.
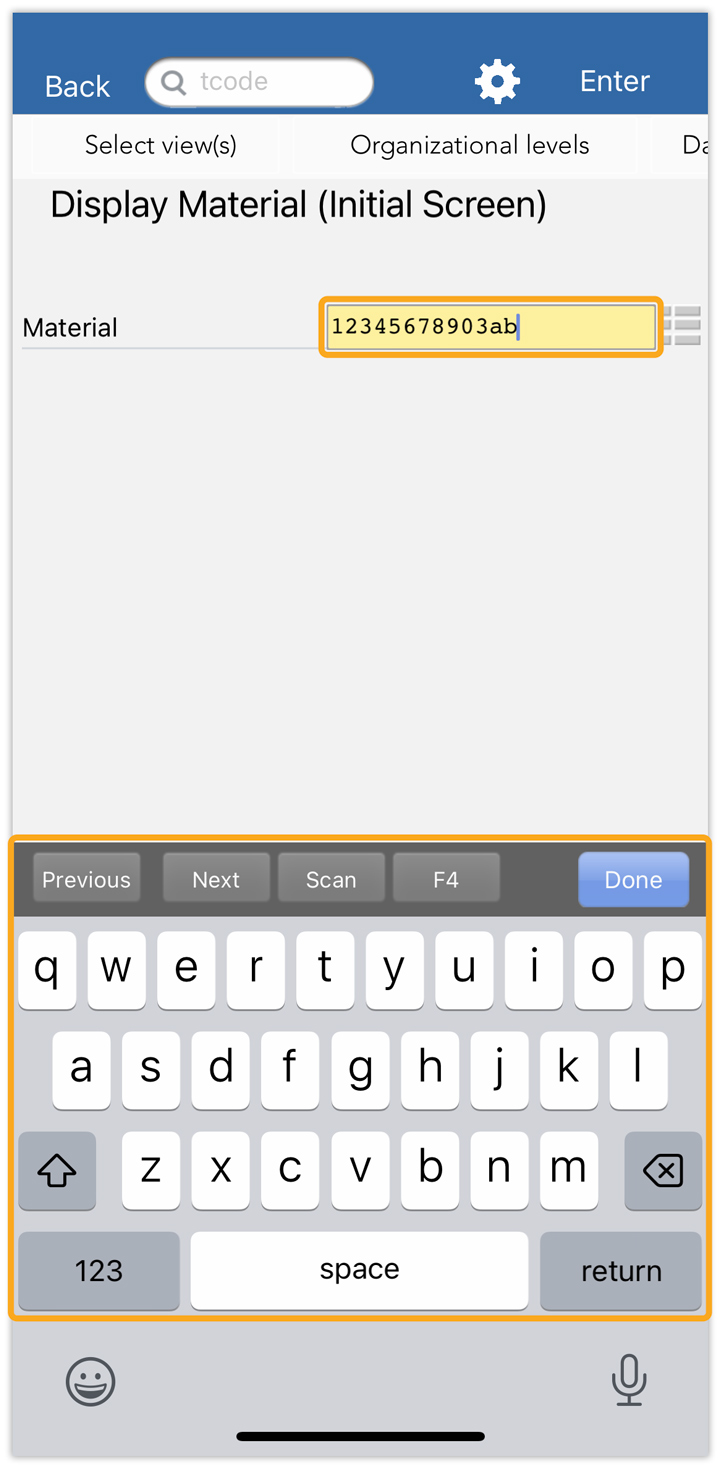
- You can manually edit the scanned value by placing the cursor on the input field.
Scanning 2D barcode
2D barcodes are images composed of dots, squares, rectangles, and hexagons. They store a significant amount of information vertically and horizontally. These barcodes hold up to 7,089 characters and can store encrypted data such as web addresses, text, images, and coupons.
A QR code is one of the most widely used types of 2D barcodes. It can be scanned by mobile phones or lasers and is commonly used for quickly accessing information across various applications. The 2D data input would normally be used in a single field like a 1D scan.
- Navigate to transaction XK02, enter Vendor details, and select the Address checkbox under General data. Click Enter to navigate to the Change Vendor: Address screen.

- Long-press on the Street/House number input field, select the Scan Barcode option from the pop-up, and scan the barcode.
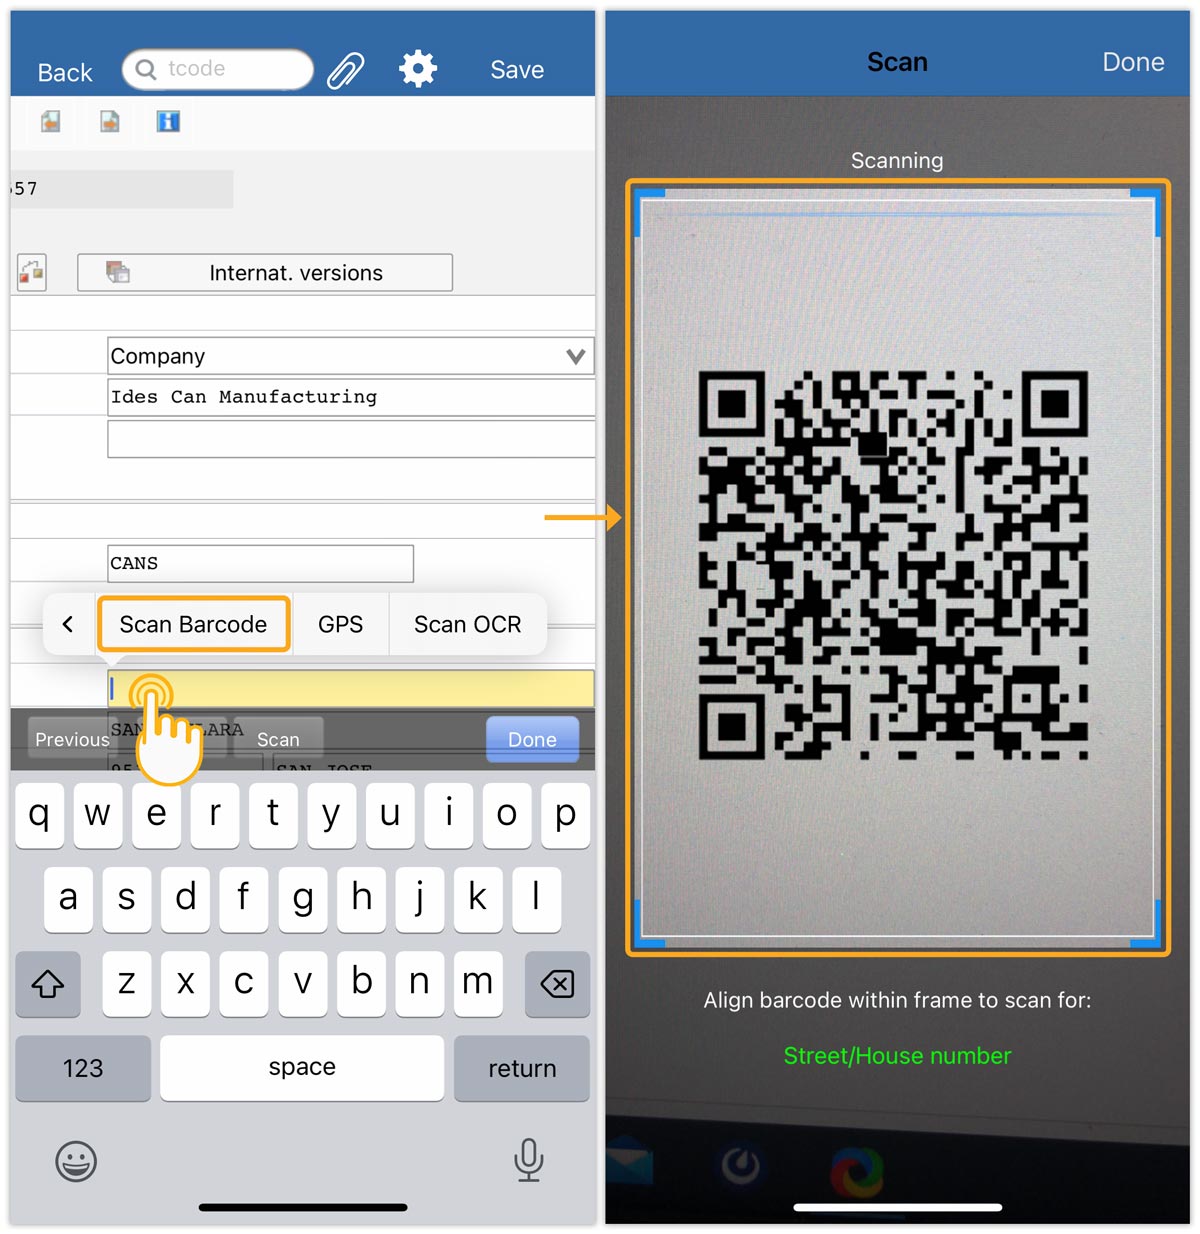
- The QR code is automatically scanned, and the value is populated into the input field.
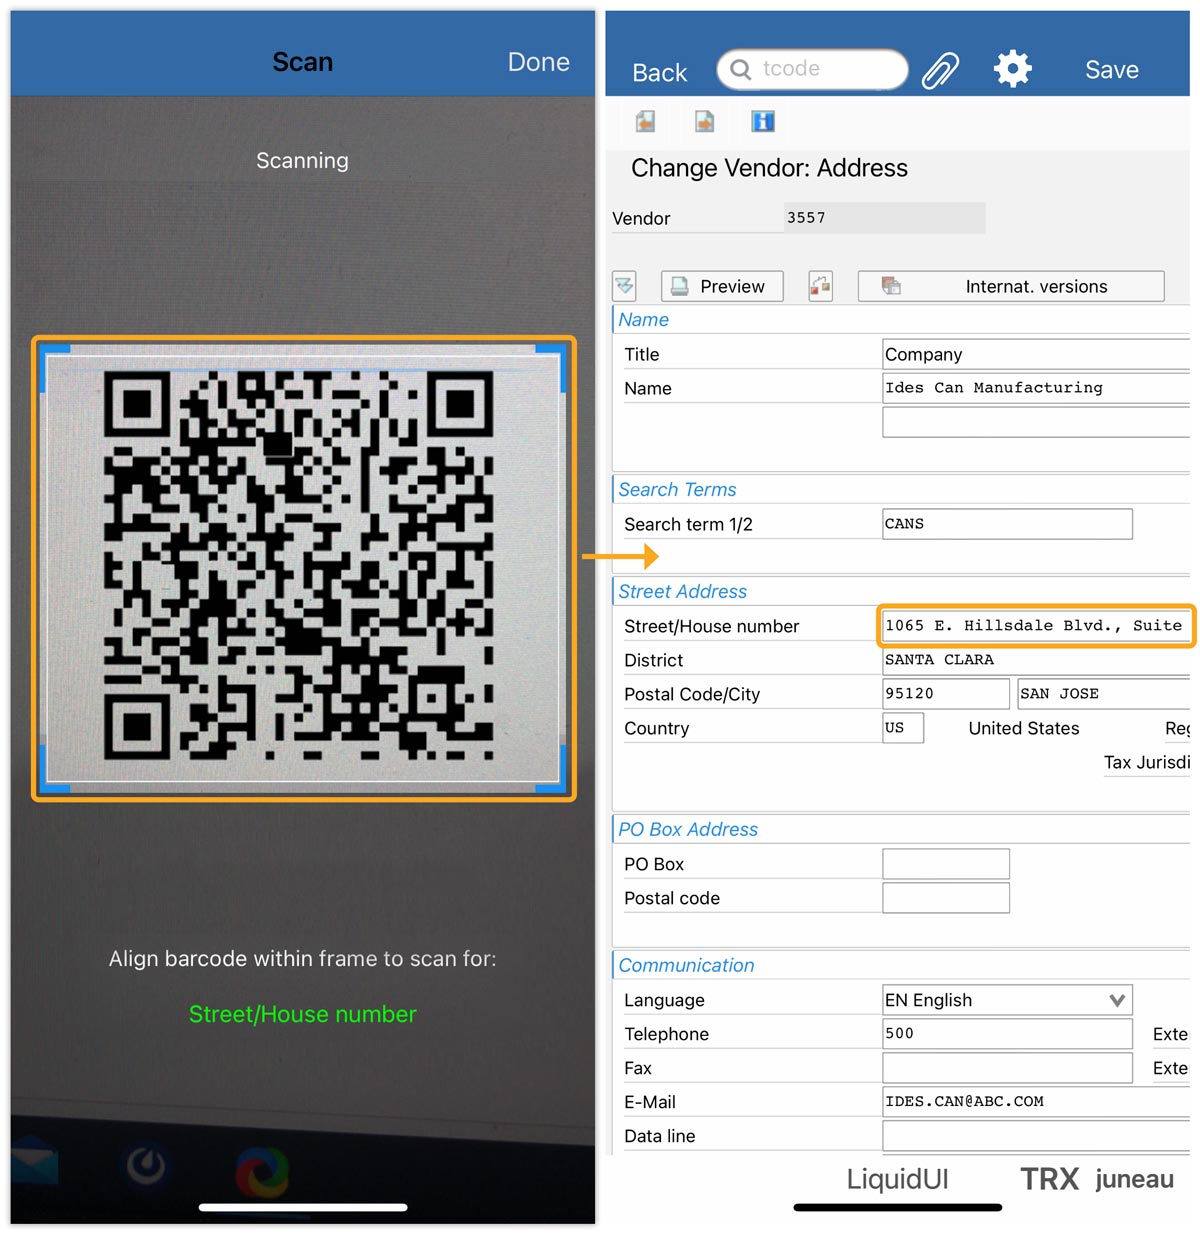
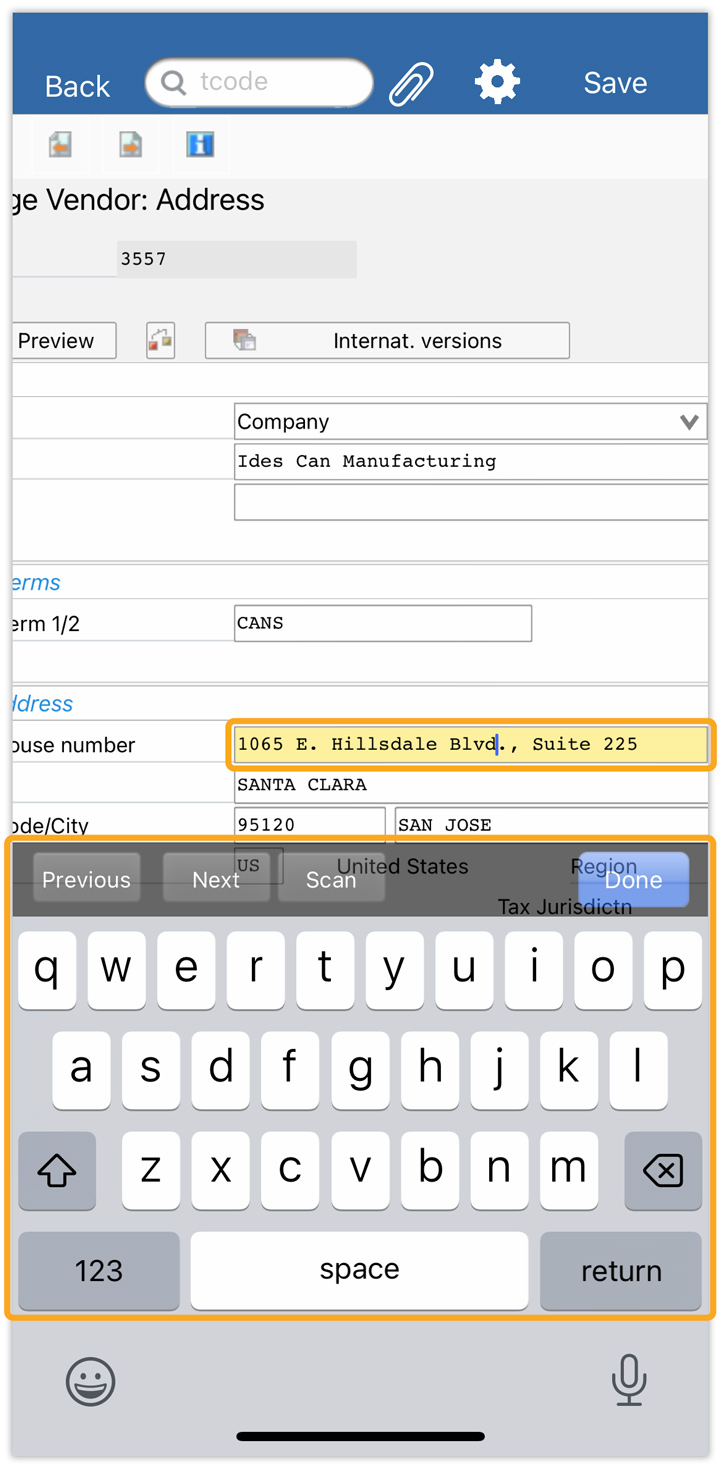
- You can manually edit the scanned value by placing the cursor on the input field.