

Prerequisites
- Products: Liquid UI WS, Liquid UI Server or Local DLL, Client Software
- Commands: pushbutton(), del(), box(), set(), enter(), onscreen()
Purpose
The article demonstrates how to create custom push buttons on SAP screens to enhance usability. Push buttons can be used for:
- Creating launchpads for easy access to transactions.
- Adding tooltips and icons
- Passing parameters to a process
- Adding push buttons to the SAP toolbar
- Executing transactions with OK code
User Interface
//Create the SAPLSMTR_NAVIGATION.E0100.sjs file inside your scripts folder for customizing the SAP Easy Access screen.
//Now, add the Liquid UI script to the above file and save it.
Example 1: Creating a launchpad
Creates a group box labeled Launch Pad with push buttons to launch transactions from the SAP Easy Access screen.
- Create a box labeled Launch Pad along with push buttons to launch transactions.
// Creates a box
box([2,0],[12,46],'Launch Pad');
// Creates push buttons for transactions
pushbutton([5,9],"Create Material","/nmm01");
pushbutton([7,9],"Create Material","/nmm01");
pushbutton([7,9],"Create Sales Ordel","/nva01");
pushbutton([9,9],"Create Notification","/niw21");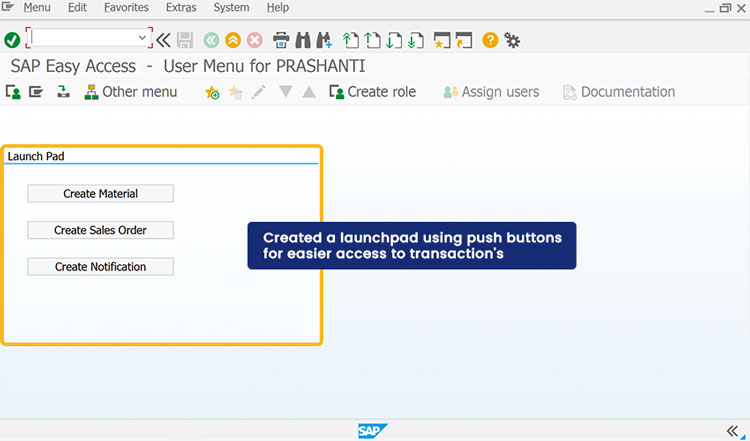
Example 2: Adding Icons to the push button
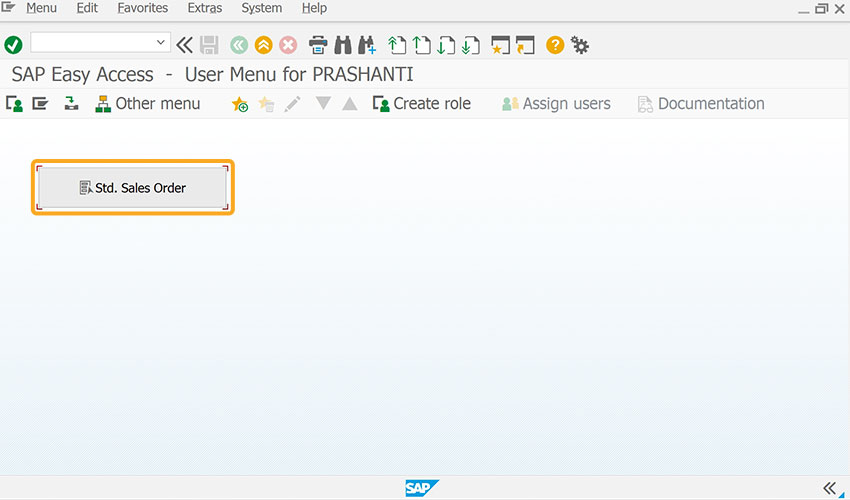
Add an icon to the push button on the SAP screen
- Create a push button labeled Std. Sales Order to execute the process.
// Creates a push button with an icon to execute the process
pushbutton([2,5],"@4D\\QCreate a Std. Sales Order@Std. Sales Order",{"process":va01_process,"size":[2,24],"using":{"z_va01_ordertype":"OR"}});
Example 3: Passing parameters to functions
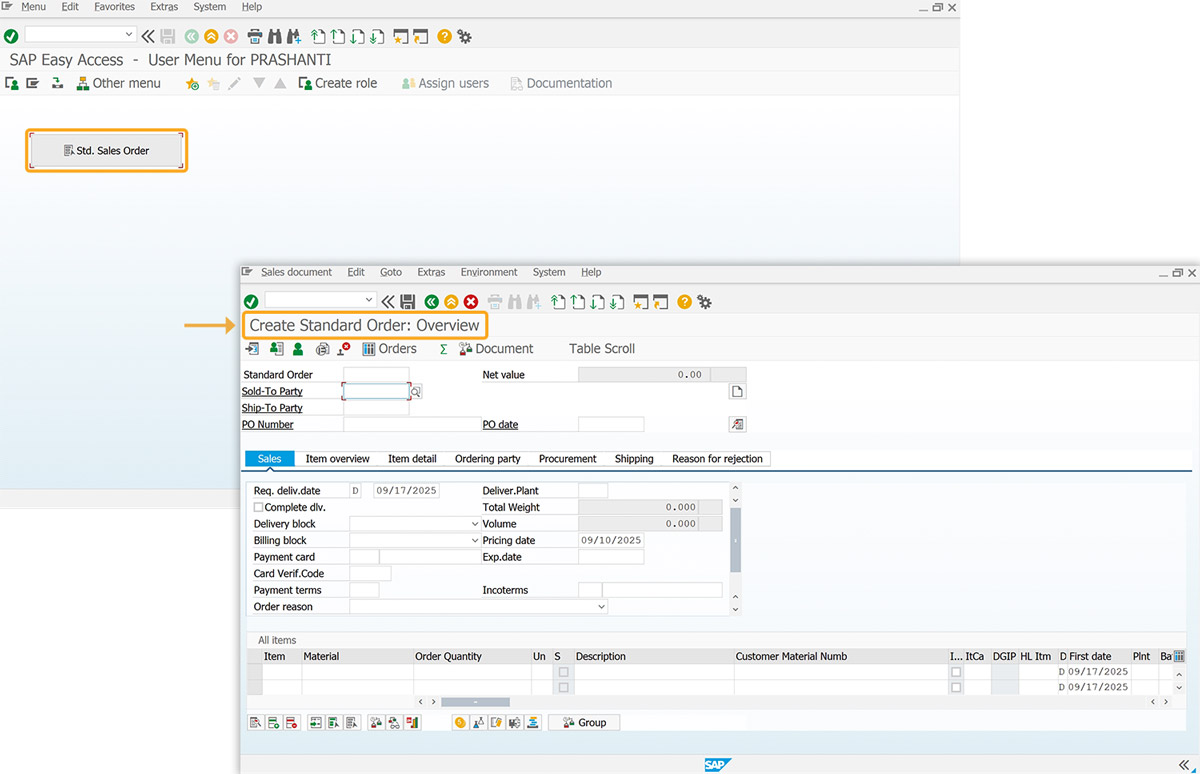
The following example shows how to assign values to fields in another transaction by passing parameters.
- Create a push button labeled Std. Sales Order, which on click assigns values to the Order Type field and performs Enter to navigate to the Overview screen.
// Creates a push button to execute the process
pushbutton([2,5],"@4D\\QCreate a Std. Sales Order@Std. Sales Order",{"process":va01_process,"size":[2,24],"using":{"z_va01_ordertype":"OR"}});

// Function to pass the parameters
function va01_process()
{
// SAP Easy Access
//onscreen 'SAPLSMTR_NAVIGATION.0101'
enter('/nva01');
// Create Sales Order: Initial Screen
onscreen 'SAPMV45A.0101'
set('F[Order Type]','or');
enter();
}
Example 4: Adding a Toolbar push button
You can place push buttons directly on the SAP toolbar
- Create a toolbar push button labeled Create Material to execute the CreateMat process on click.
// Creates a toolbar push button to execute the process
pushbutton([TOOLBAR],"Create Material",{"process":createMat,"using":{"v1":"BEARINGS","v2":"C","v3":"FERT"}});
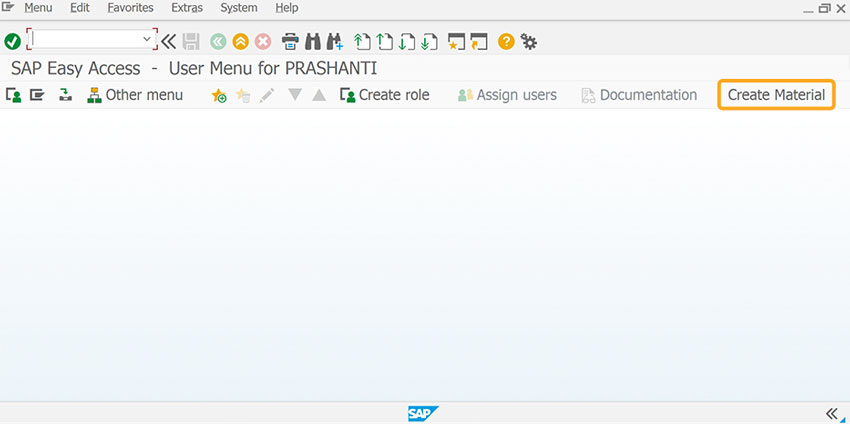
Example 5: Executing transaction with OK code
Executes a transaction using an OK code.
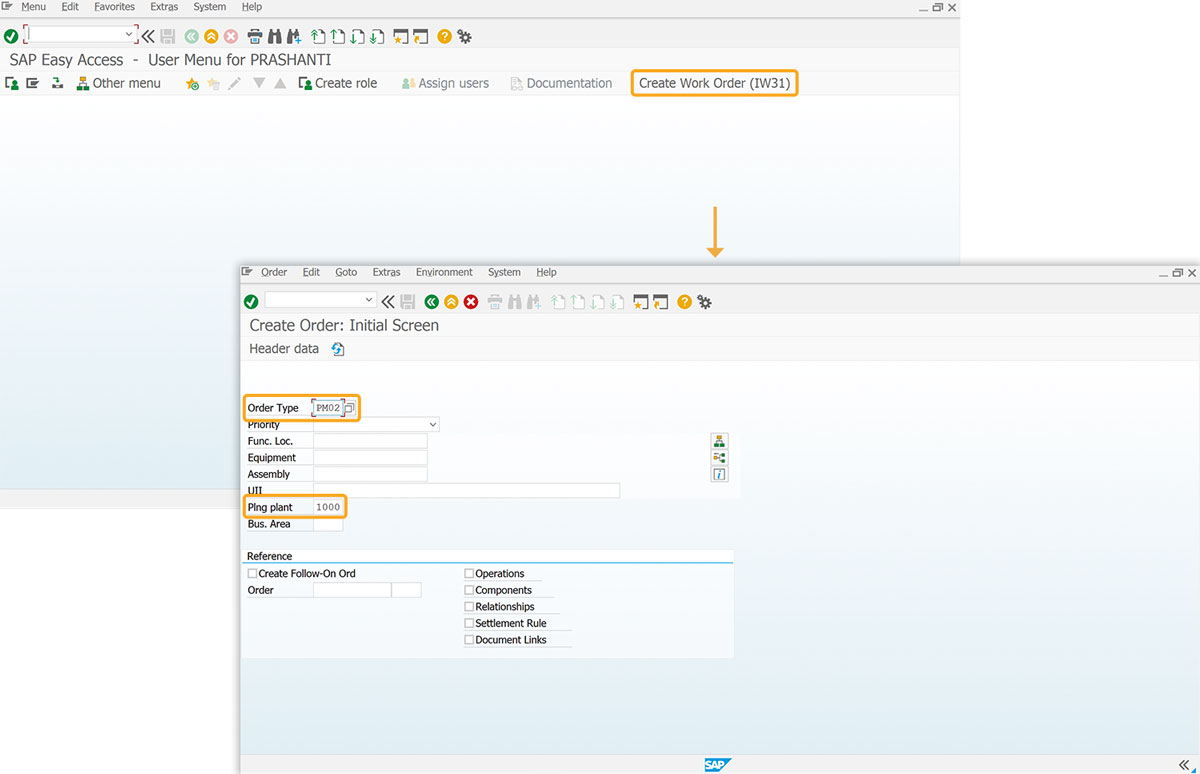
- Create a toolbar push button labeled Create Work Order (IW31) to navigate to the specified transaction screen.
// Creates a toolbar pushbutton to navigate to the transaction"
pushbutton([TOOLBAR],'Create Work Order (IW31)','/OIW31 AUFPAR-PM_AUFART=PM02; CAUFVD-IWERK=1000',"/nmm01");