


Liquid UI now supports the Arrow Functions, a feature introduced by ECMAScript 6. Arrow functions provide a more concise and streamlined way to define functions, offering shorter syntax and reducing the need for the traditional function keyword and parentheses in certain cases.
Pre-requisites:
- Liquid UI WS
- Liquid UI Server v3.5.600.0 and above
- Webscript.dll v1.1.196.0 and above
Syntax:
|
Regular function |
Arrow Function |
var z_input= function(x, y){
  return x * y;
}
|
var z_input= (x, y) => { return x * y };
Here, you don't need the function keyword, the return keyword, and the curly brackets. // In case of only one expression, parentheses are optional
var z_input= (x, y) => x * y;
|
Arrow Function with Parameter
The Arrow function also returns an object. Here, the body of the function is enclosed with parentheses to distinguish between a block and an object. The following actions help visualize how to use the arrow function directly in the SAP interface.
- Delete the image container from the SAP Easy Access screen.
- Add an input field to enter the username.
- Add a push button to execute the process.
- Add a function to generate a welcome message.
//Create the SAPLSMTR_NAVIGATION.E0100.sjs file inside your scripts folder for customizing the SAP Easy Access screen.
//Now, add the Liquid UI script to the above file and save it.
Customization
- Delete the image container on the SAP Easy Access screen using del().
// Deletes the image container on the SAP screen
del("X[IMAGE_CONTAINER]");
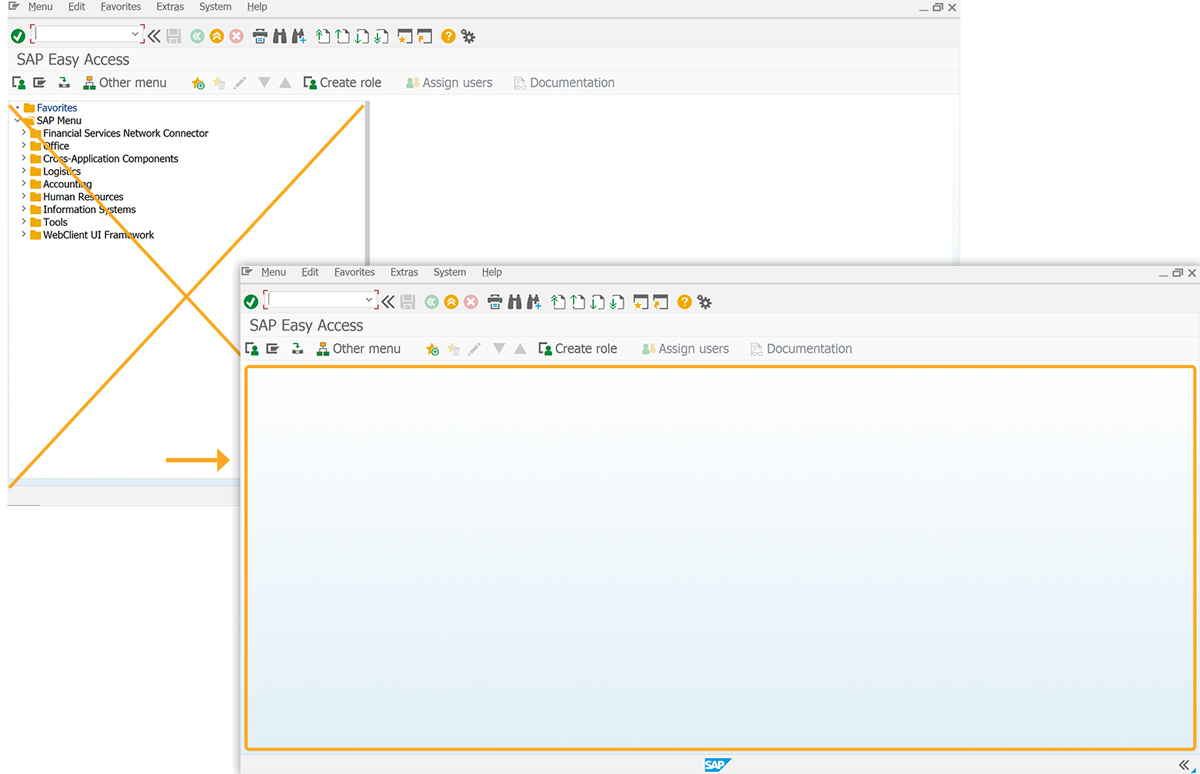
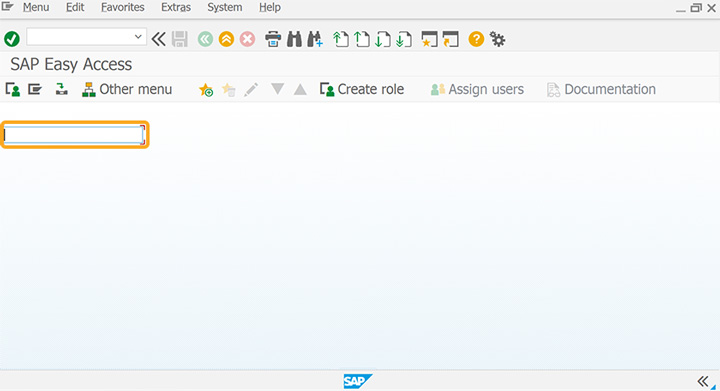
- Add an input field to enter the username.
// Creates an input field to enter the username
inputfield([1,0],{"name":"z_username", "size":21, "nolabel":true});
z_date = Date();
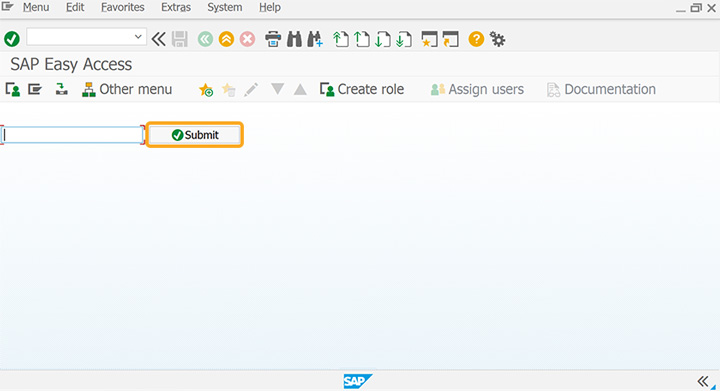
- Add a push button labeled @0V@Submit to execute the Displayuser process.
// Creates a push button to execute the process
pushbutton([1,23], "@0V@Submit",{"process":Displayuser, "using":{"user":z_username}});
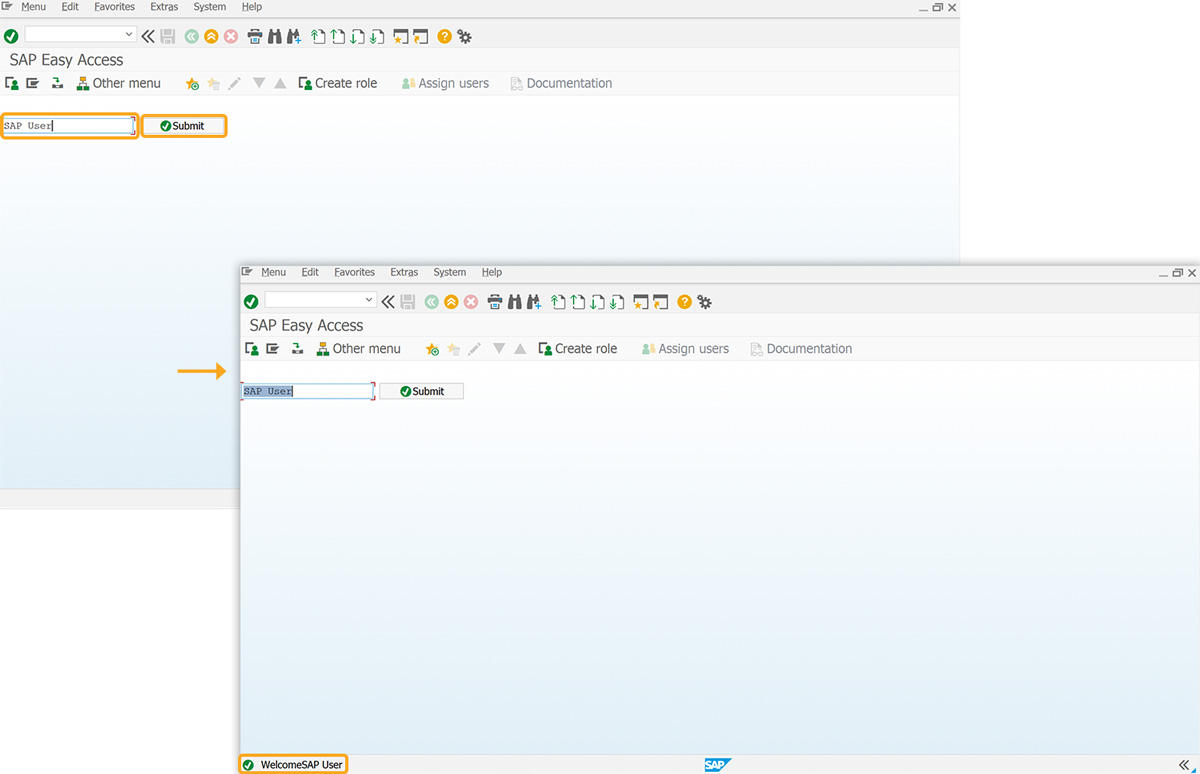
- Add Displayuser function to generate a welcome message by using a user value passed in the param object.
// Function to generate a welcome message
Displayuser=param=> "S: "+"Welcome"+param.user;
SAP Process
- Refresh the SAP screen, enter text in the input field, and click Submit. Then, a message will appear at the bottom of the SAP screen, as shown in the image below.
Arrow function with 'this' functionality
In Arrow Functions, handling this is also different when compared to regular functions. In regular functions, this keyword represents the object that calls the function, which could be either a window, a document, a button, or whatever. Whereas in arrow functions, this keyword always represents the object that defines the arrow function.
//Create the SAPLSMTR_NAVIGATION.E0100.sjs file inside your scripts folder for customizing the SAP screen.
//Now, add the Liquid UI script to the above file and save it.
Customization
- Delete the image container on the SAP Easy Access screen using del()
// Deletes the image container on the SAP screen
del("X[IMAGE_CONTAINER]");
The following two scenarios demonstrate the difference in how the ´this´ keyword behaves in regular functions versus arrow functions within the SAP GUI scripting environment:
Scenario 1: Regular Function ´this´ Keyword
- Add a push button labeled Test regular function this Keyword to execute the thiskeyword process.
// Creates a push button to execute the process
pushbutton([3,1],"Test regular function this keyword",{"process":thiskeyword});
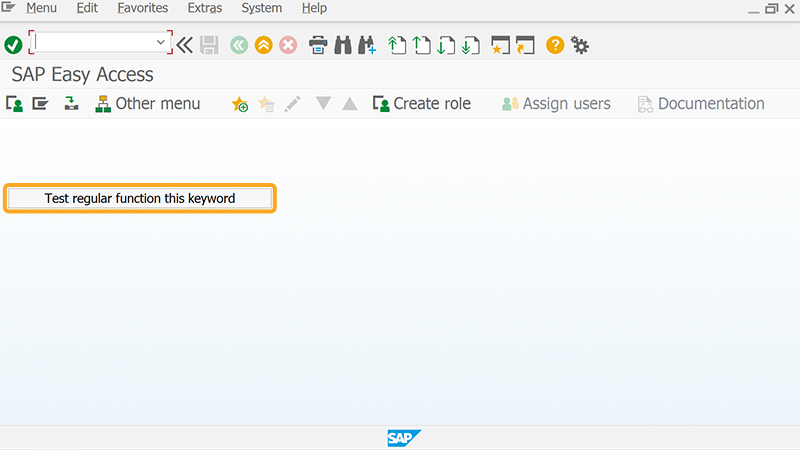
- Refresh the SAP screen and click on Test regular function this keyword push button. It will display [Object Screen] on the bottom of the SAP screen.
Scenario 2: Arrow Function ´this´ Keyword
- Add a push button labeled Test arrow function this Keyword to execute the Test process.
// Creates a push button to execute the process
Test= ()=>this;
pushbutton ([1,1],"Test arrow function this keyword ",{"process": Test});
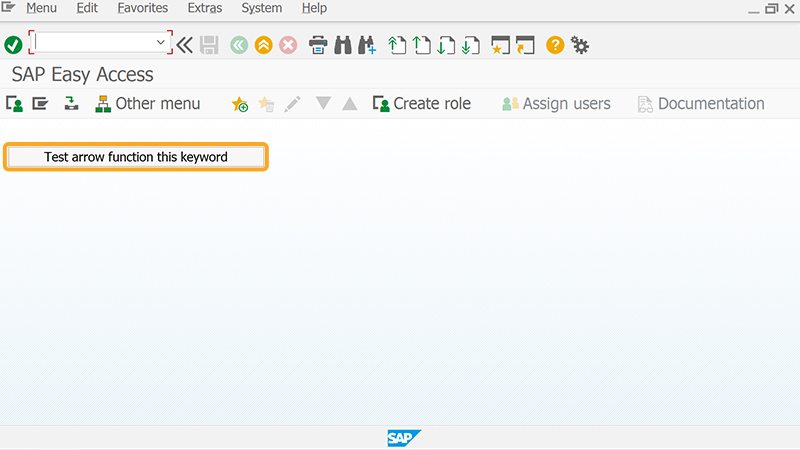
- Click on the Test arrow function this Keyword push button. Then, you can view [object global] at the bottom of the SAP screen, as shown in the image below.
![After Liquid UI – Clicked push button to test arrow function, showing [object global] at screen bottom](/images/ws_documentation/ws-basics-arrowfunctions-arrowfunction.jpg)