


Liquid UI Scheduler, an automated scheduling tool in LAMP for scheduling meetings with the Liquid UI team. It eliminates the hassle of back-and-forth emails. Using this scheduler, you can perform the following functions:
Schedule a demo meeting
You can book a meeting from multiple places on our site, depending on your interaction.
Where to find it
You can access the scheduler in any of the following ways:
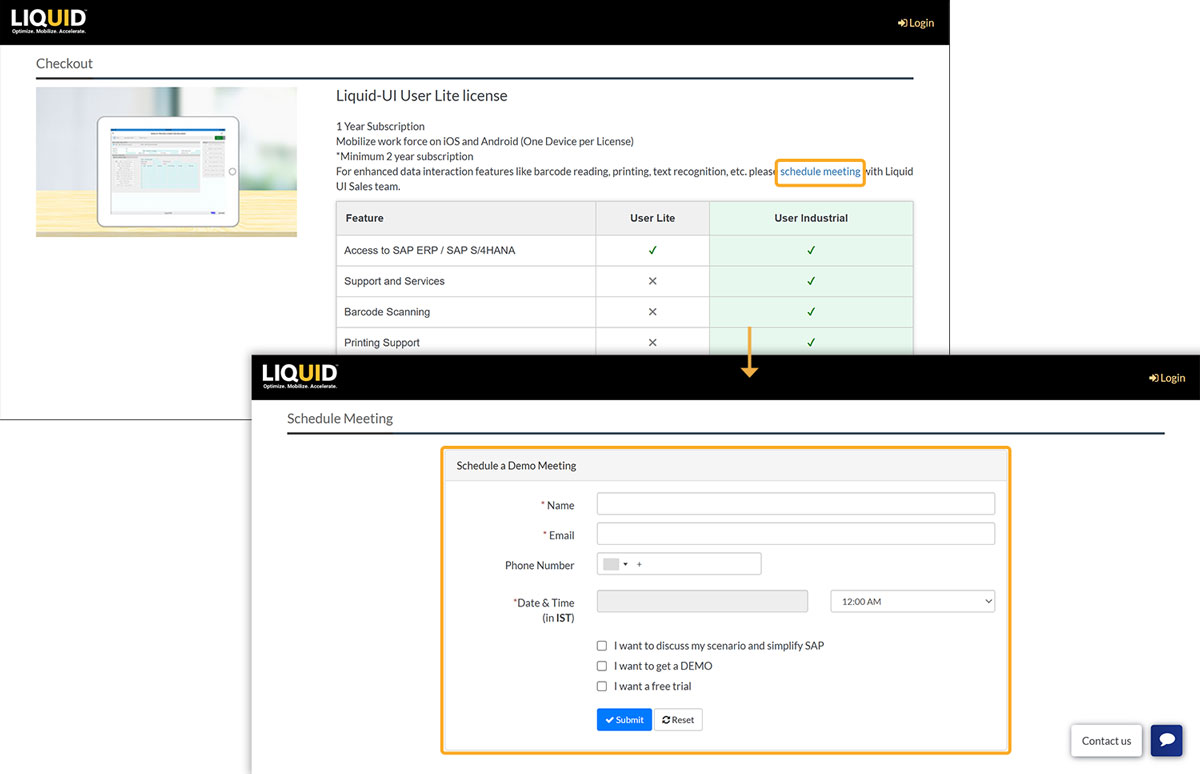
- From the License Details section, click schedule meeting to navigate to the Schedule a Demo Meeting window.
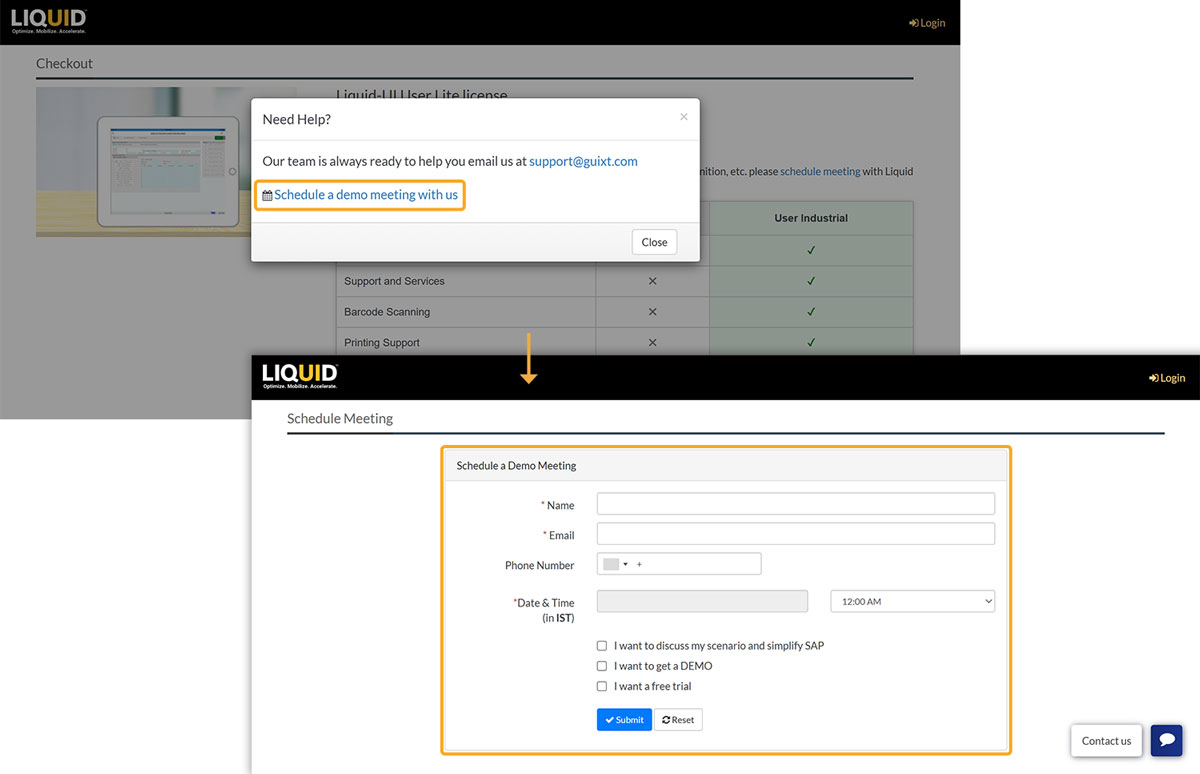
- If you have initiated the Buy Now process and spent more than five minutes on the Checkout/Review Invoice pages, an Automatic pop-up appears to help you proceed further, as shown below.
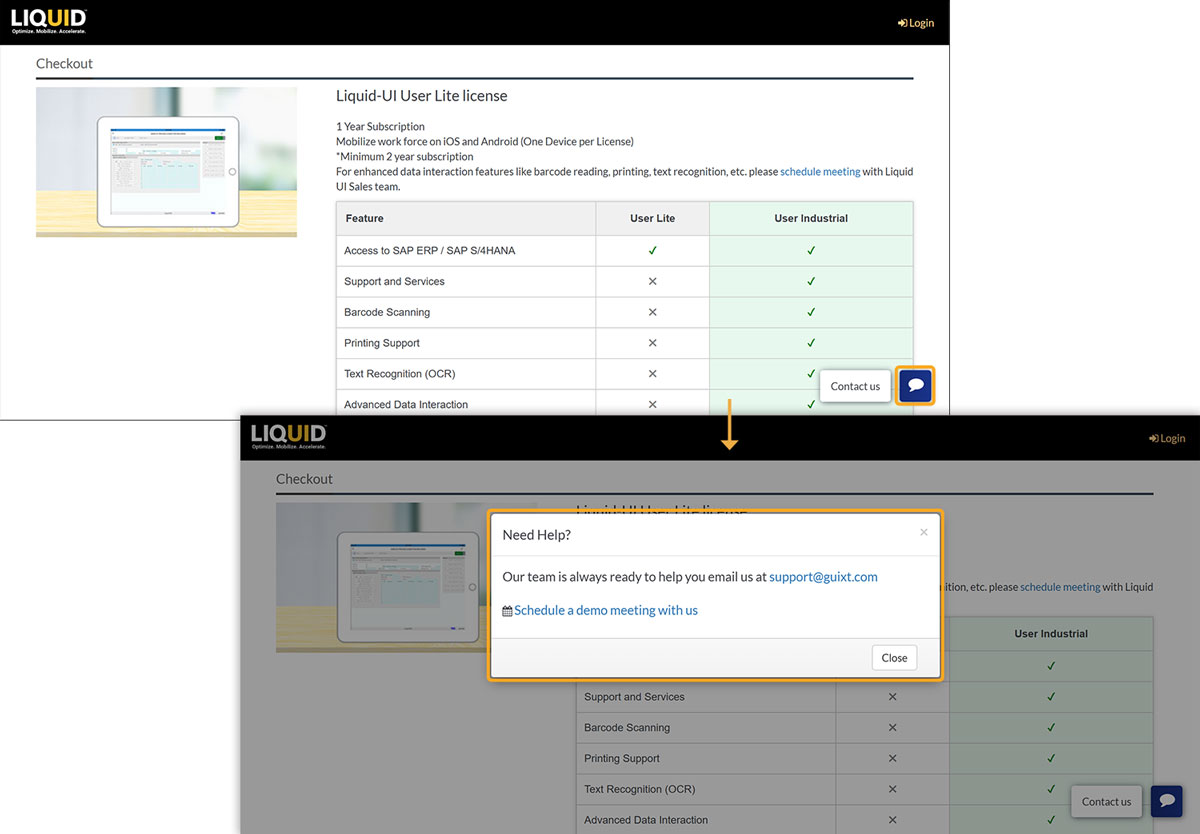
- Upon clicking the Contact Us button located in the bottom right-hand corner of your page, a pop-up window will emerge to assist you in proceeding further, as shown below.
Steps to Schedule
- Click Schedule a demo meeting with us. Fill in your details, and click Submit.
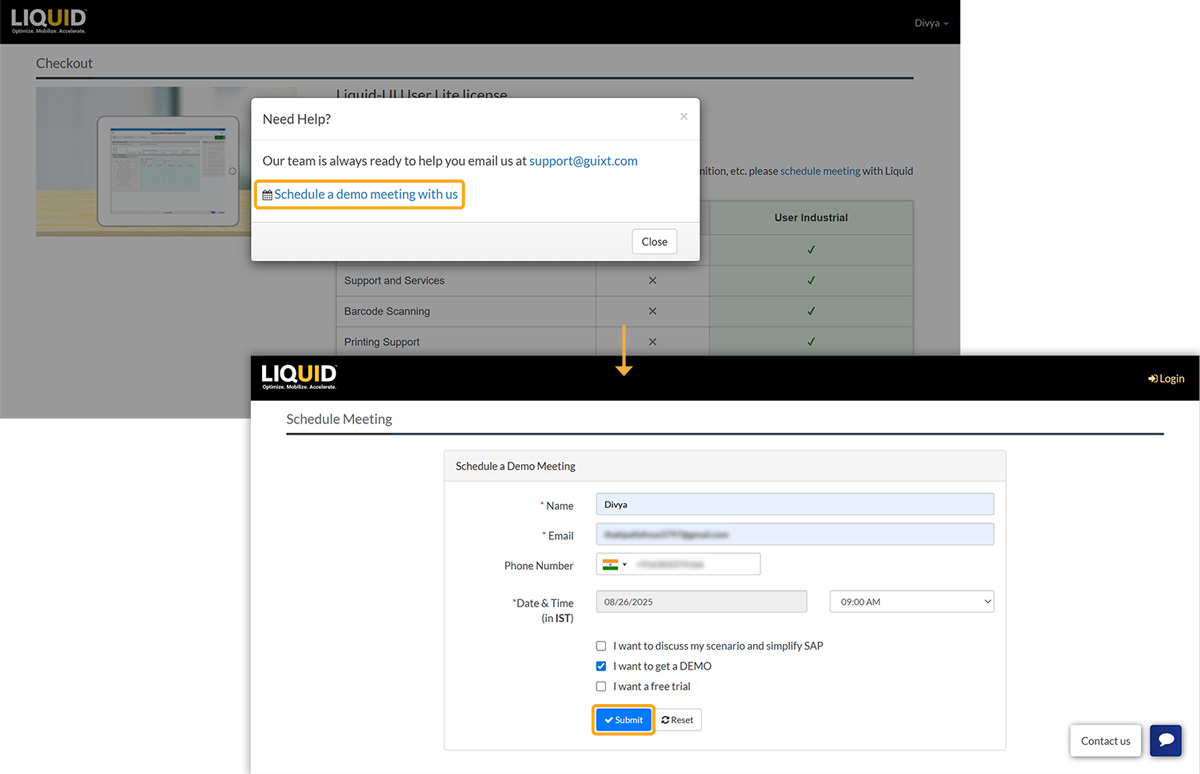
Form fields:
- Name: Enter your full name.
- Email: Provide a valid email address.
- Phone Number: Select your country and type your number.
- Date & Time (in IST): Pick any available 30-minute slot from the calendar.
- (Optional) Select any relevant options:
- I want to discuss my scenario and simplify SAP
- I want to get a DEMO
- I want a free trial
- If you have missed or entered incorrect details, an error notification will appear. Then, update accordingly and resubmit the form.
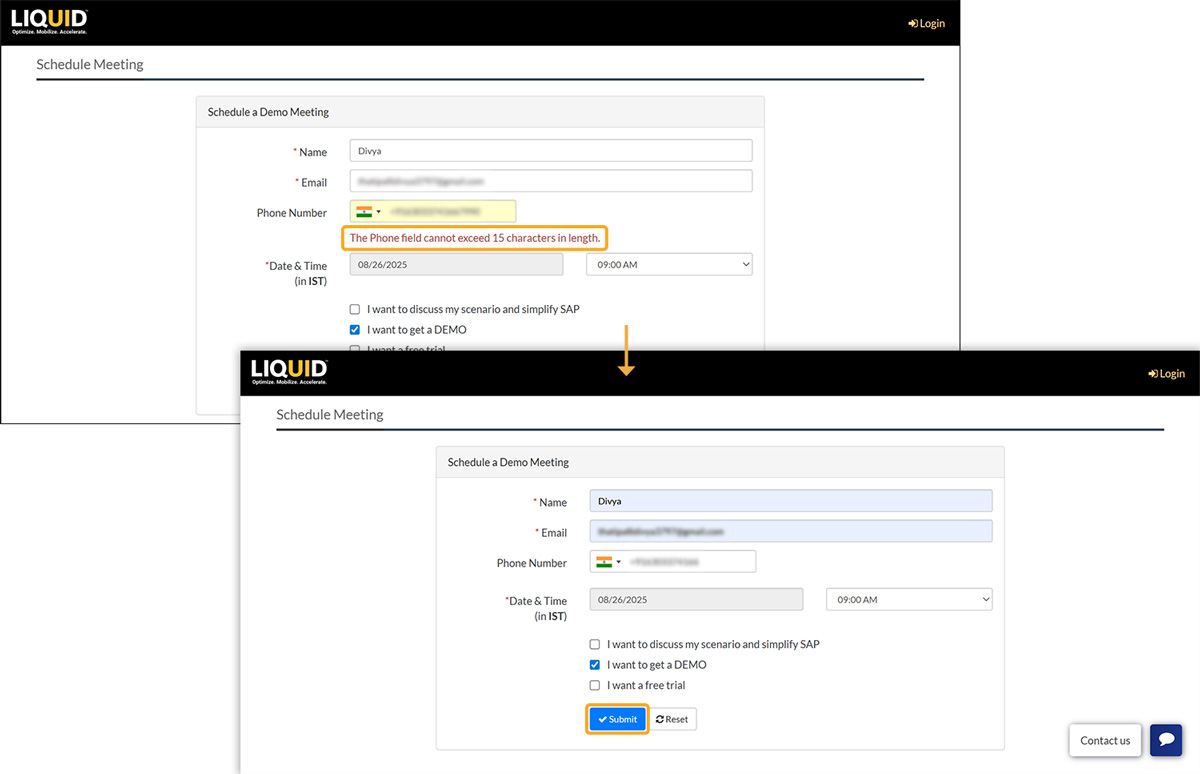
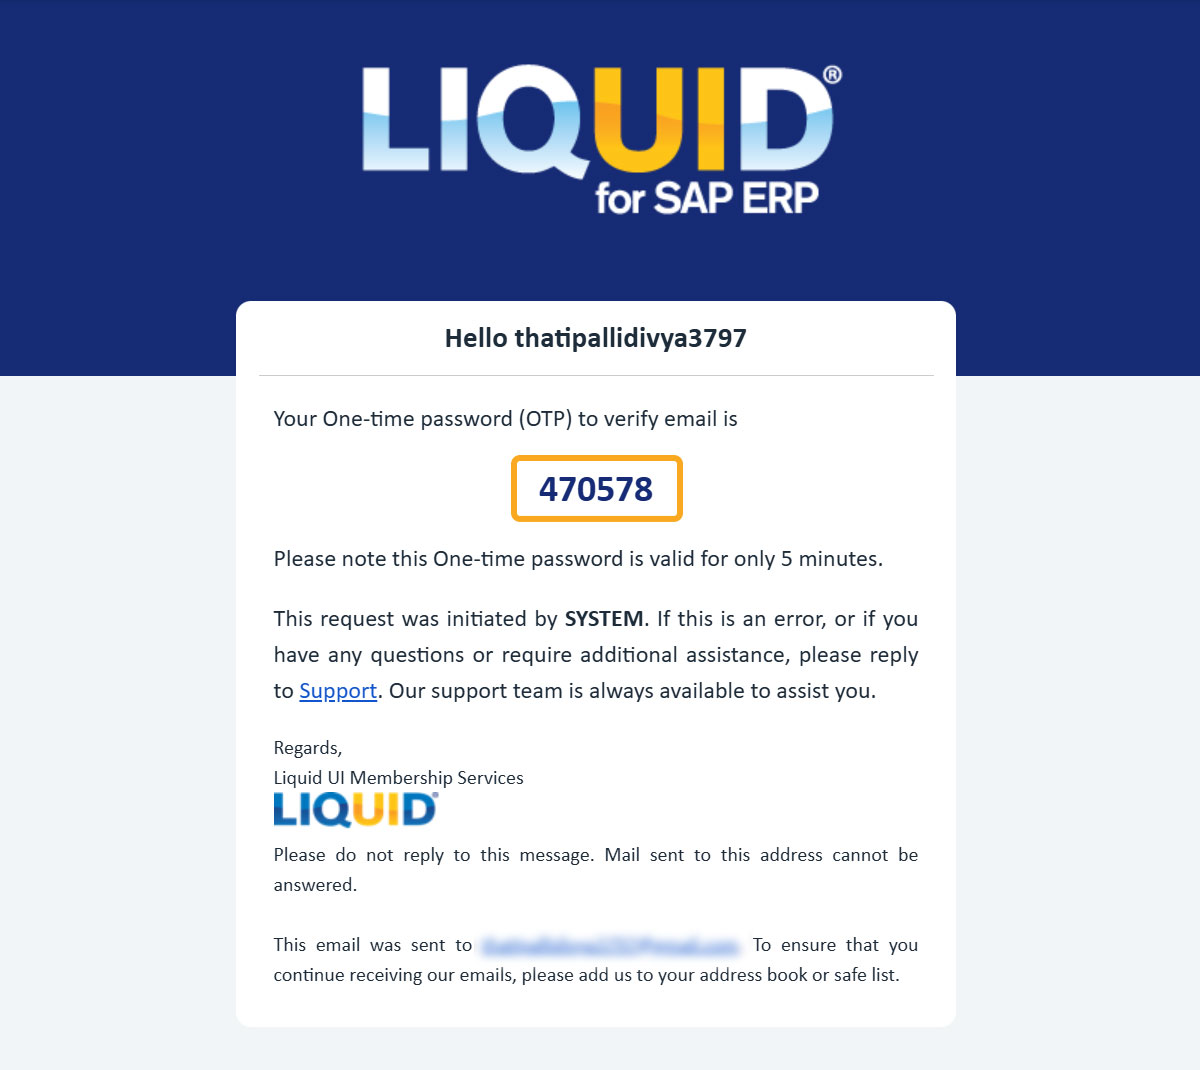
- After submitting the request, you will receive a six-digit code (with five-minute validity) to verify your email, as shown in the image below.
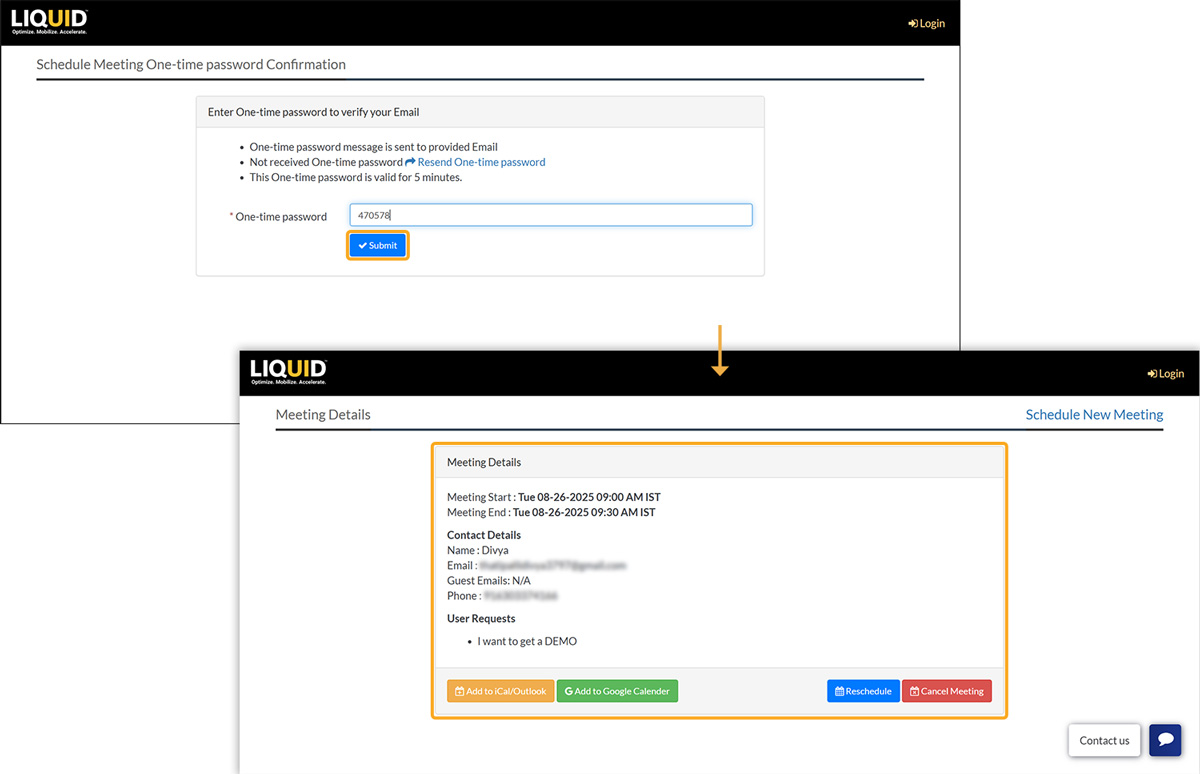
- Enter the 6-digit verification code sent to your email. This code is valid for 5 minutes. After submission, you’ll see a confirmation pop-up with your meeting details.
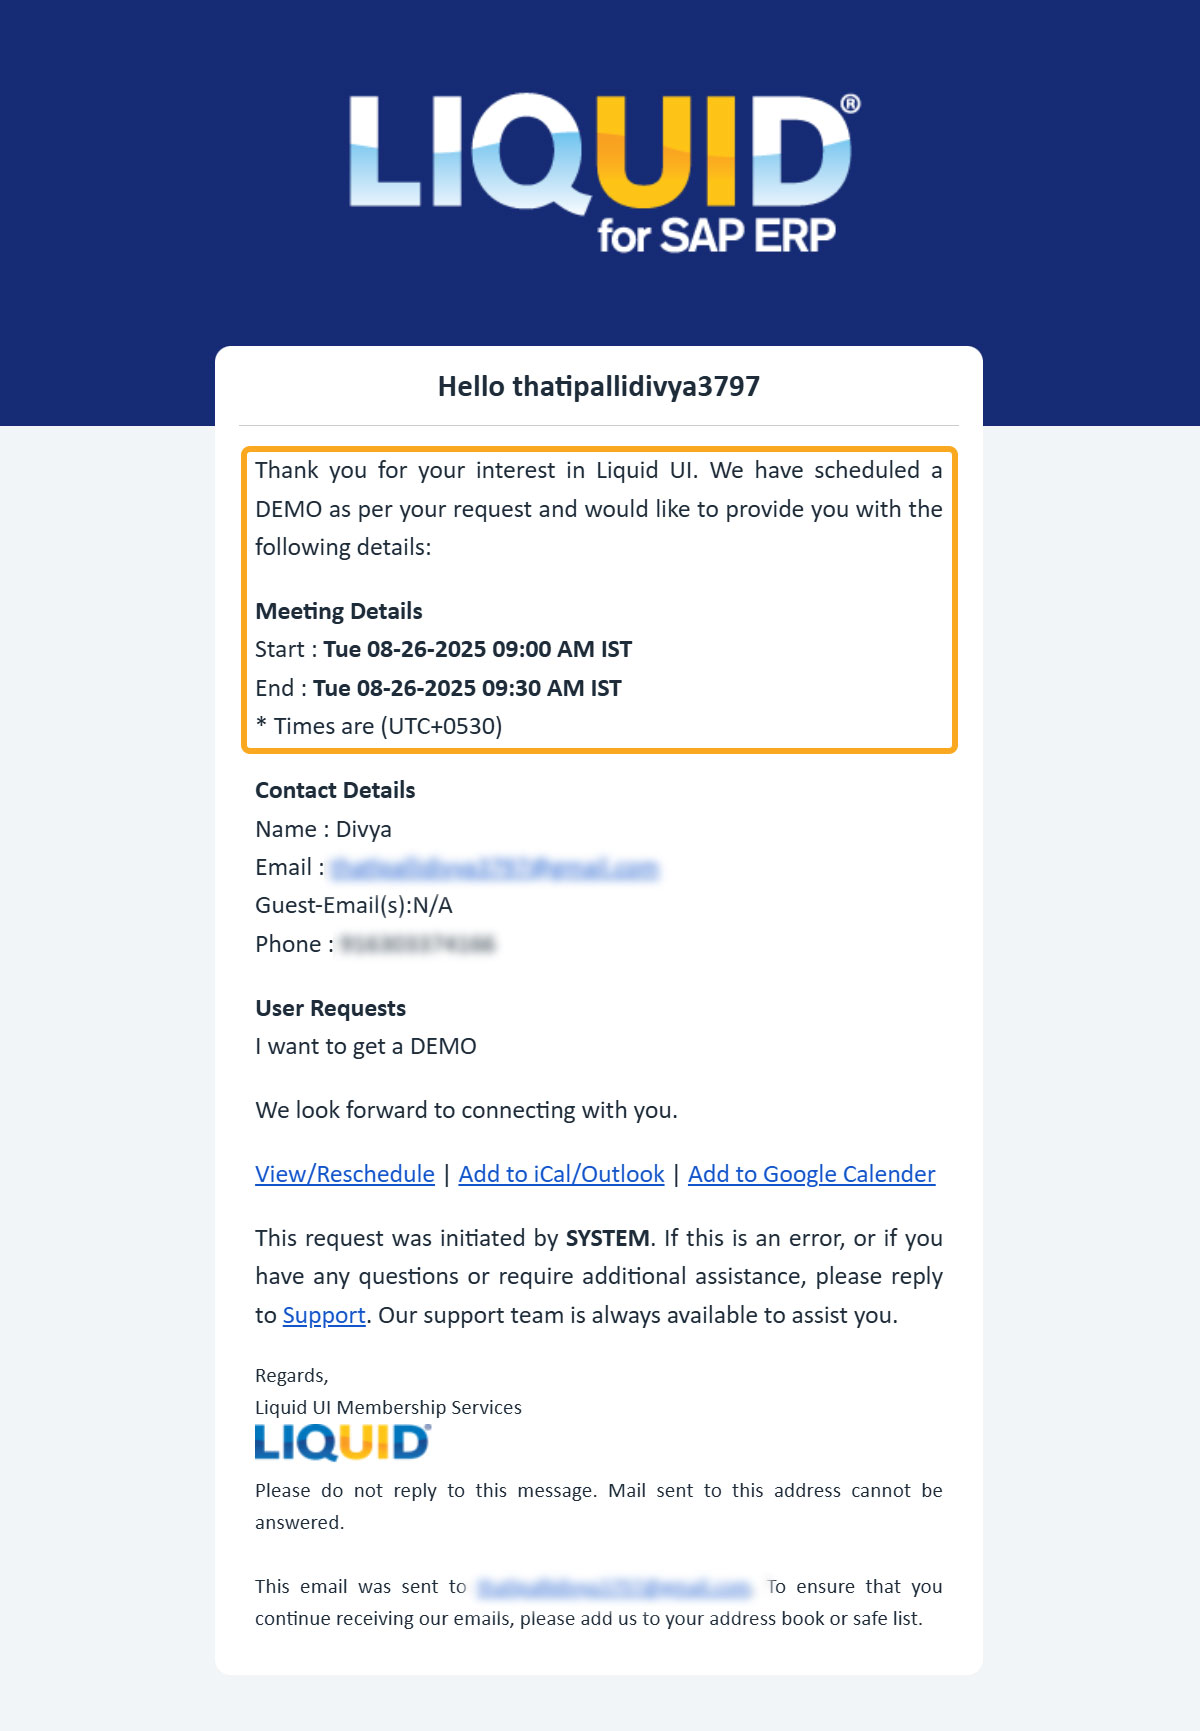
- You will also receive an email with the same information.
Reschedule a Demo Meeting
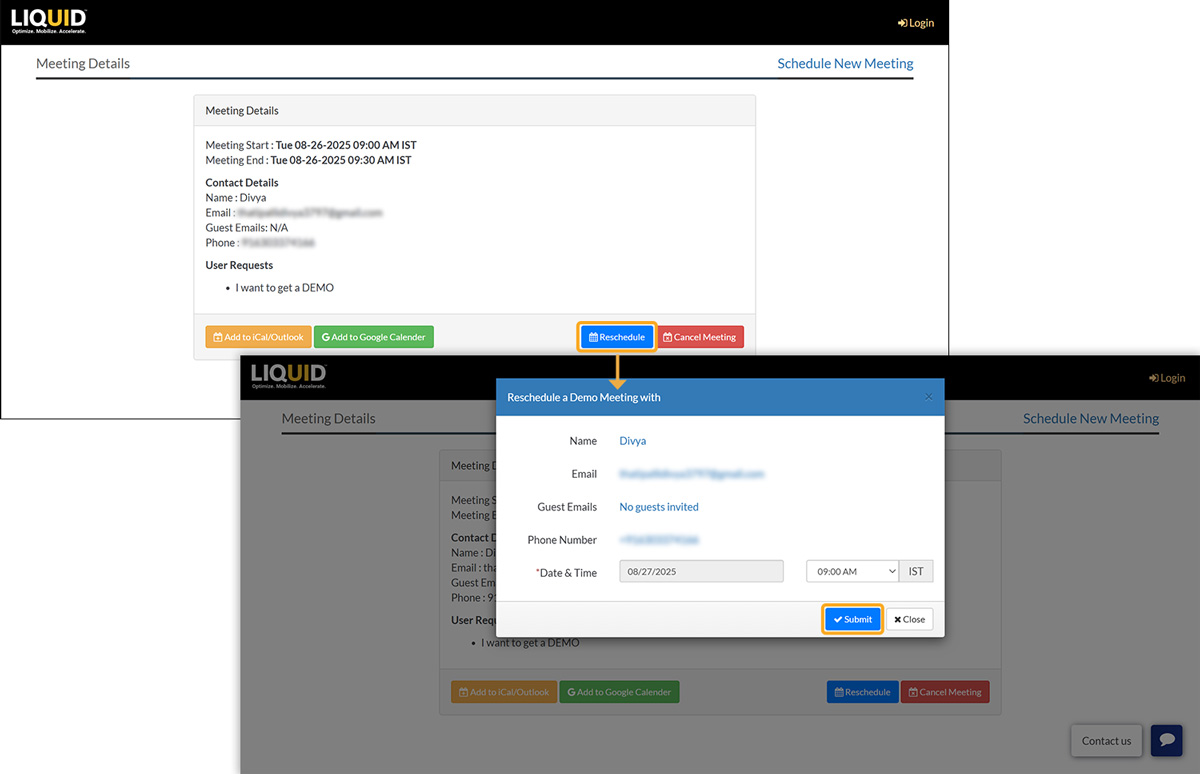
If your plans change, you can reschedule the meeting by clicking the Reschedule button in the confirmation pop-up or email.
Steps to Reschedule
- Click Reschedule from your original confirmation screen or email. Choose a new available date and time. Click Submit.
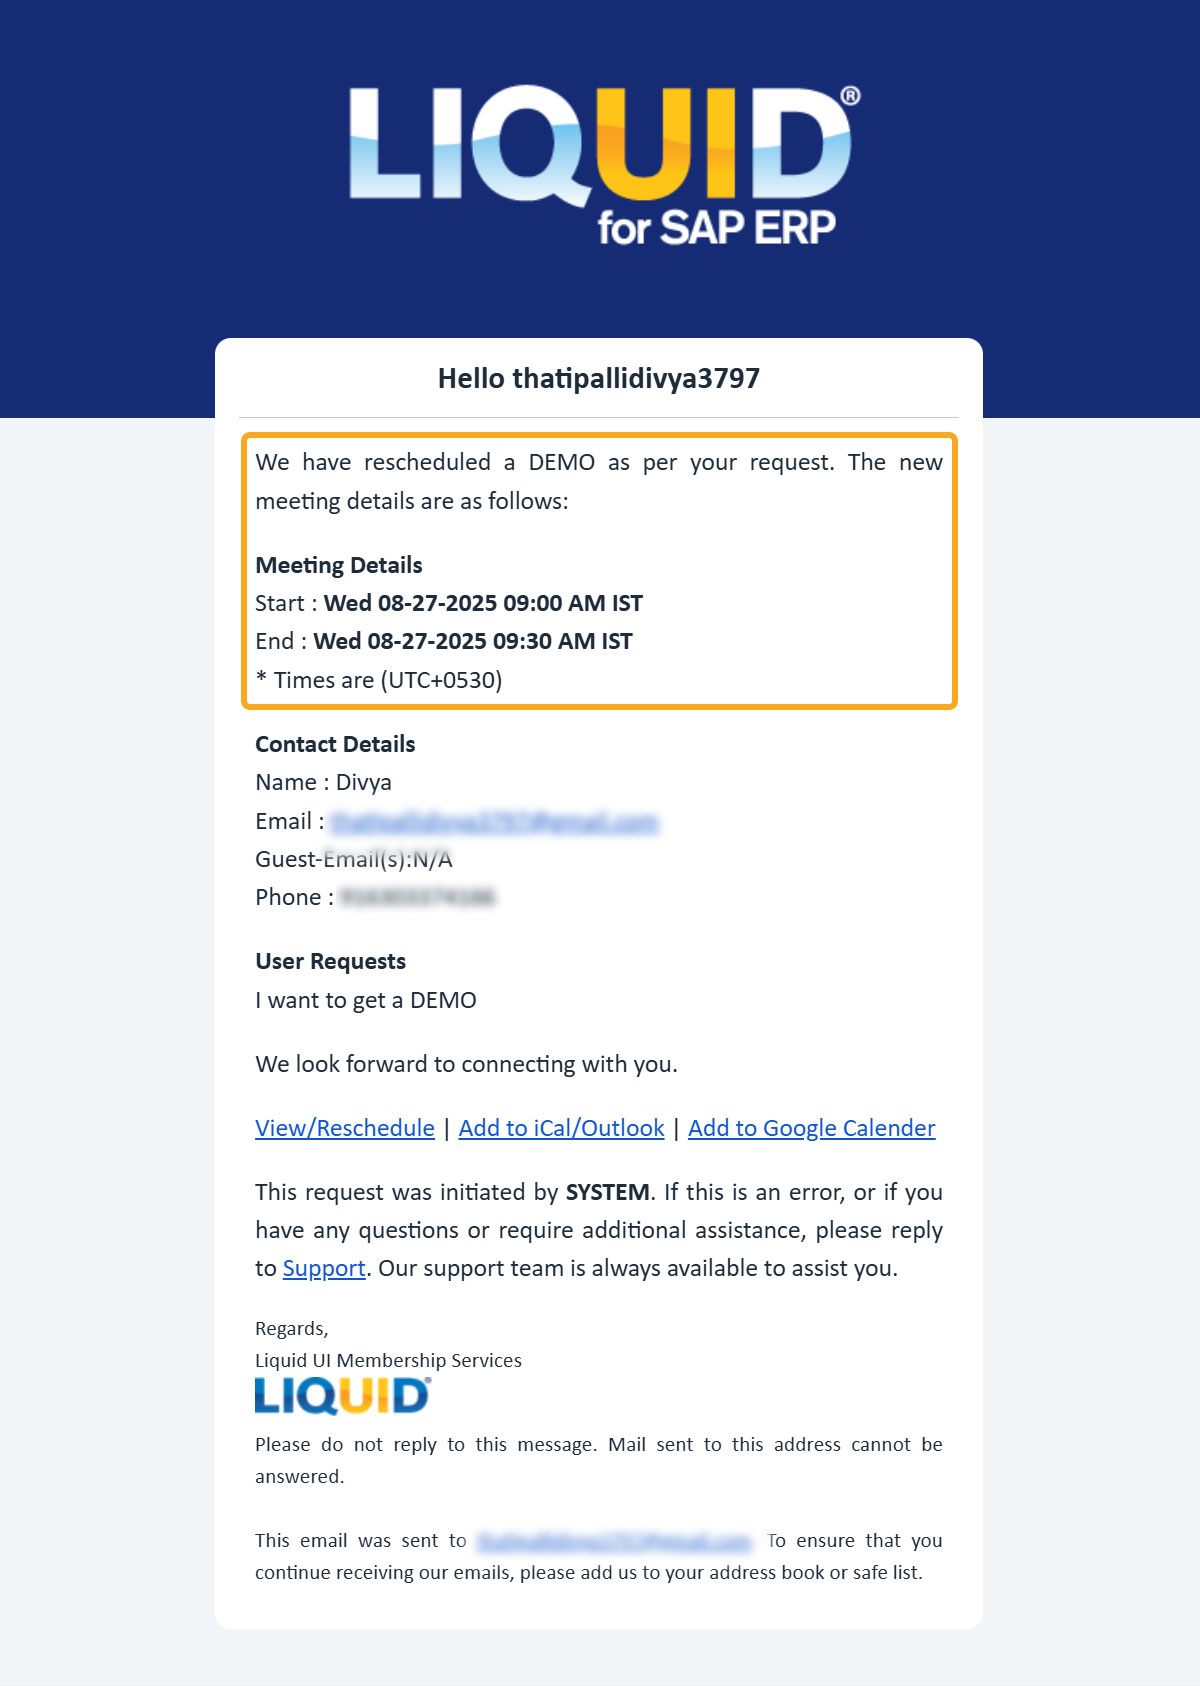
- You’ll get a new confirmation email with the updated schedule.
Cancel a Demo Meeting
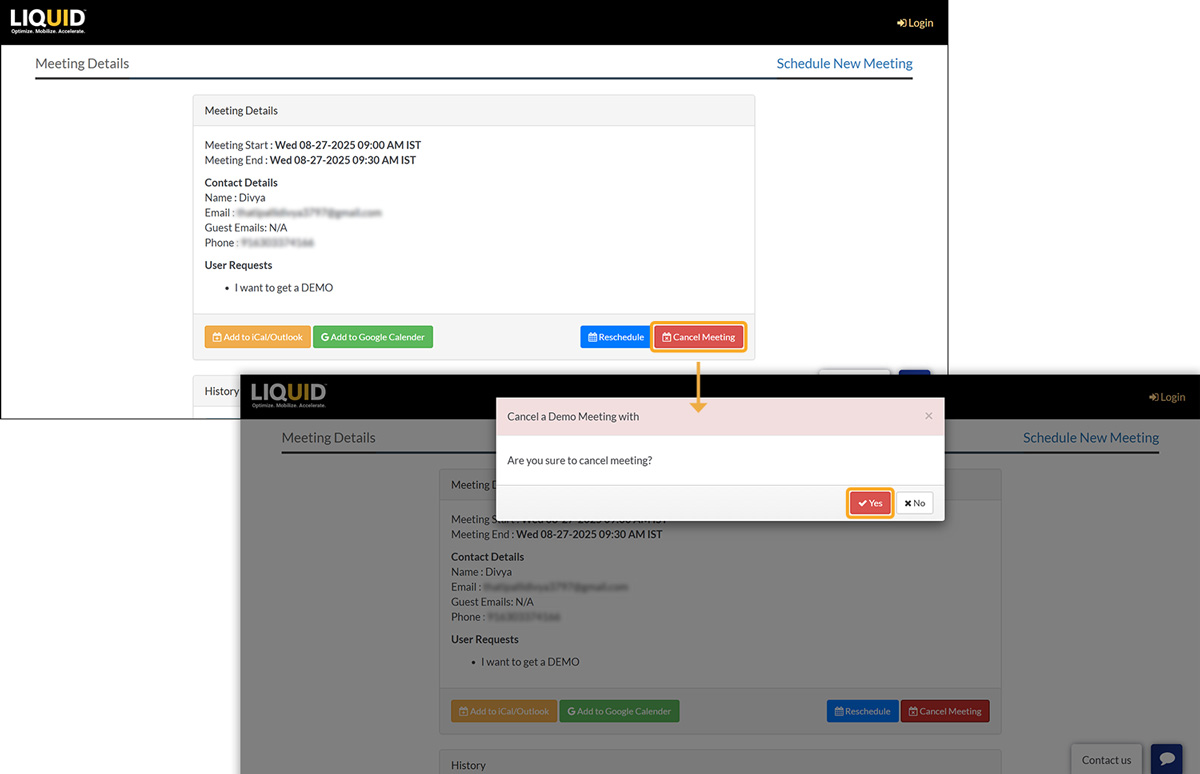
You can cancel the meeting if needed by clicking the Cancel Meeting button.
Steps to Cancel
- Click Cancel Meeting from your confirmation pop-up or email. Confirm the cancellation when prompted.
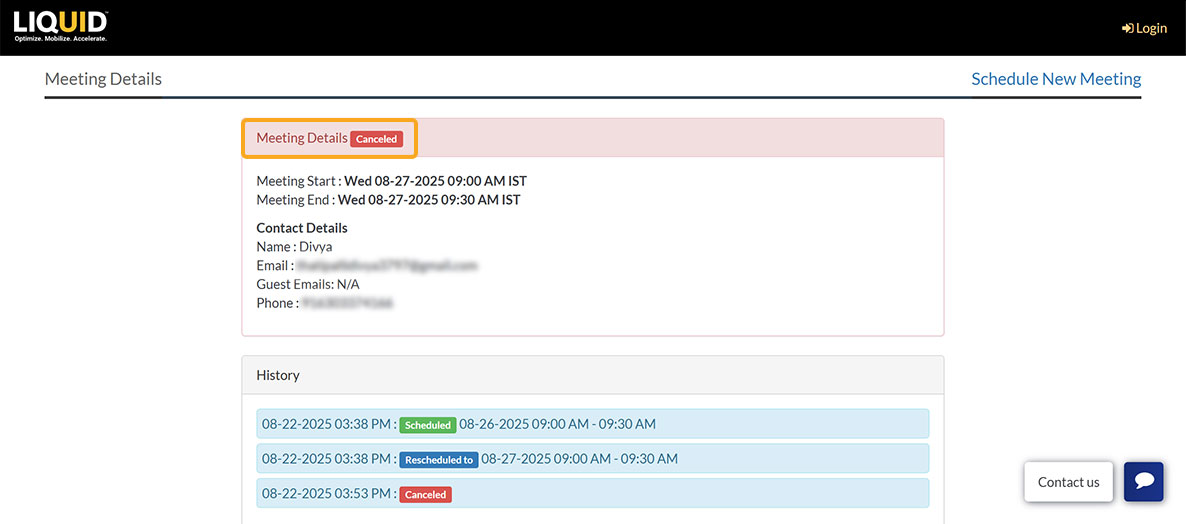
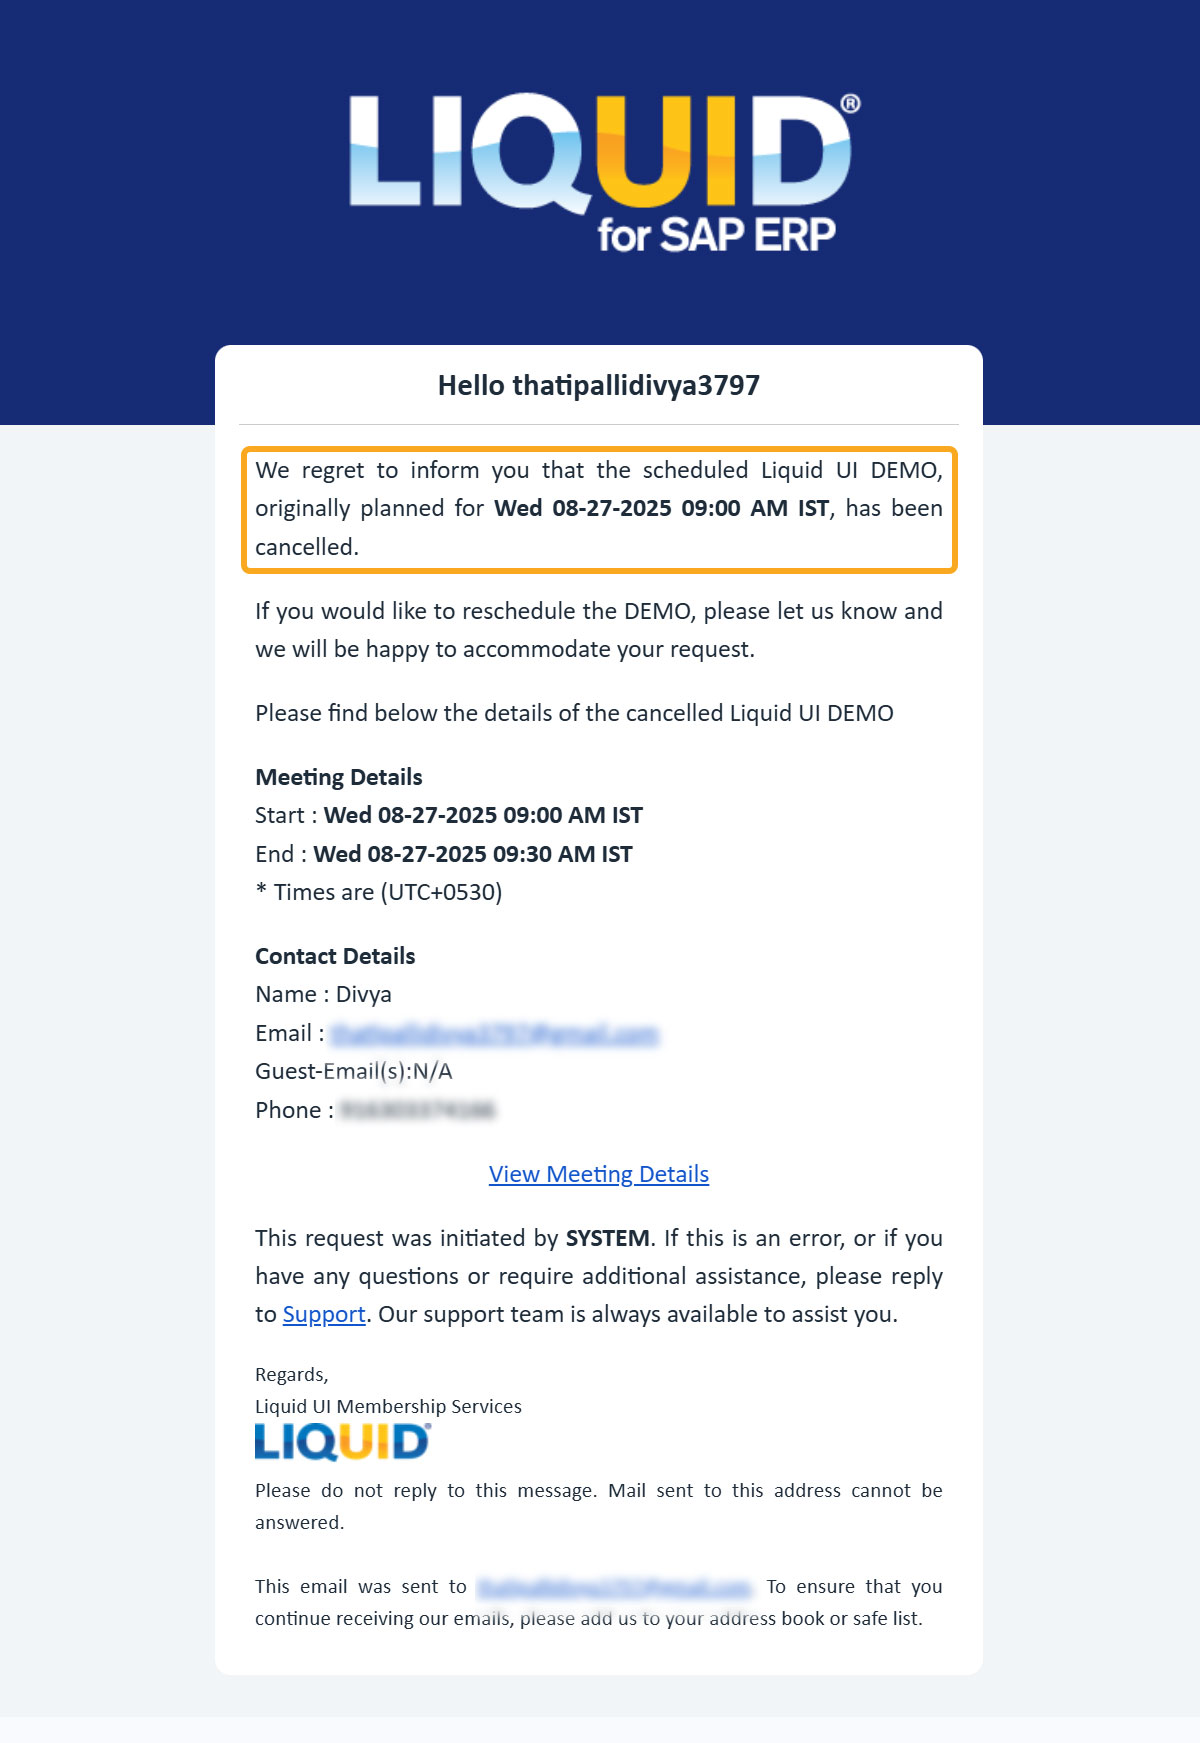
- Then, the Meeting Details screen appears with the details that the meeting was Canceled, as shown in the image below.
- In addition, you will receive an email from LAMP notifying you that the meeting has been canceled.
Schedule through Salesforce Representative
If a Salesforce representative shares a meeting link with you, you can schedule directly without going through the verification process.
Steps with Personalized Link
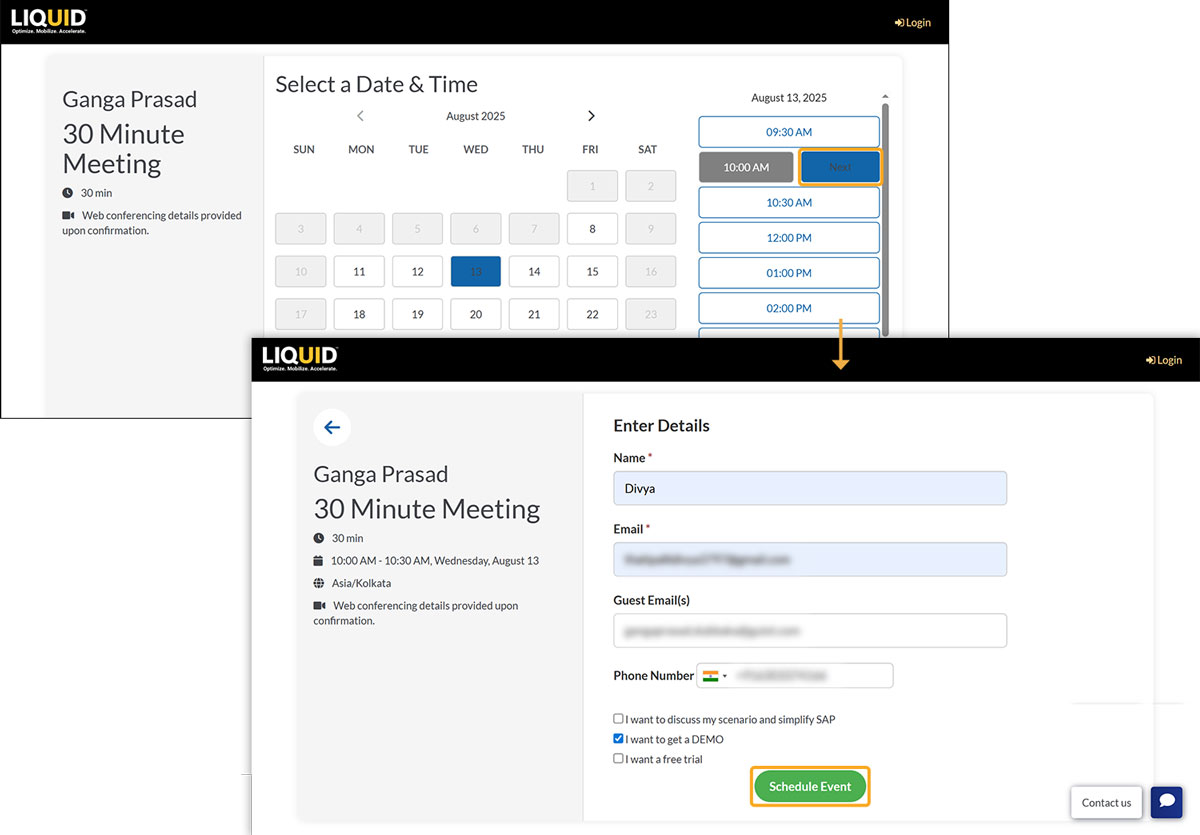
- Open the link provided by your Salesforce rep.
- Select the available time slot and click Next (no verification code required). Fill in the form and click Schedule Event.
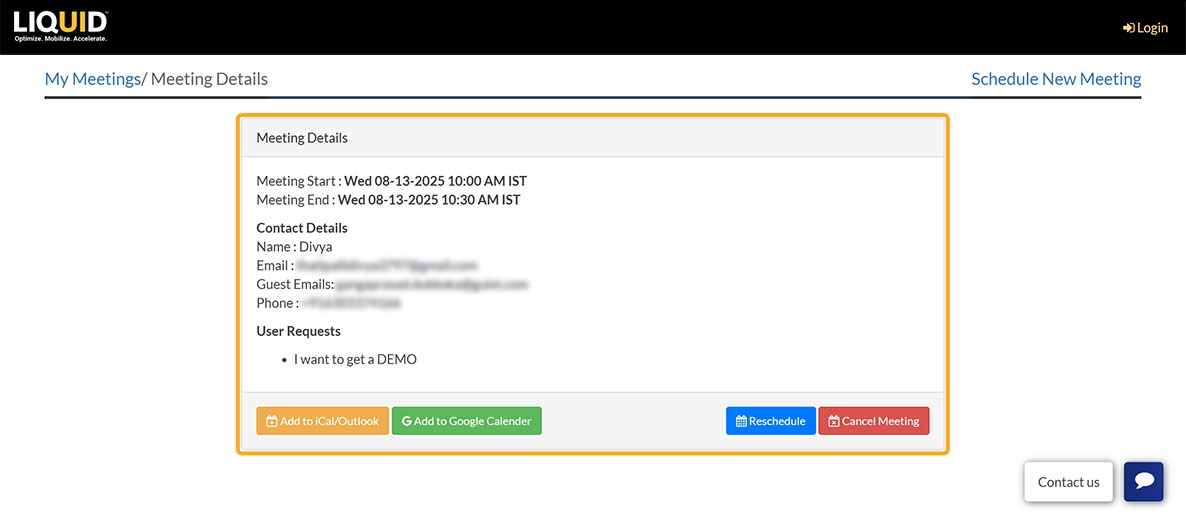
- Once scheduled, you'll receive a pop-up notification.
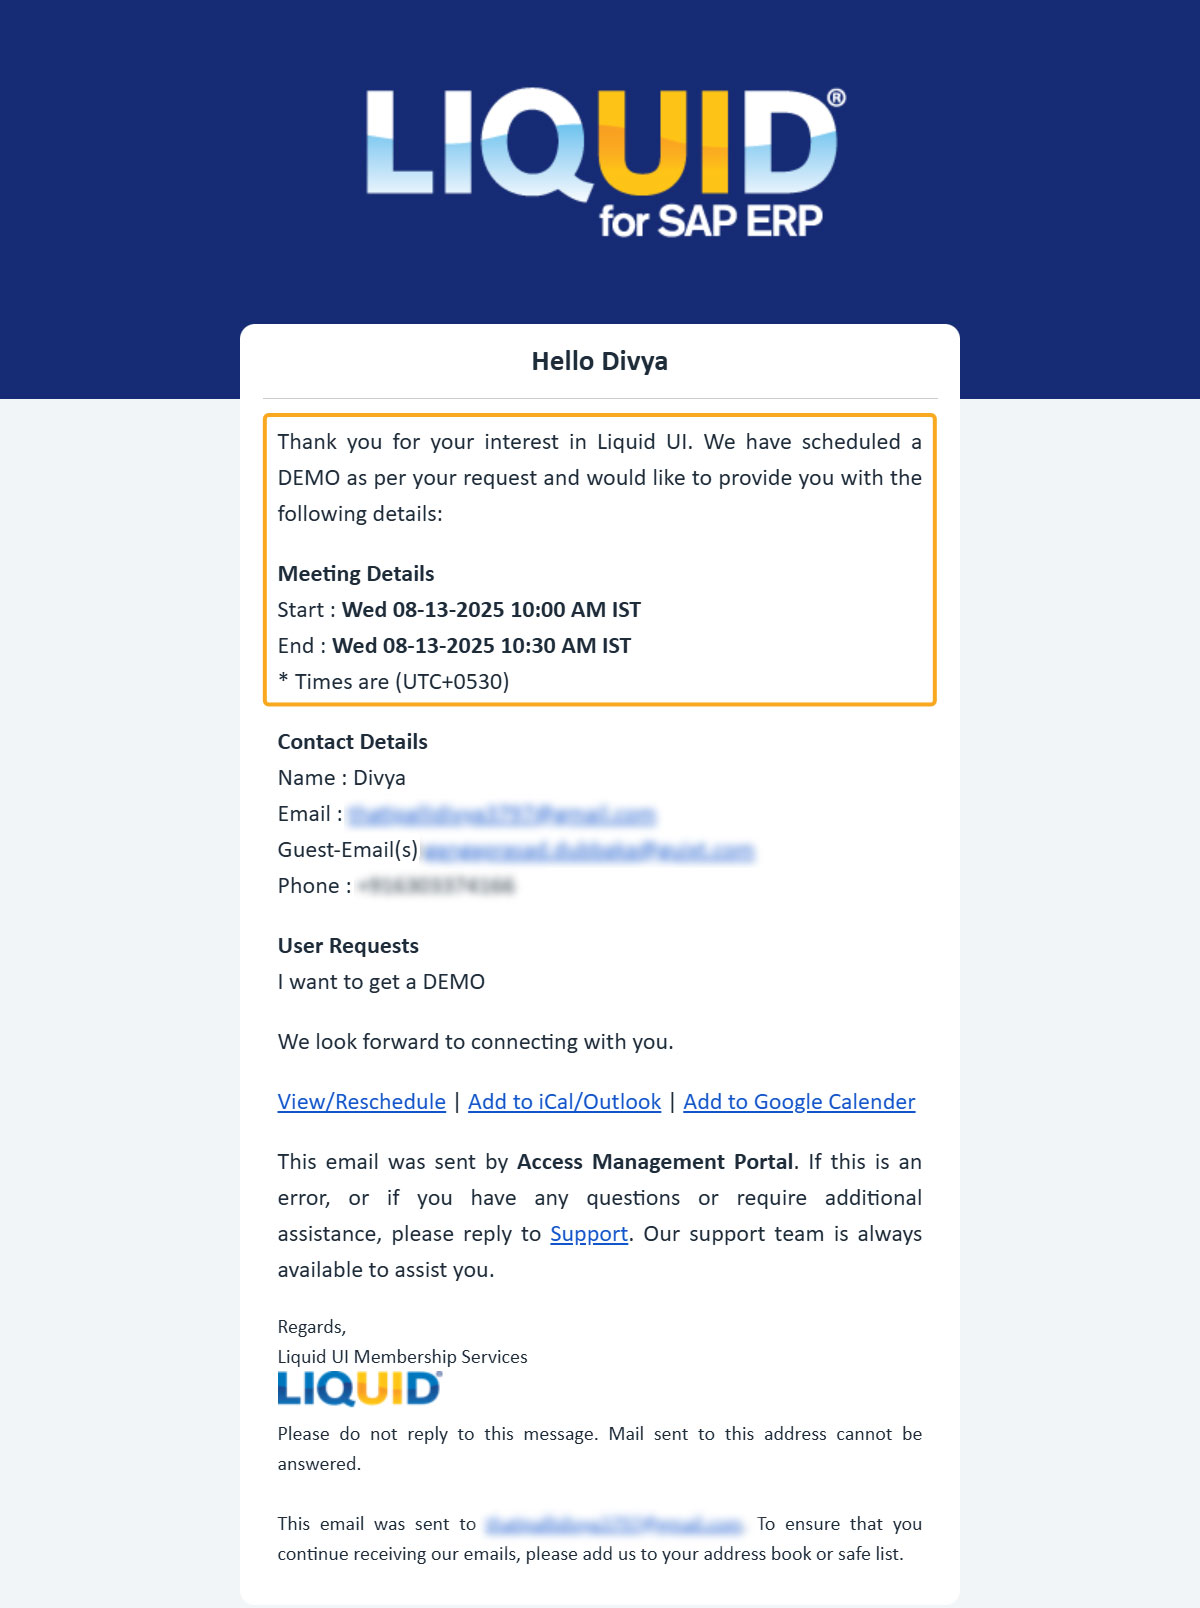
- In addition, you will also receive an email notification with the scheduled meeting details, as shown below.
- You can reschedule or cancel the meeting at any time using the links provided in your confirmation email.