


Prerequisites
- Products: SAP GUI, Liquid UI for iOS (Optional), Liquid UI for Android (Optional)
- Client and Server devices should be in the same network.
The Liquid UI SDK offers the infrastructure to customize and display SAP screens on both desktop and mobile devices. By configuring the SDK, you enable the Liquid UI Server to communicate with your SAP Server and deliver tailored screens to SAP GUI and mobile devices.

Note: After installing the Liquid UI SDK software with a valid license, you must Activate GuiXT in SAP GUI and then configure the SDK.
The Liquid UI SDK comes mostly pre-configured. After installation, you can connect to an existing SDK connection in SAP GUI to access sample customized screens.
To configure your own setup, follow these two steps:
- Configure your Liquid UI Server to communicate with your SAP Server
- Configure your script's directory path in guixt.sjs file
- Configure your proxy server details in the sapproxy.ini file
- Restart your Liquid UI Server
- Configure your SAP GUI (/clients) to communicate with the Liquid UI Server
- Add a new SAP connection to connect to your Liquid UI Server
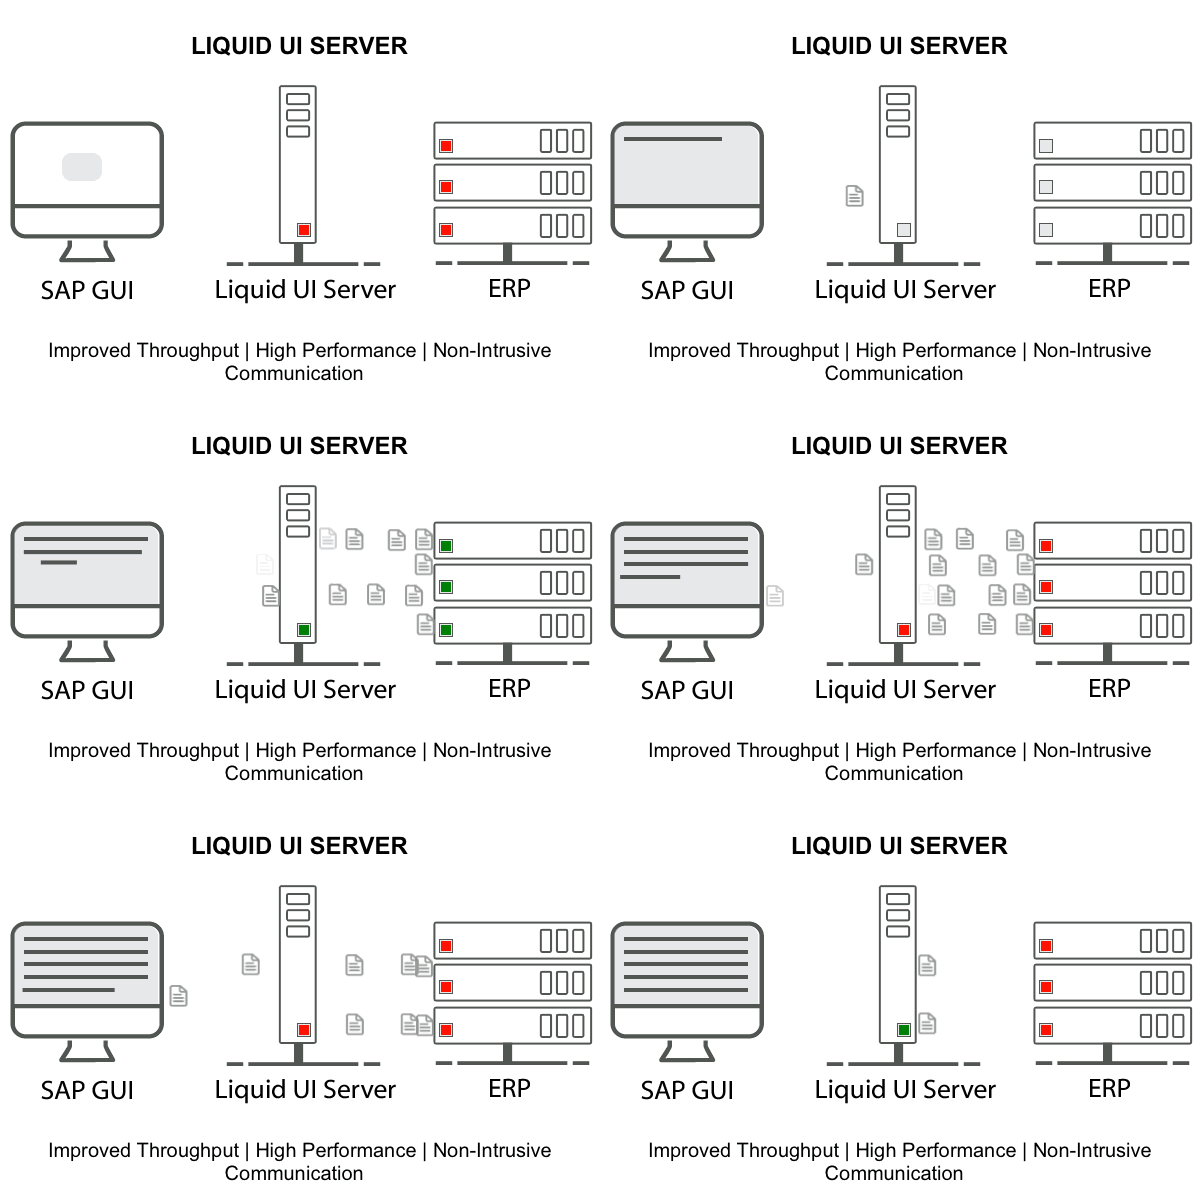
Configure your Liquid UI Server
The Liquid UI Server requires configuration files located in the Liquid UI SDK installation folder.
64 bit OS: C:\Program Files\Liquid UI SDK\LUI Server
32 bit OS: C:\Program Files (x86)\Liquid UI SDK\LUI Server
guixt.sjs
The guixt.sjs is the configuration file that defines various parameters, such as script directory path, license key, debug flags, and more. This file is present in the Liquid UI Server folder and can be opened with any text editor.
Note: The guixt.sjs file is pre-configured with all settings required for Liquid UI SDK.
Save changes in administrator mode to apply them.
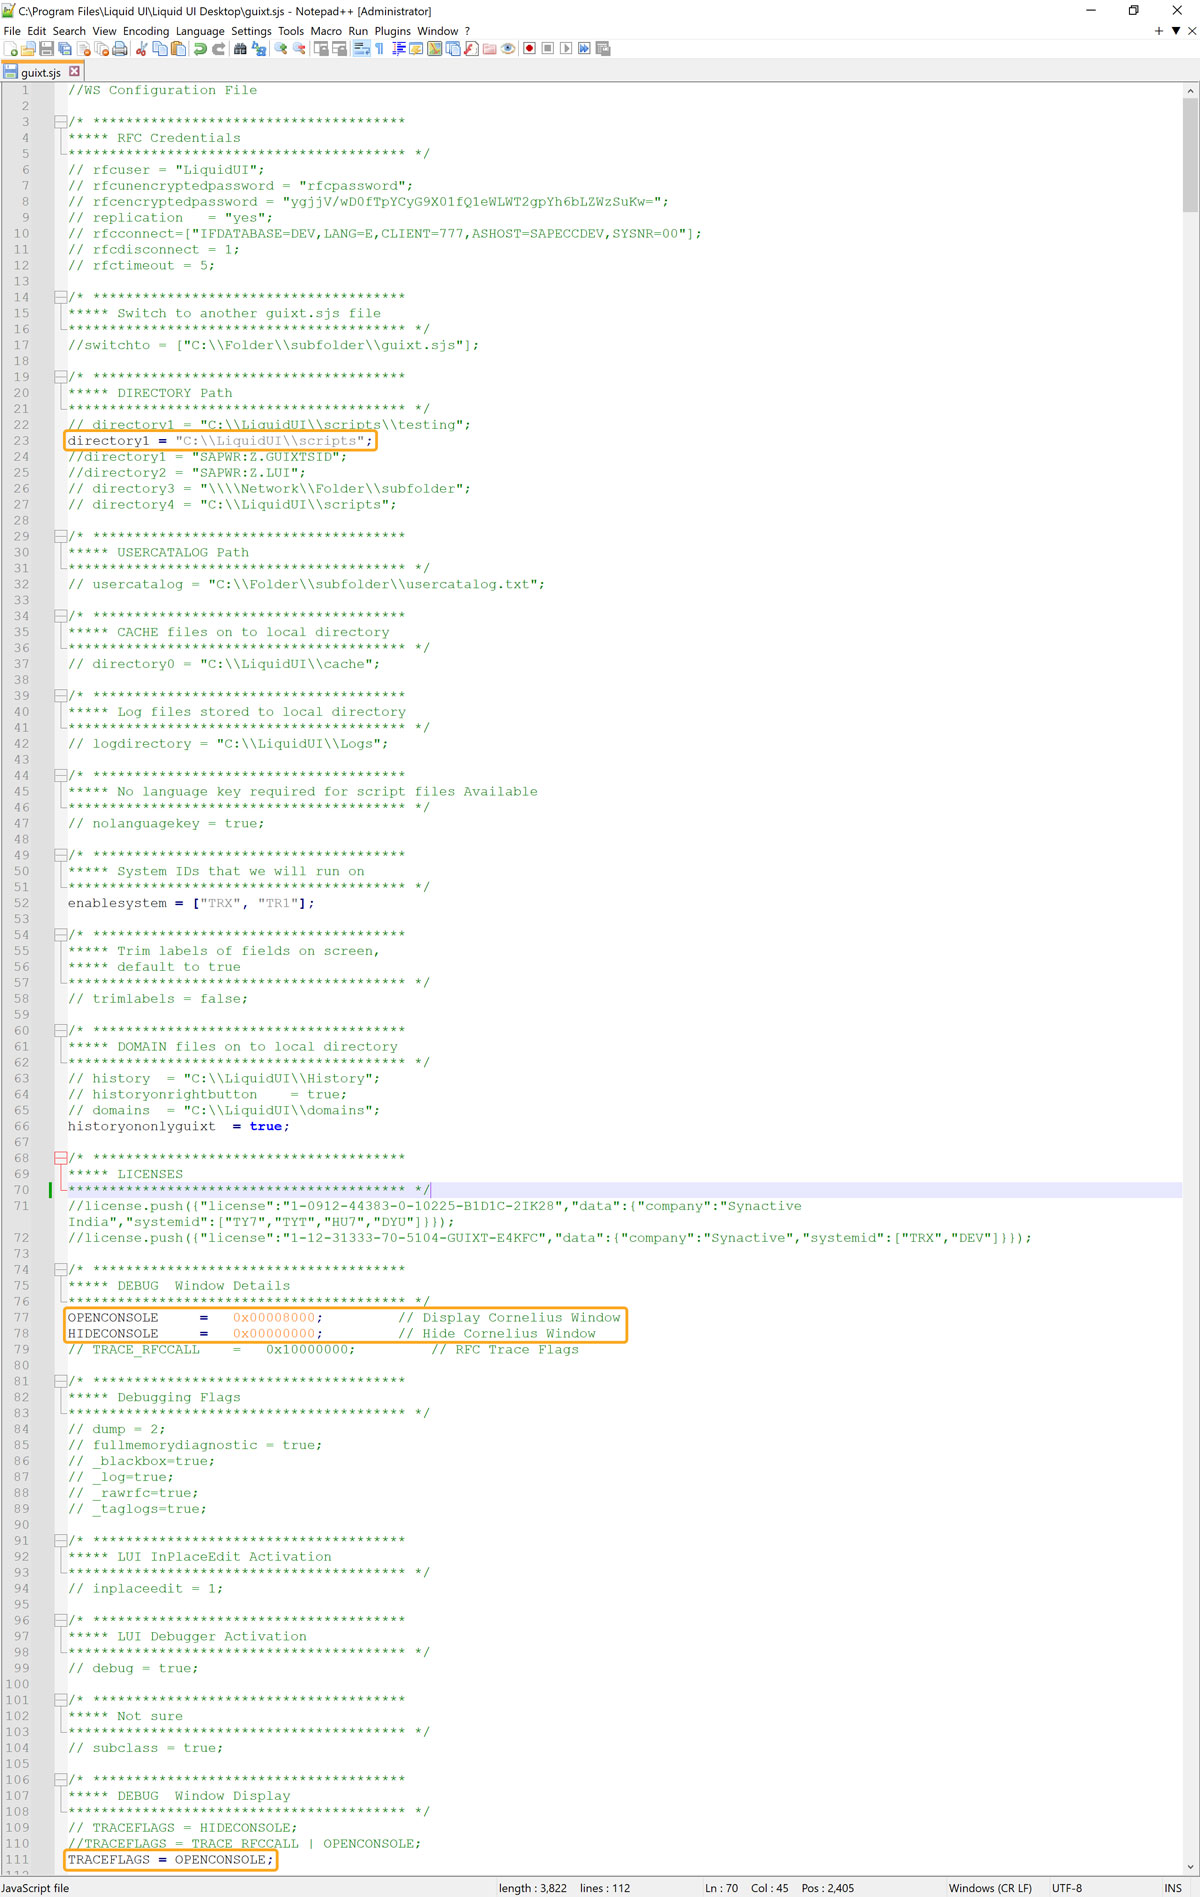
The configuration parameters are defined as follows:
| Directory1 | Path for WS scripts |
| OPENCONSOLE |
Enables console output |
| HIDECONSOLE | Disables console output |
| TRACEFLAGS | Set trace options for debugging |
sapproxy.ini
The sapproxy.ini configuration stores proxy server details that let your SAP GUI connect to your SAP Server using Liquid UI Server.
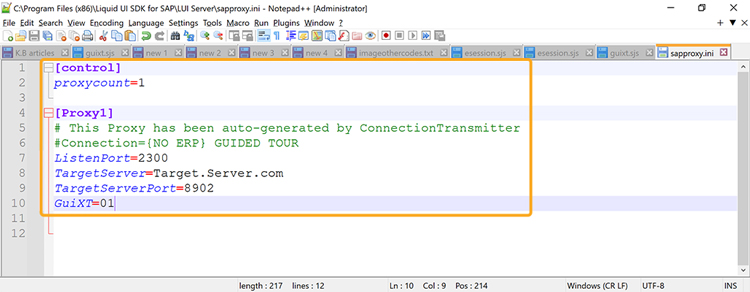
The Server configuration parameters are defined as follows:
| proxycount | Number of connections between the SAP Server and Liquid UI Server. |
| ListenPort | Port number used by the Liquid UI Server (must be in the 32xx series). |
| TargetServer | Host name or IP address of the SAP application server. |
| TargetServerPort | Port of the SAP server to connect to |
| GuiXT |
|
Restart Liquid UI Server
After editing both configuration files:
- Open Services, select Liquid UI Server, and click Restart the service.
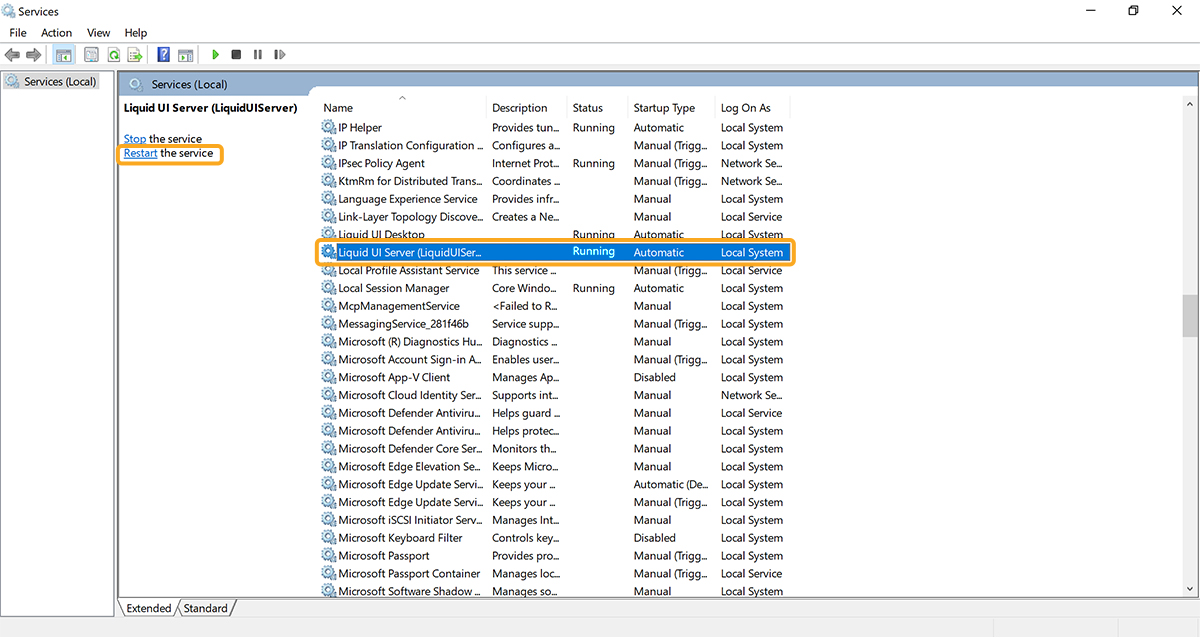
Configuring your SAP GUI
After the server is configured, you need to add a new connection in the SAP GUI:
- Open your SAP logon pad. Click the New, then the Create New System Entry window appears. Fill in the required details and click Next.
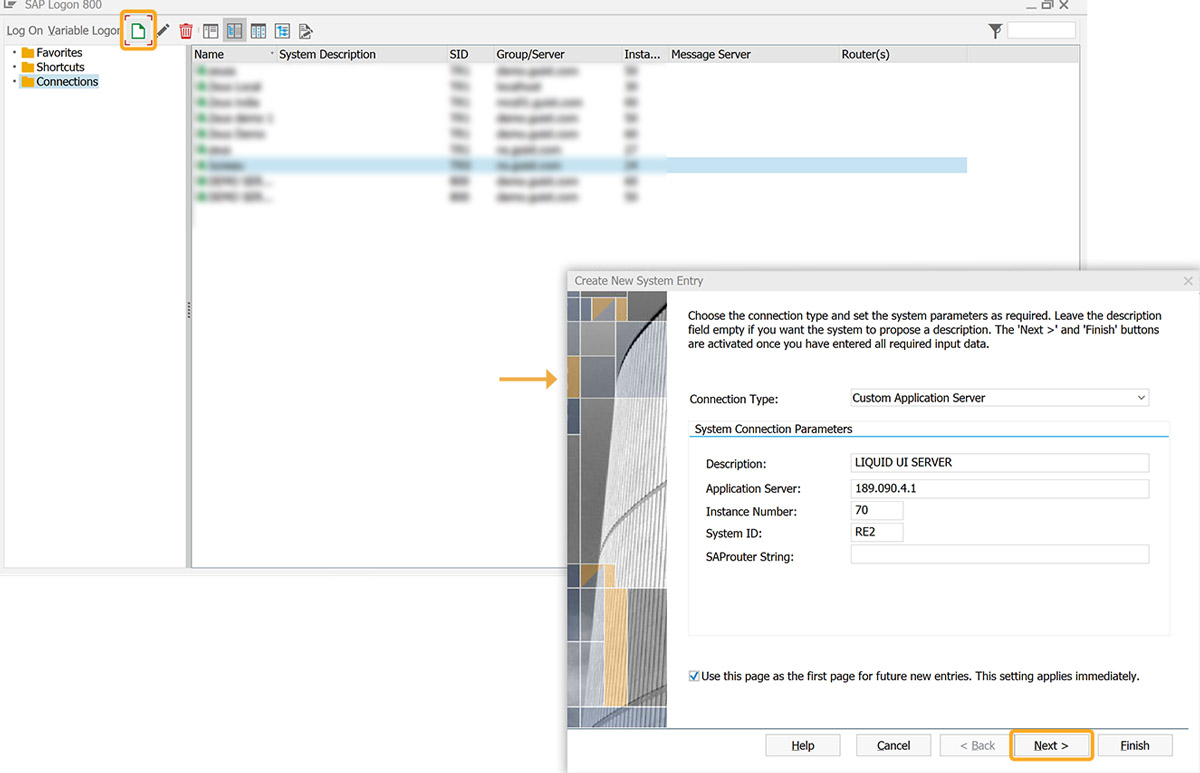
As per the image, the Liquid UI Server connection has the following details:
- Connection Type - Custom Application Server
- Description - Specifies information about the Server
- Application Server - localhost (or IP address if on another machine)
- Instance Number - 10 (last two-digit of the proxy Listenport)
- System ID - SAP system ID
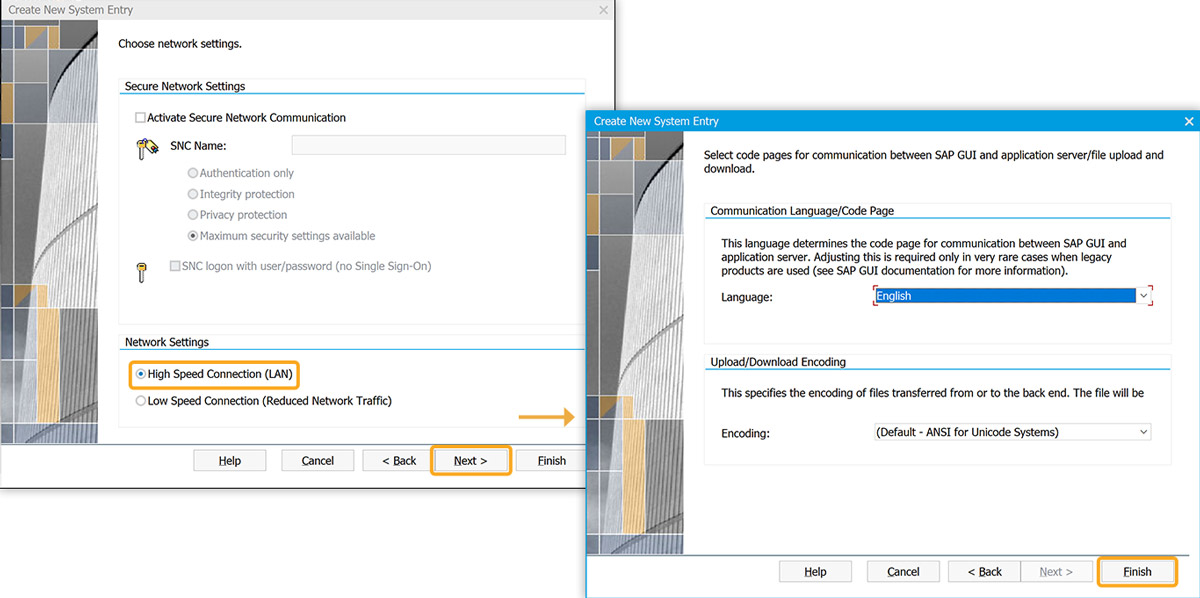
- Select the required network settings and click Next. Select the preferred language from the Language drop-down list, and click Finish.
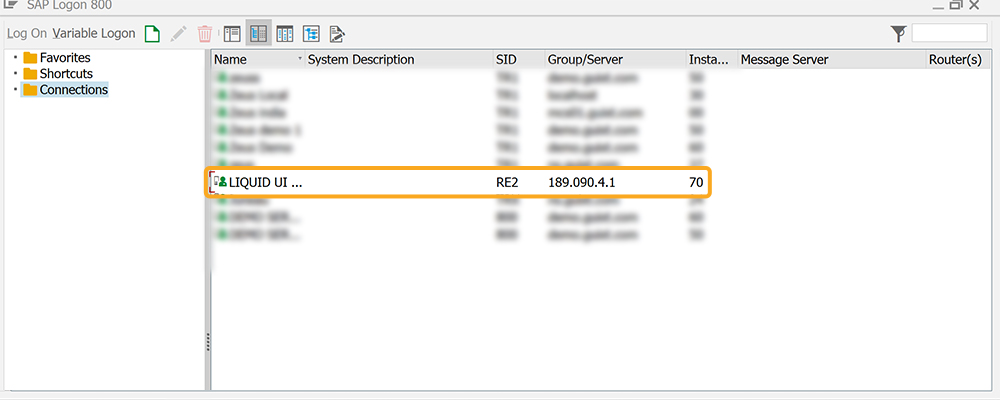
- Then, the newly added Liquid UI Server connection appears in the list of connections on your SAP logon pad.
Configuring Liquid UI for iOS (Optional)
Click here for details on how to add a connection in Liquid UI for iOS using QR Code.
Click here for details on the Connection transmitter.
Configuring Liquid UI for Android (Optional)
You can add your server connection in the Liquid UI for Android through a simple scan using a connection transmitter.
Click here for details on how to add a connection in Liquid UI for Android using a QR Code.
Note: Ensure that the Liquid UI Server and client device are on the same network, and check that Windows Firewall allows the Liquid UI app.
Next Steps

Customizing screen layout using Designer
Create your first SAP customization script using Designer and deploy it on desktop and mobile Customizing screen layout using Text Editor
Create your first SAP customization script using Text Editor and deploy it on desktop and mobile.
5 min.
5 min.
This article is part of the 1.0 Get started with the Liquid UI development tutorial.