

Prerequisites
- Products: Liquid UI WS, Liquid UI Server or Local DLL, Client Software
- Commands: del(), pushbutton(), gettableattribute(), enter(), set(), table(), title(), text(), inputfield()
Purpose
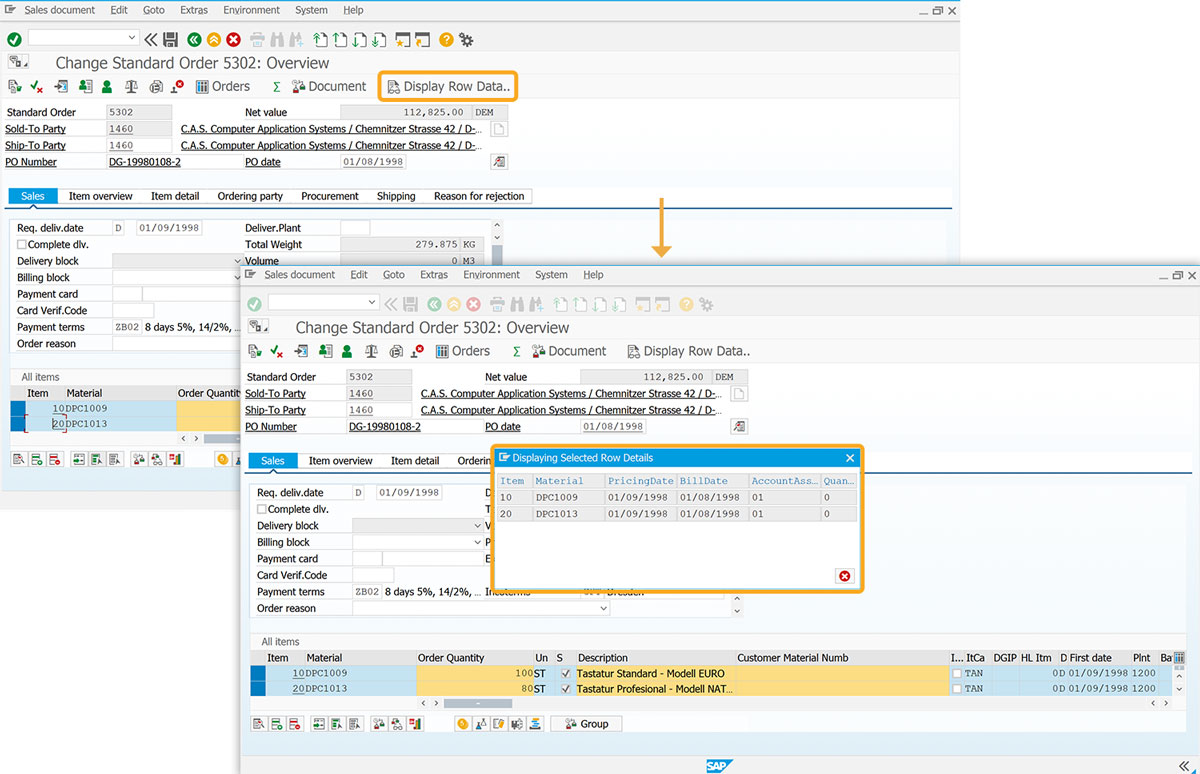
This article demonstrates how to display the column data of a selected table row inside the pop-up window, using the Change Standard Order (VA02) screen as a guide.
- Include a push button.
- Implement data fetching/display function.
- Delete existing pop-up elements.
- Modify title.
- Remove default push buttons.
- Add input fields for key values.
- Create input fields as needed.
- Assign values.
- Create input fields based on selected rows.
- Assign array values to input fields.
User Interface
//Create the file SAPMV45A.E4001.sjs inside your scripts folder for customizing the Change Standard Order: Overview Screen
//Now, add the Liquid UI script to the above file, and save it.
Customization
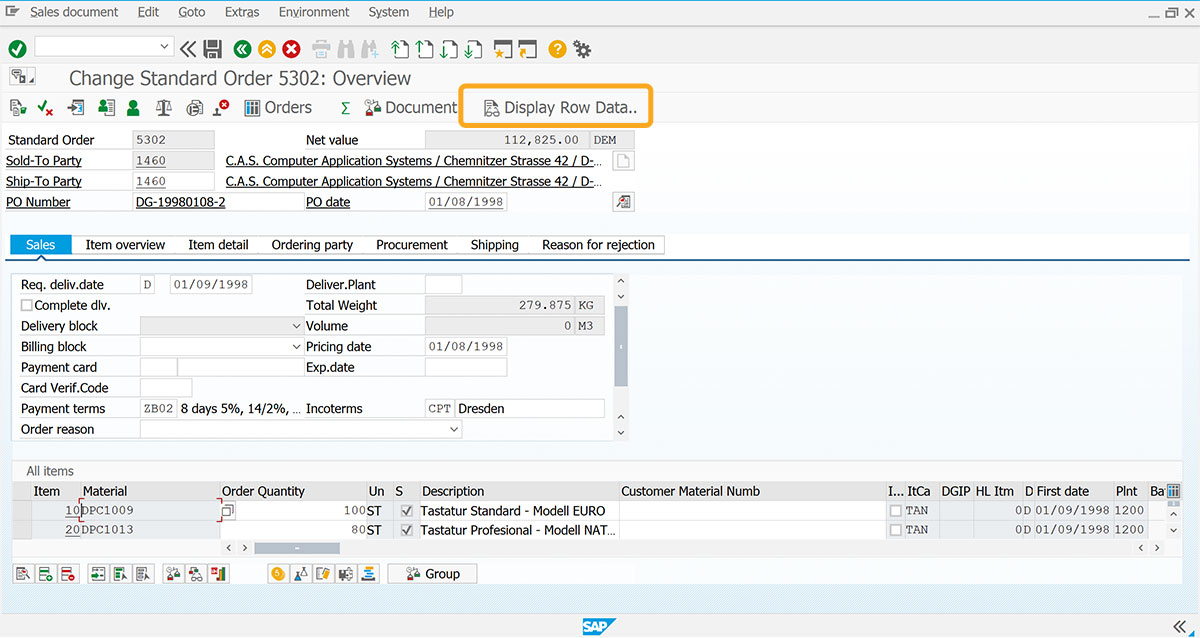
- Insert a Display Row Data toolbar push button. When clicked, this button will execute the DisplayRowData process.
// Creates a push button to execute the process
pushbutton([TOOLBAR], "@0P@Display Row Data..",{"process":DisplayRowData});
- Add DisplayRowData function to fetch selected row values.
// Function to fetch row values
function DisplayRowData(){
   z_matarray=[];
   z_pricingdatearray=[];
   z_billingdatearray=[];
   z_itemarray=[];
   z_accassigngrparray=[];
   z_quantity=[];
   enter("/o");
   gettableattribute("T[All items]", {"firstvisiblerow":"FVisRow", "lastvisiblerow":"LVisRow", "lastrow":"LastRow","selectedrows":"SelRows"});
   for(i=0;i<LastRow;i++){
   ROW_NUMBER = i;
      if(SelRows[ROW_NUMBER]=="X"){
         // adding 1 as SelRows is array which has index begin from 0
         selected_row_number = ROW_NUMBER+1;
         set("V[z_item]","&cell[All items,Item,"+(selected_row_number)+"]");
         z_itemarray.push(z_item);
         set("V[z_material]","&cell[All items,Material,"+(selected_row_number)+"]");
         z_matarray.push(z_material);
         set("V[z_pricingdate]","&cell[All items,Pricing date,"+(selected_row_number)+"]");
         z_pricingdatearray.push(z_pricingdate);
         set("V[z_billingdate]","&cell[All items,Billing Date,"+(selected_row_number)+"]");
         z_billingdatearray.push(z_billingdate);
         set("V[z_accassigngroup]","&cell[All items,VBAP-KTGRM,"+(selected_row_number)+"]");
         z_accassigngrparray.push(z_accassigngroup);
   	set("V[z_compquantity]","&cell[All items,Component quantity,"+(selected_row_number)+"]");
         z_quantity.push(z_compquantity);
      }
    }
 }
-
//Create the file RSM04000_ALV_NEW.E2000.sjs inside your scripts folder for customizing the sessions-related popup window
Delete the existing elements from the popup window using clearscreen().
//Now, add the Liquid UI script to the above file, and save it.
// Deletes all existing elements on the popup
clearscreen();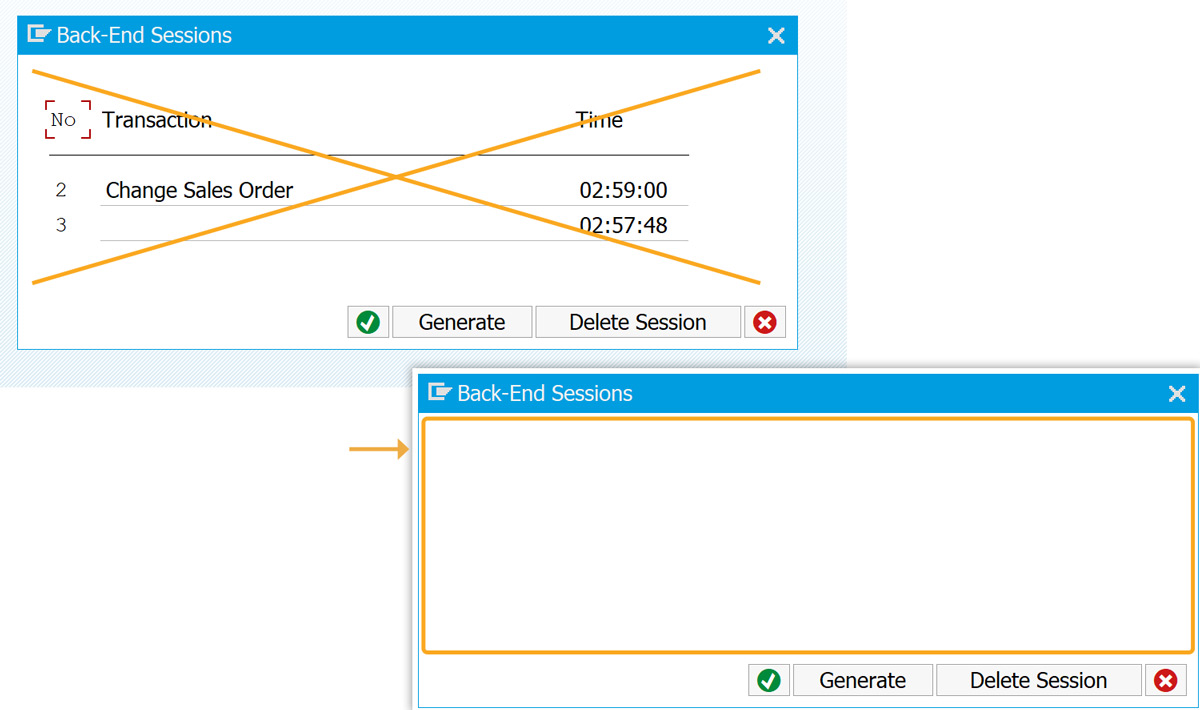
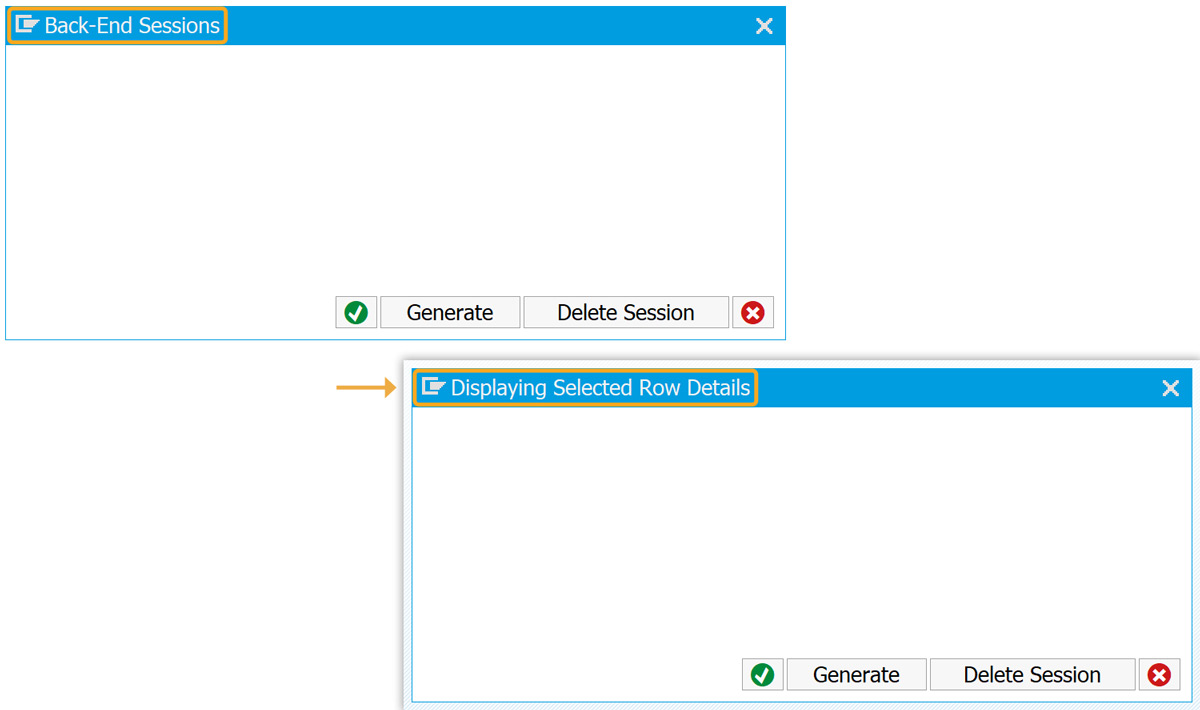
- Modify the title of the popup window.
// Sets a new title for the popup window
title('Displaying Selected Row Details', {"size":[1,10]});
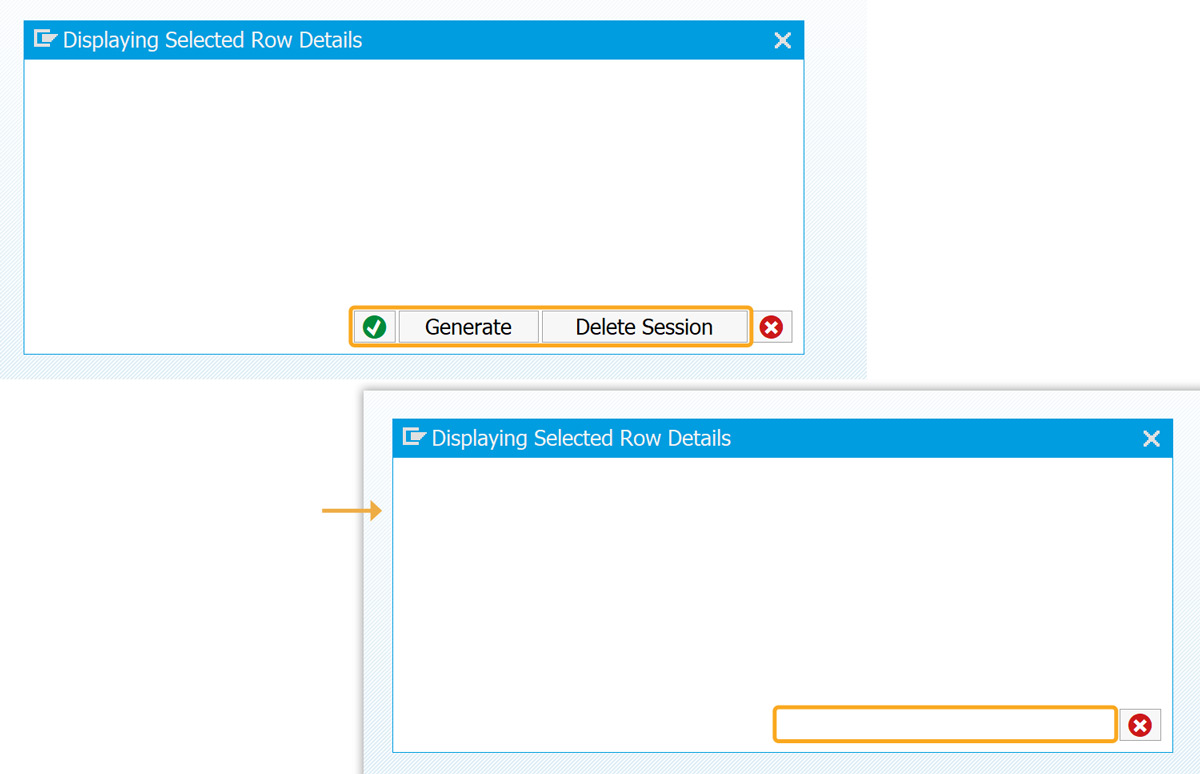
- Delete the existing Generate, End Session, Delete Session, and Continue push buttons from the pop-up window.
// Deletes existing push buttons on the popup window
del('P[Generate]');
del('P[End Session]');
del('P[Delete Session]');
del('P[Continue]');
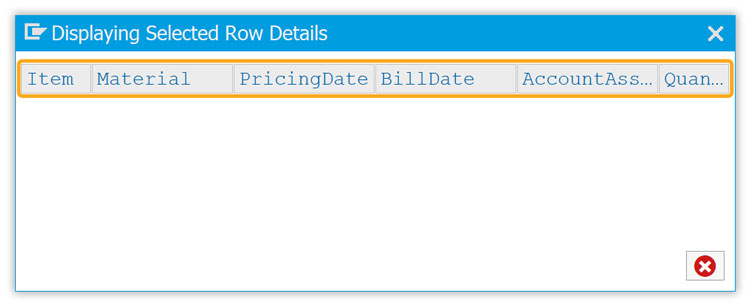
- Display the key values by adding six input fields, labeled Item, Material, PricingDate, BillDate, AccountAssignGrp, and Quantity.
// Adds six input fields with default values
inputfield([0,0],{"size":5, "intensified":true, "nolabel":true, "default":"Item", "readonly":true});
inputfield([0,6],{"size":11, "intensified":true, "nolabel":true, "default":"Material", "readonly":true});
inputfield([0,18],{"size":11, "intensified":true, "nolabel":true, "default":"PricingDate", "readonly":true});
inputfield([0,30],{"size":11, "intensified":true, "nolabel":true, "default":"BillDate", "readonly":true});
inputfield([0,42],{"size":11, "intensified":true, "nolabel":true, "default":"AccountAssignGrp", "readonly":true});
inputfield([0,54],{"size":5, "intensified":true, "nolabel":true, "default":"Quantity", "readonly":true});
- Add a statement to create input fields based on selected rows.
// Creates input fields based on the selected rows for(j=0;j<z_matarray.length;j++){ inputfield([j+1,0],{"size":5,"name":"z_item_&V[j]","nolabel":true,"readonly":true}); inputfield([j+1,6],{"size":11,"name":"z_matarray_&V[j]","nolabel":true,"readonly":true}); inputfield([j+1,18],{"size":11,"name":"z_pricingdate_&V[j]","nolabel":true,"readonly":true}); inputfield([j+1,30],{"size":11,"name":"z_billingdate_&V[j]","nolabel":true,"readonly":true}); inputfield([j+1,42],{"size":11,"name":"z_accassigngrp_&V[j]","nolabel":true,"readonly":true}); inputfield([j+1,54],{"size":5,"name":"z_quantity_&V[j]","nolabel":true,"readonly":true}); } - Add a statement to assign array values to input fields.
// Displays  the array values in input fields
for(j=0;j<z_matarray.length;j++){
   set("V[z_matarray_&V[j]]",z_matarray[j]);
   set("V[z_billingdate_&V[j]]",z_pricingdatearray[j]);
   set("V[z_pricingdate_&V[j]]",z_billingdatearray[j]);
   set("V[z_item_&V[j]]",z_itemarray[j]);
   set("V[z_accassigngrp_&V[j]]",z_accassigngrparray[j]);
   set("V[z_quantity_&V[j]]",z_quantity[j]);
}
SAP Process
- Go to the VA02 transaction. Enter the Order number and press Enter. On the Overview screen, select the desired rows.
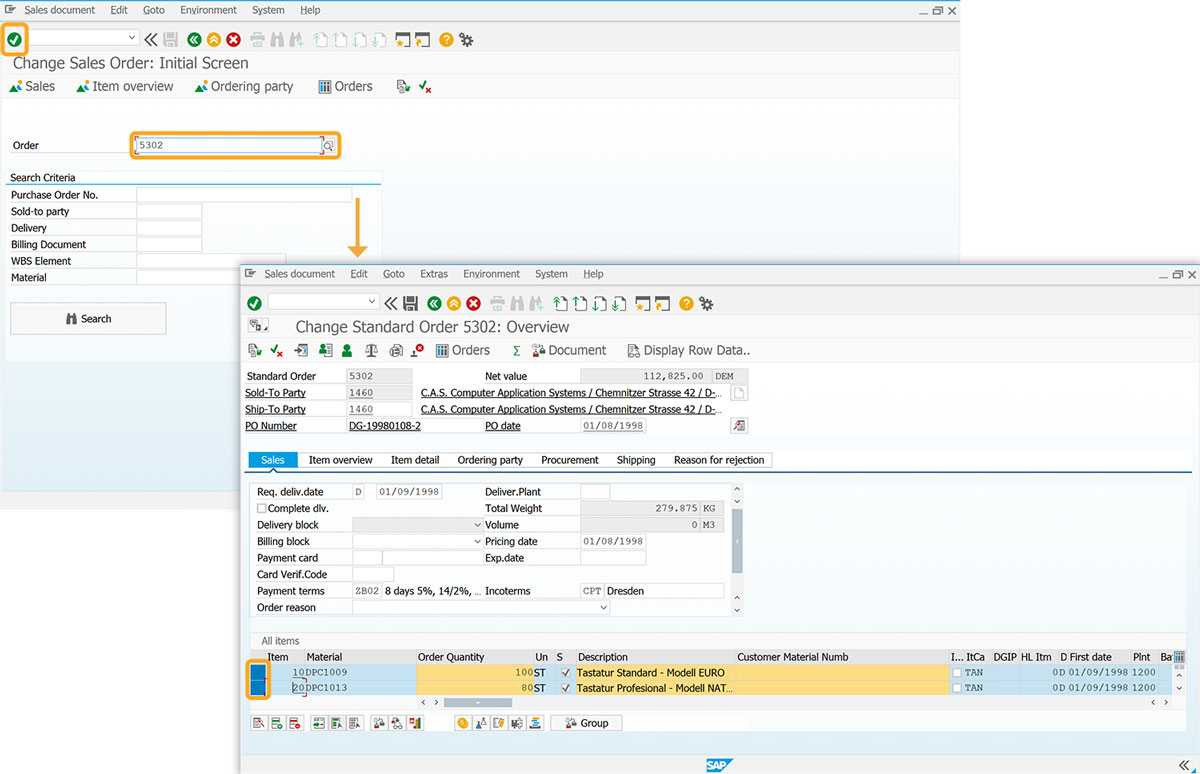
- Now, click on the Display Row Data toolbar push button, and the pop-up window will then appear and display the selected values of the row, as shown in the image below.