


Prerequisites
- Products: Liquid UI WS, Liquid UI SCerver or Local DLL, Client Software
- Commands: del(), text(), title(), onUIEvents()
Purpose
This article demonstrates how to customize the dialog box that displays the list of all opened sessions and add functionality to the pop-up window. We will guide you through the following steps, considering the SAP Easy Access screen:
- Delete the image container from the SAP Easy Access screen
- Add a push button to open a new session
- Clear the pop-up screen
- Remove the push buttons on the pop-up
- Change the title of the pop-up
- Add text and relabel push buttons
- Implement a function to navigate to the VK11 transaction screen
- Add functionality to handle user confirmation
User Interface
//Create the SAPLSMTR_NAVIGATION.E0100.sjs file inside your scripts folder for customizing the SAP Easy Access screen
//Now, add the Liquid UI script to the above file and save it.
Customization
- Delete the image container on the SAP Easy Access screen using del().
// Deletes image container on the SAP screen
del("X[IMAGE_CONTAINER]");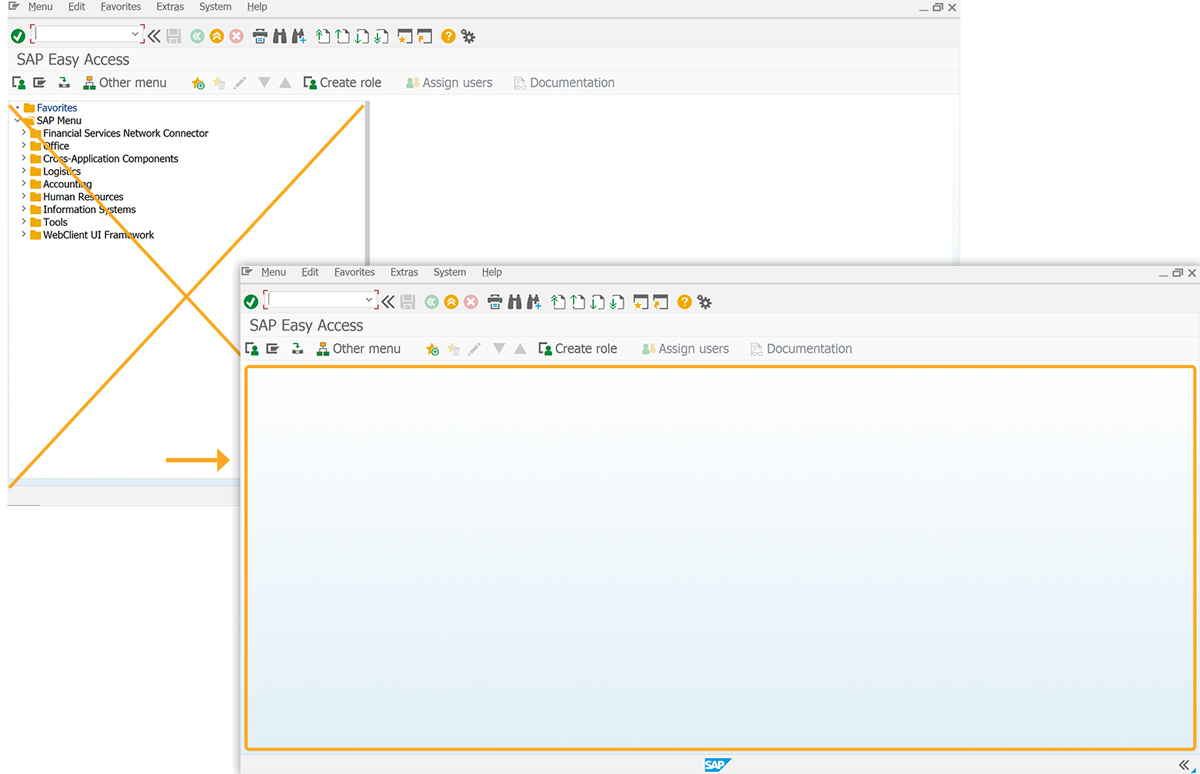
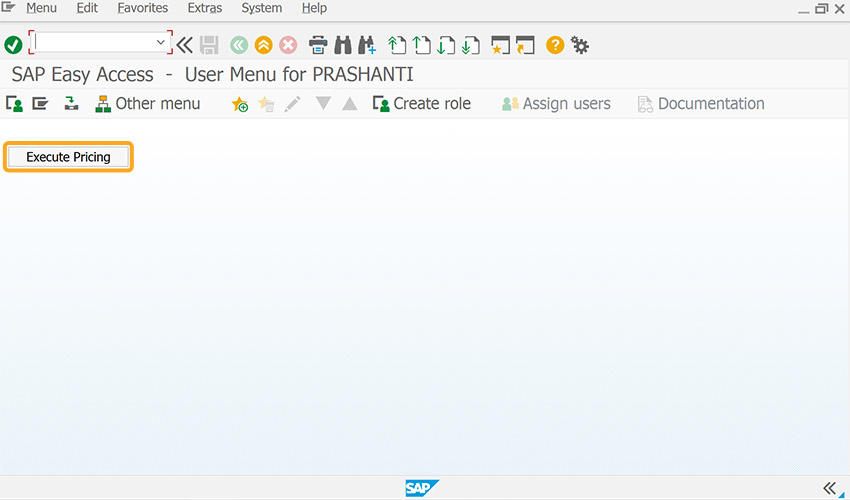
- Add a push button labeled Execute Pricing to open a new session on click.
// Creates a push button to open a new session on click
pushbutton([1,1], 'Execute Pricing', '/o');
//Create the RSM04000_ALV_NEW.E2000.sjs file inside your scripts folder for customizing the Back-End sessions dialog box
//Now, add the Liquid UI script to the above file and save it. - Delete the text on the pop-up screen using the clearscreen command.
// Clears the text on the pop-up screen
clearscreen();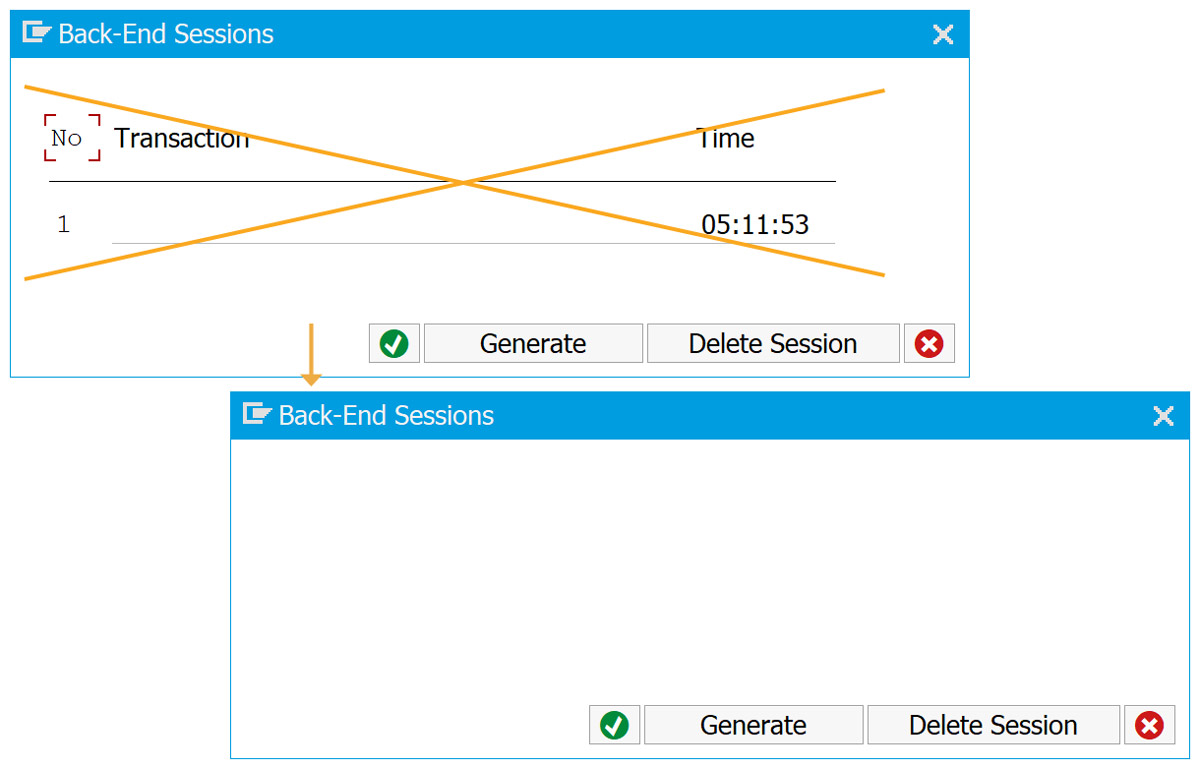
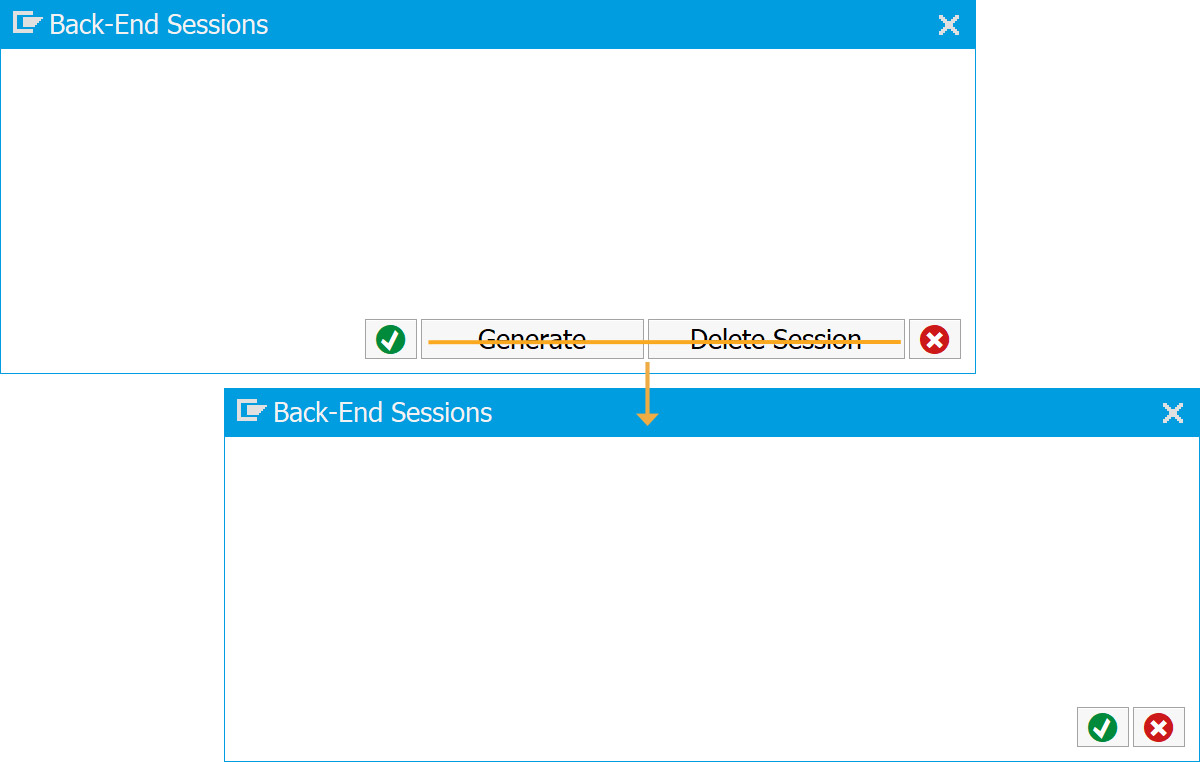
- Delete the Generate and Delete Session push buttons using the del command.
// Deletes two pushbuttons Generate and Delete Session
del('P[Generate]');
del('P[Delete Session]');
- Change the title of the pop-up screen to Decision to Proceed using the title command.
//Changes the pop-up title to Decision to Proceed
title('Decision to Proceed');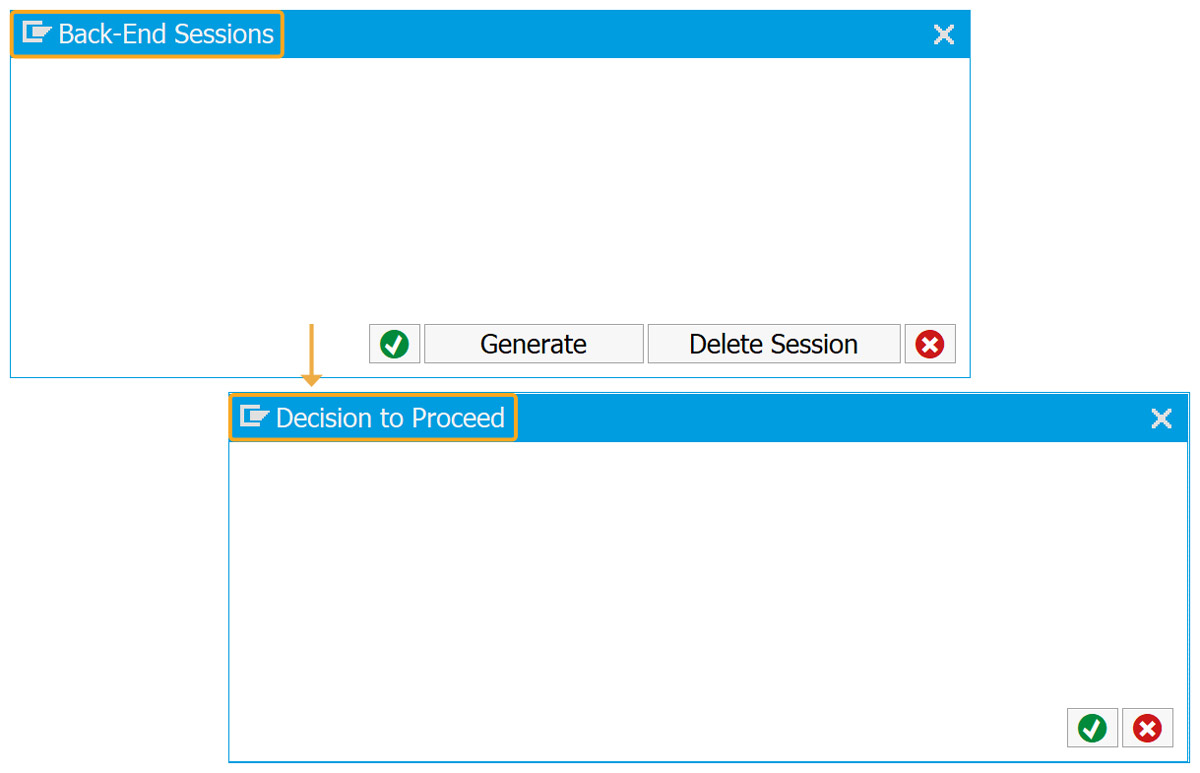
- Add text and relabel existing push buttons.
// Adds instructions on the pop-up menu
text([1,2], 'Do you want to create pricing conditions?');
// Creates text on the 3rd row and 2nd column
text([2,2], 'Press <Yes> to continue, Press <No> to stop');
// Relabels buttons with icons
text('P[Continue]','@01@Yes');
// Changes Cancel pushbutton text to No with icon
text('P[Cancel]','@02@No');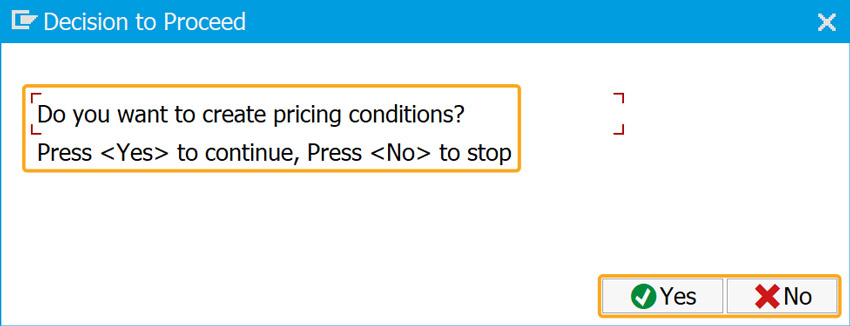
- Add an executeVK11 function that navigates to the Create Condition Records screen (VK11) and assigns the PR00 value to the Condition type field.
// Function to execute VK11 when the user clicks 'Yes' on the pop-up
function executeVK11() {
 onscreen 'SAPLSMTR_NAVIGATION.0100'
 enter('/nvk11');
 onscreen 'SAPMV13A.0100'
 set('F[Condition type]','PR00');
 enter();
 onscreen 'SAPLV14A.0100'
 enter();
 }
- Add functionality to handle user confirmation.
// Executes the executeVK11 function and navigates to the VK11 transaction
onUIEvents['Enter'] = {"fcode":"/12", "process":executeVK11}
// Cancels the process and remains on the same screen when No is clicked
onUIEvents['/12'] = {"fcode":"/12"};
SAP Process
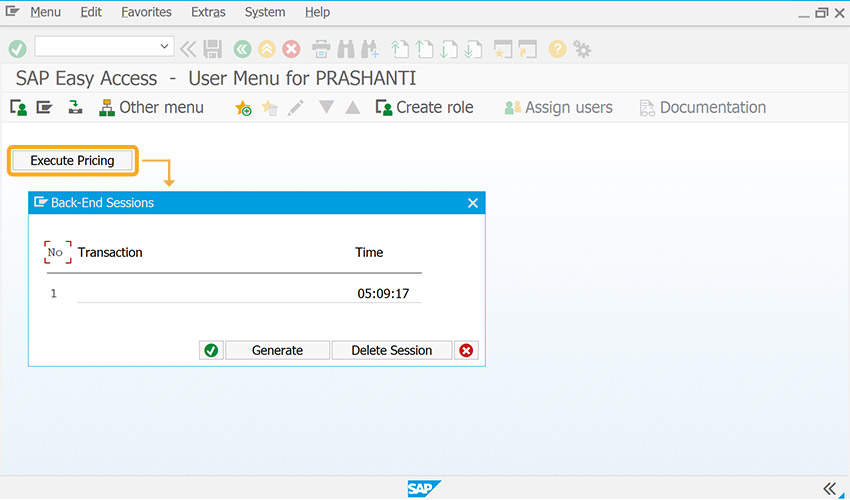
- After refreshing the SAP screen, click the Execute Pricing button to display the Back-End Sessions dialog box, as shown in the image below.
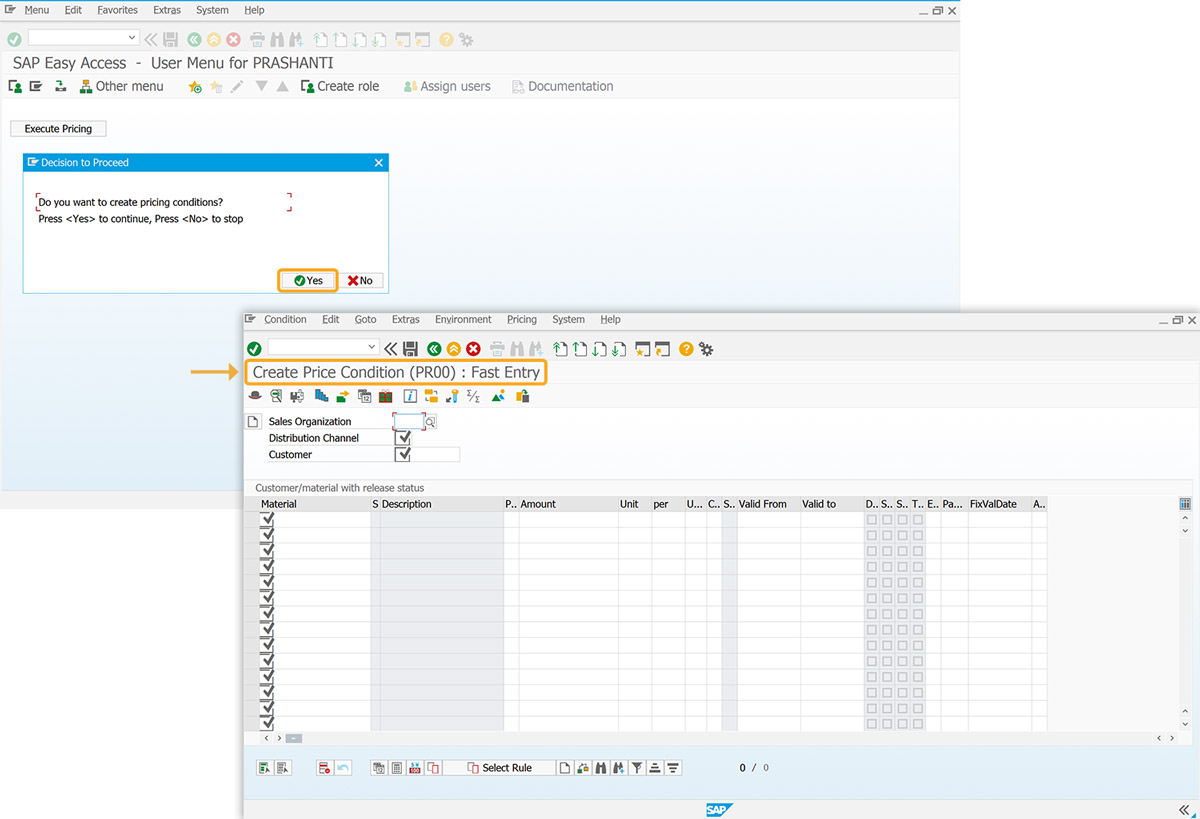
- In the pop-up window, click Yes to enter and run the executeVK11 function, which navigates to the VK11 transaction, as shown below.
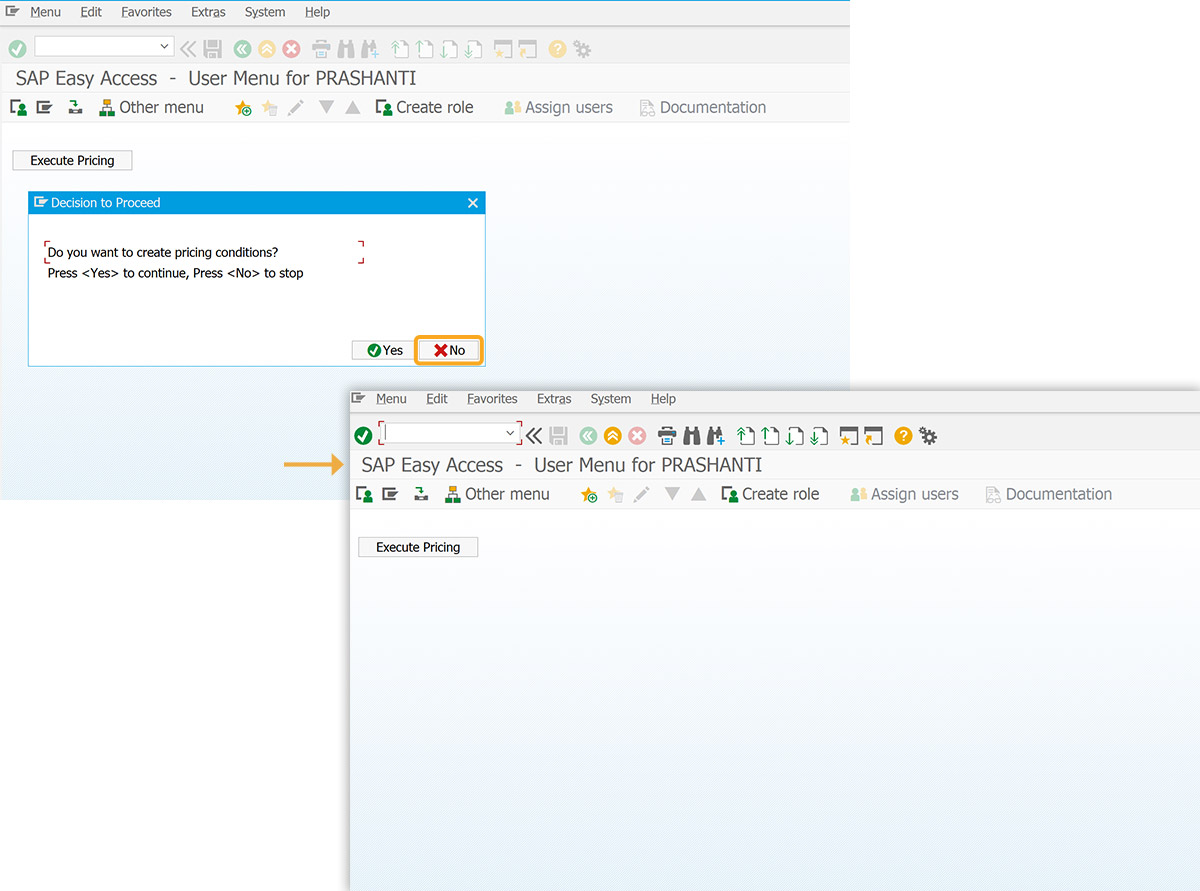
- Click No to perform F12 and cancel the process, staying on the same screen.
Next Steps

Get the message, message type, message number, and message id using _message, _msgtype, _msgno, and _msgid
Learn how to display all the details of an SAP message
Learn how to display all the details of an SAP message
10 min.
This article is part of the Interpreting function codes tutorial.