


This article details how to customize the existing VA01 screen using Liquid UI Designer. You’ll learn how to remove or modify existing fields and add new UI elements such as radio buttons and group boxes to improve usability.

Note: A valid License is required to use Liquid UI Designer.
To obtain a license, contact us at rfi@guixt.com or call us at +1(650)341-3310.
Launching Designer
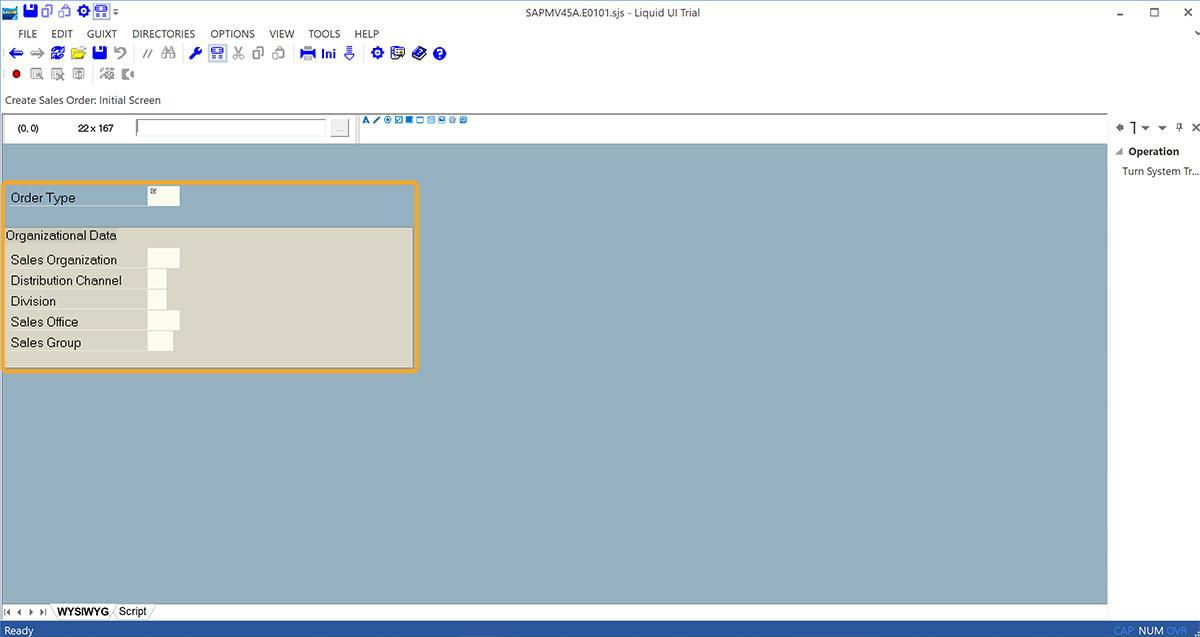
- To customize the VA01 screen, open SAP GUI and navigate to VA01. Then, open Liquid UI Designer from your Windows programs. The VA01 screen will now appear within the Designer interface, as depicted in the image below.
Removing existing fields:
To remove unnecessary fields:
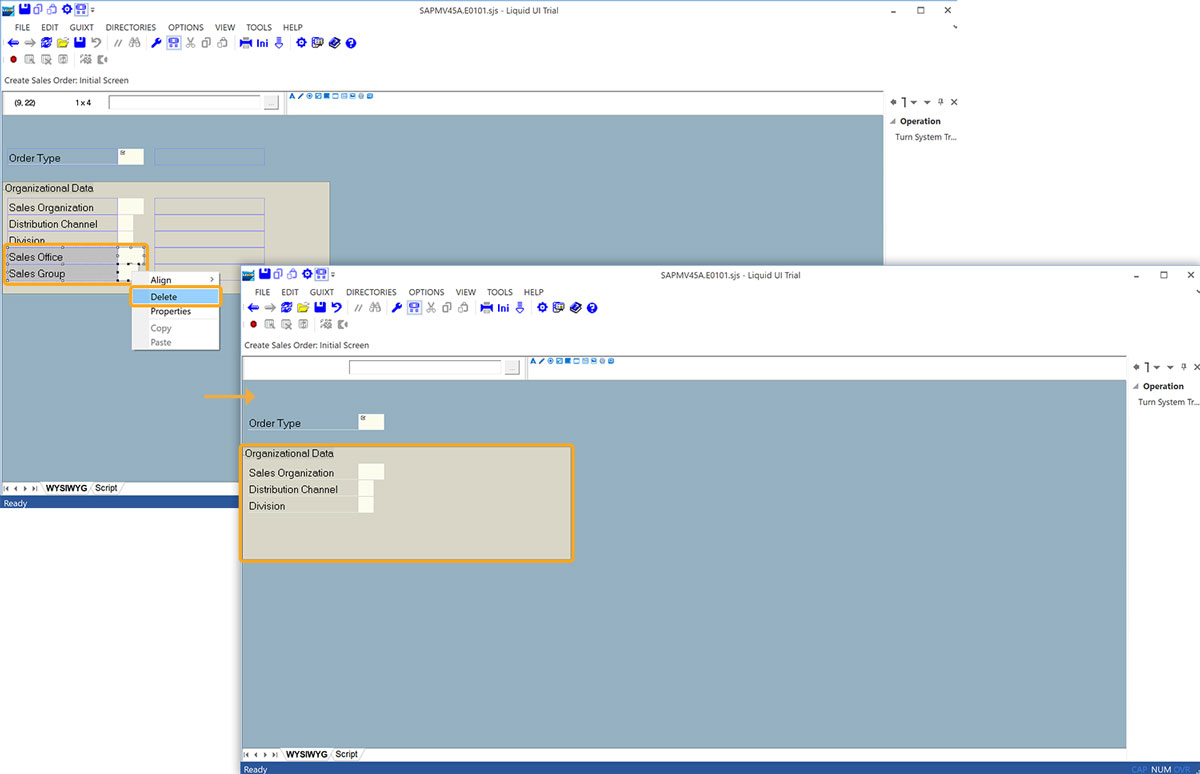
- To remove the Sales Office and Sales Group fields, including their input areas, select both and right-click to choose Delete.
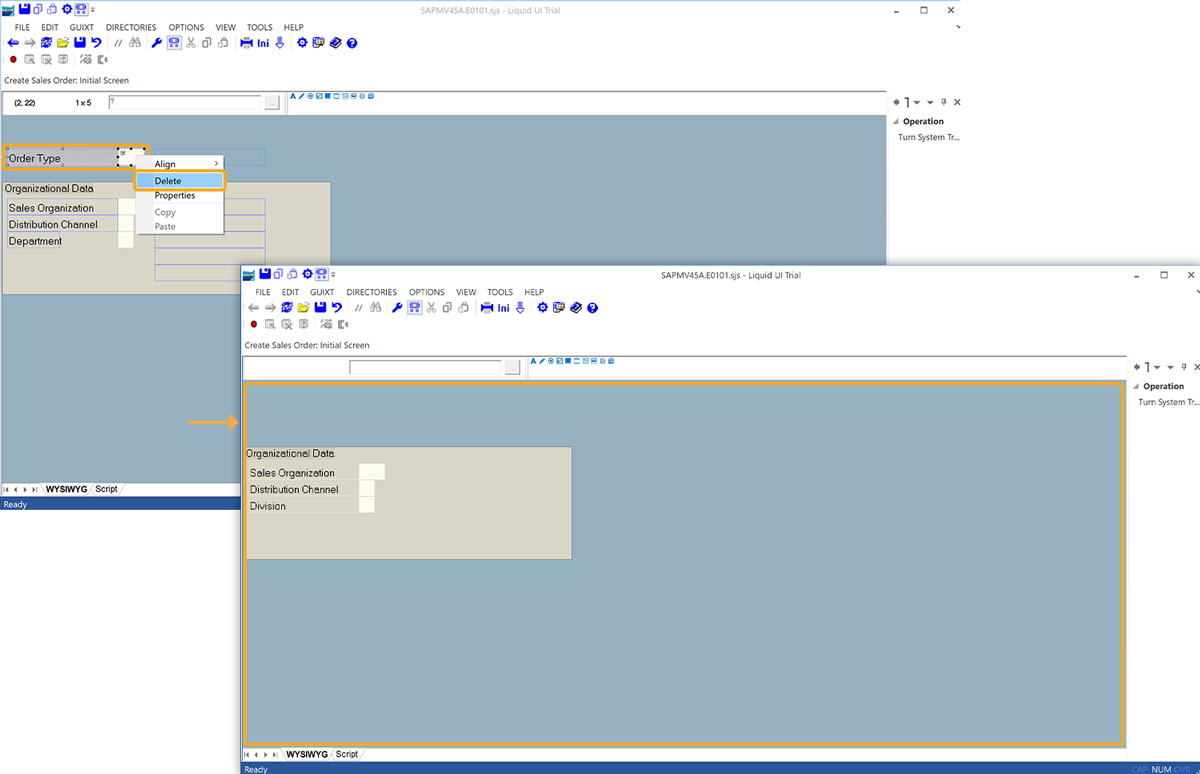
- Next, right-click the Order Type input field and select Delete.
Note: To select multiple fields, hold the Ctrl key while clicking.
Modifying existing fields:
Update field values using the Properties dialog:
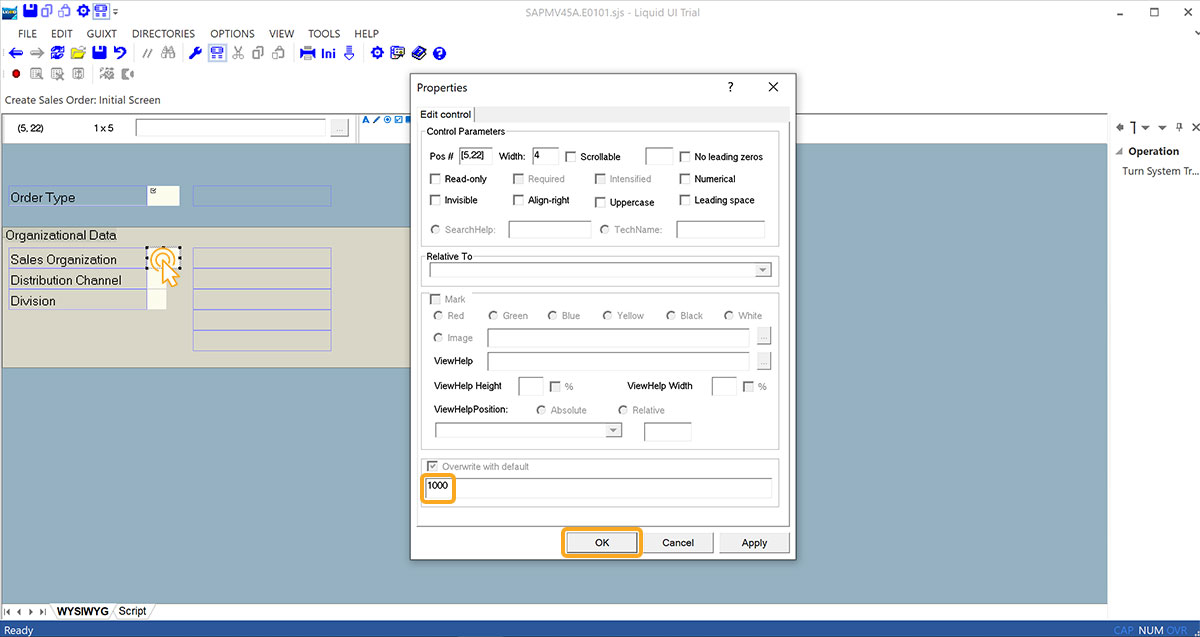
- In the Sales Organization input field, double-click to enter 1000 in the Overwrite with default field. Then, click OK.
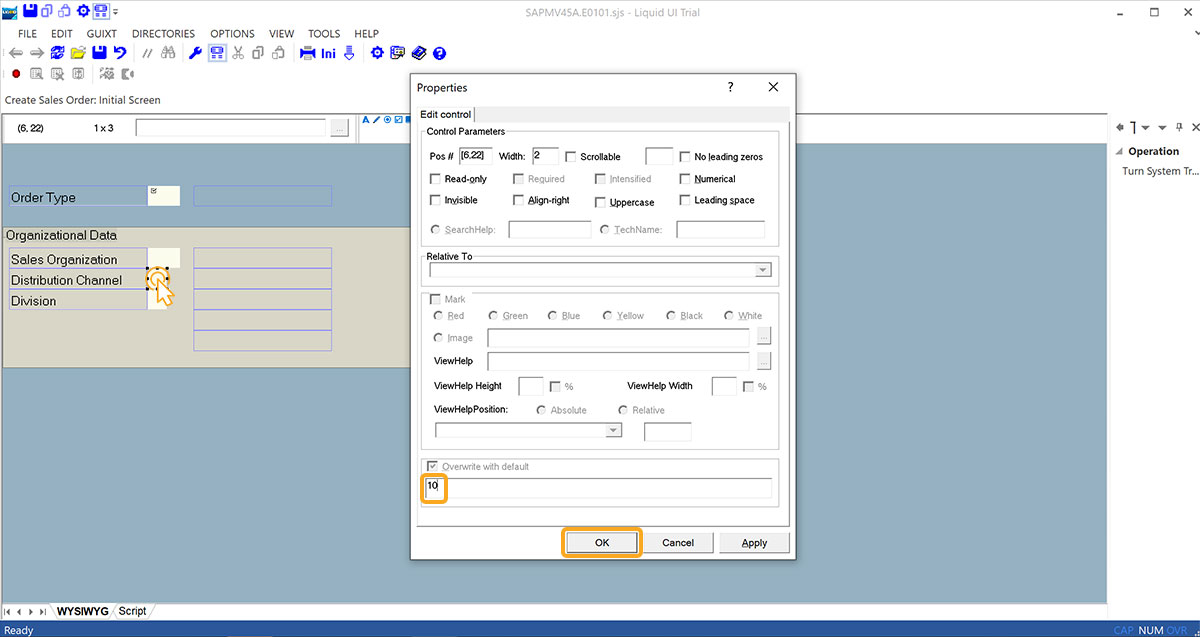
- Double-click the Distribution Channel input field, enter 10 in the Overwrite with default field, then click OK.
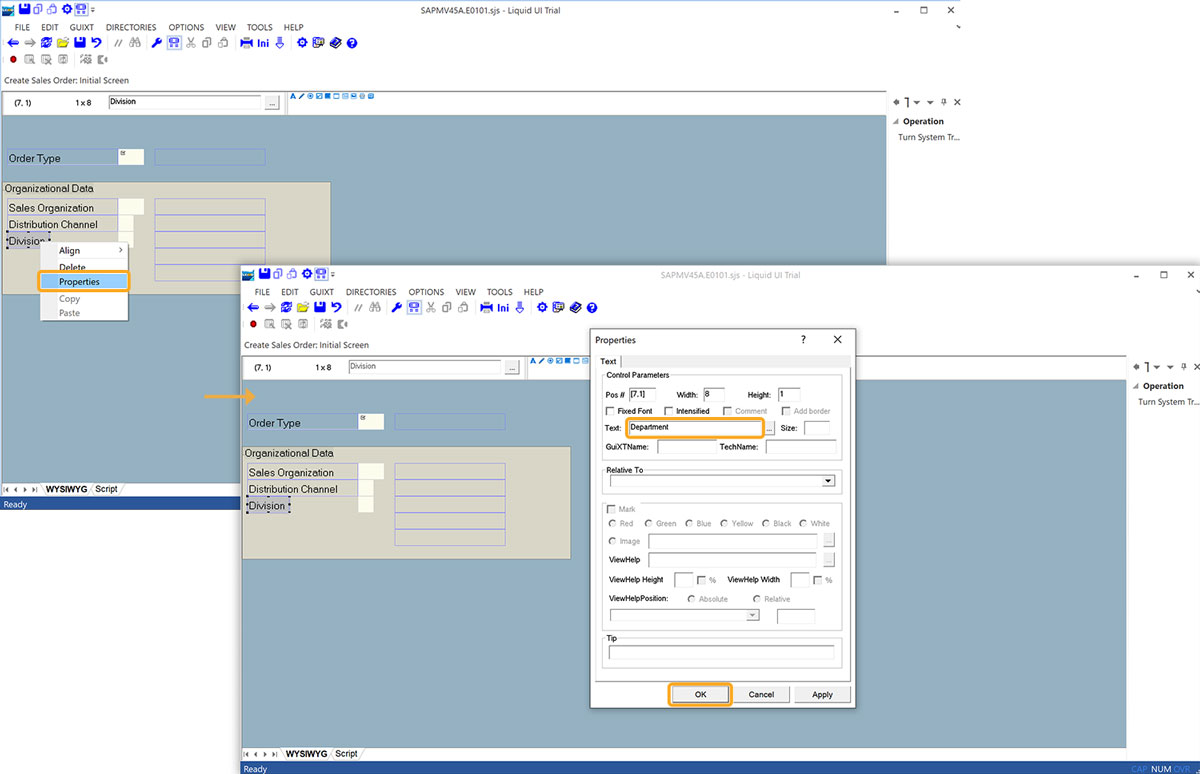
- Right-click the Division input field, choose Properties, and change the Text to Department, then click OK.
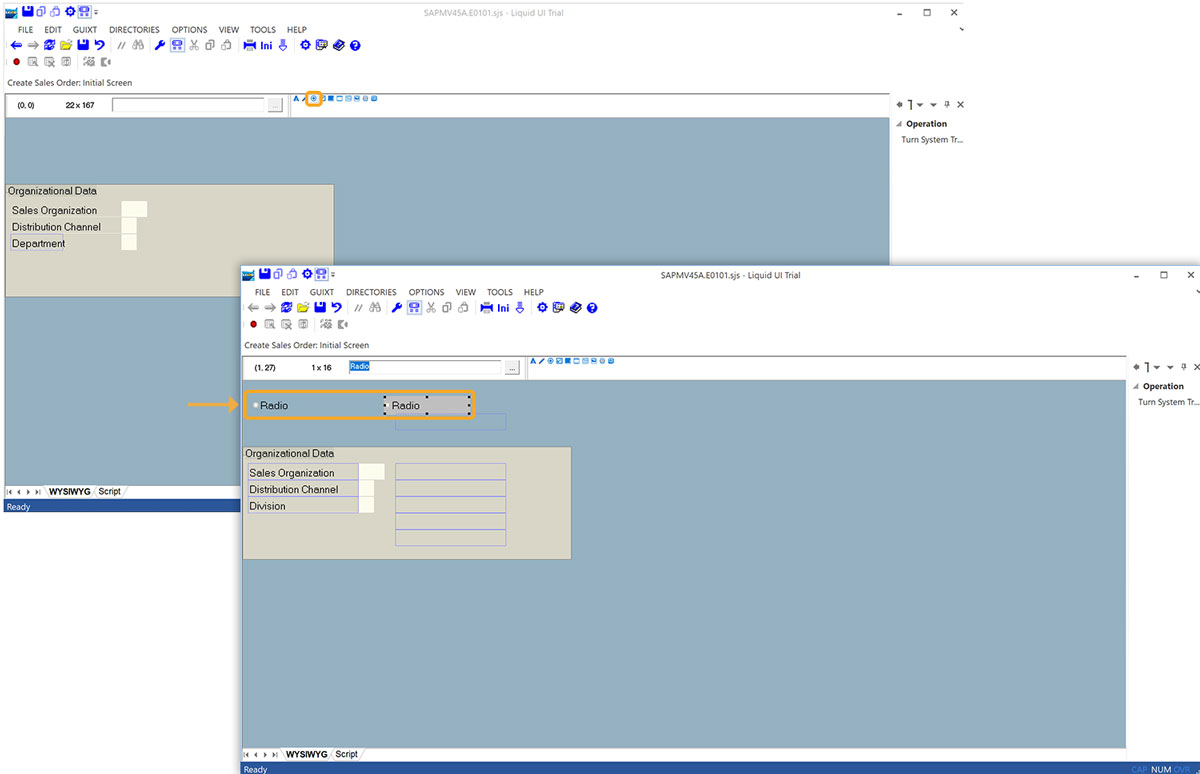
Adding radio buttons
- Click on the Radiobutton icon and drag two buttons onto the screen.
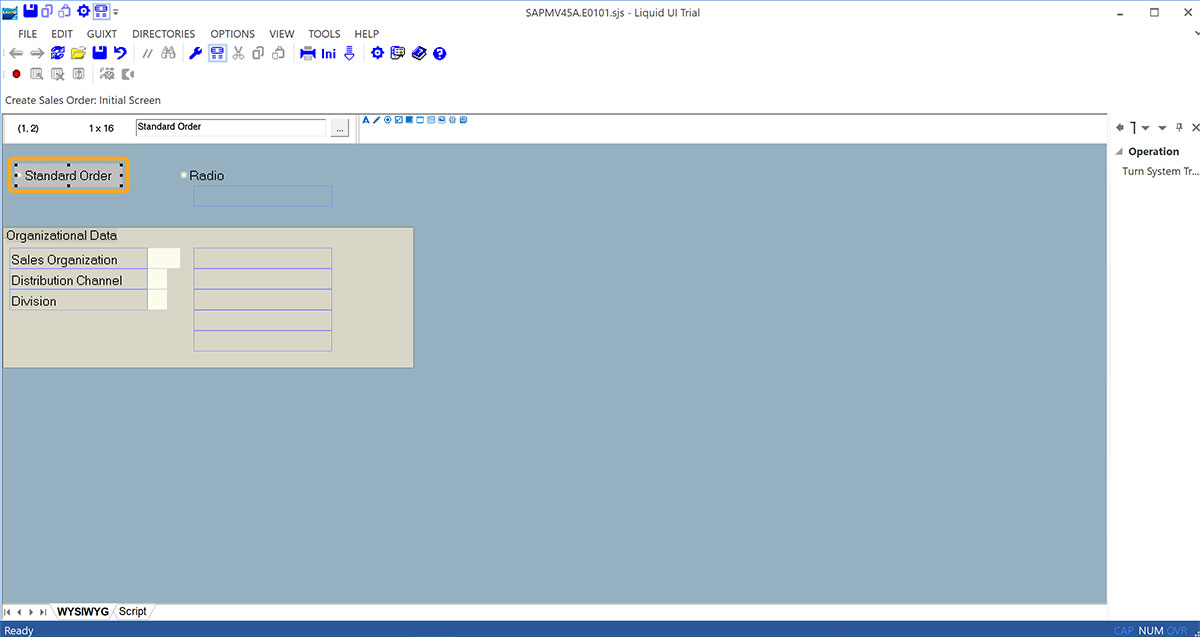
- Right-click the first radio button and choose Properties. Under the Radio Button tab, set the Text to Standard Order, and click OK.
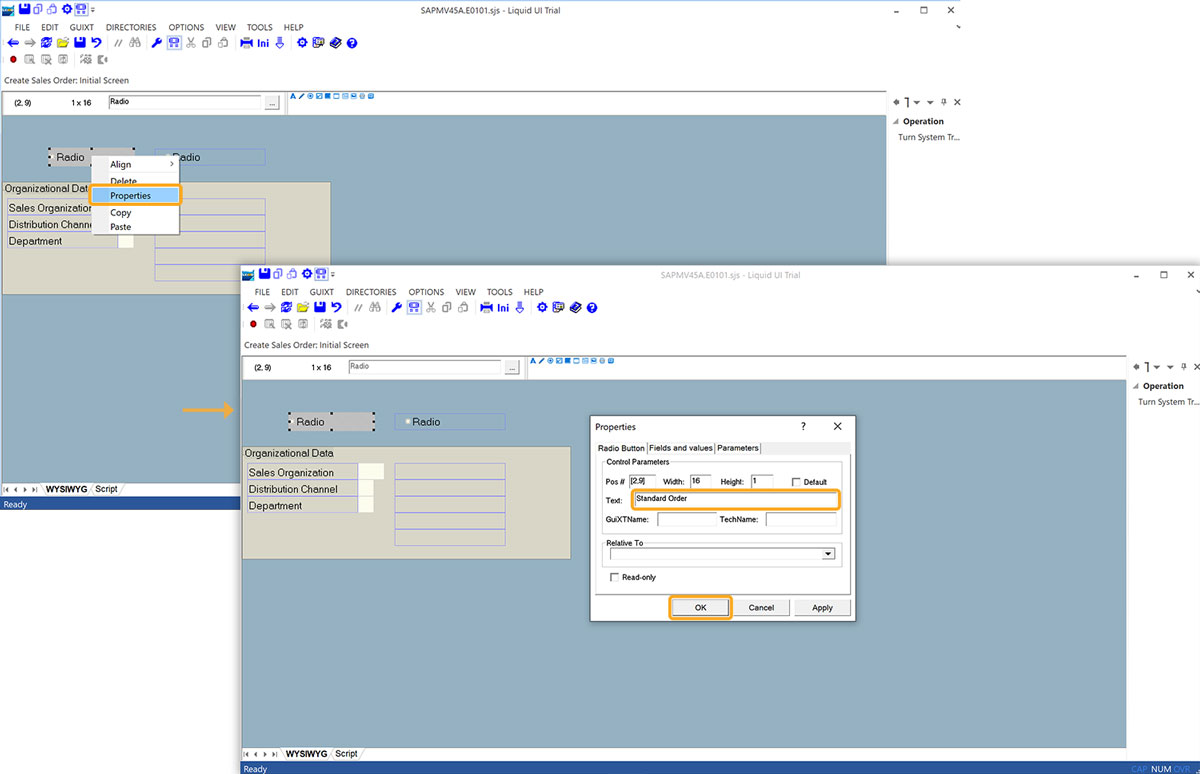
- Now, the Standard Order radio button will appear, as shown in the image below.
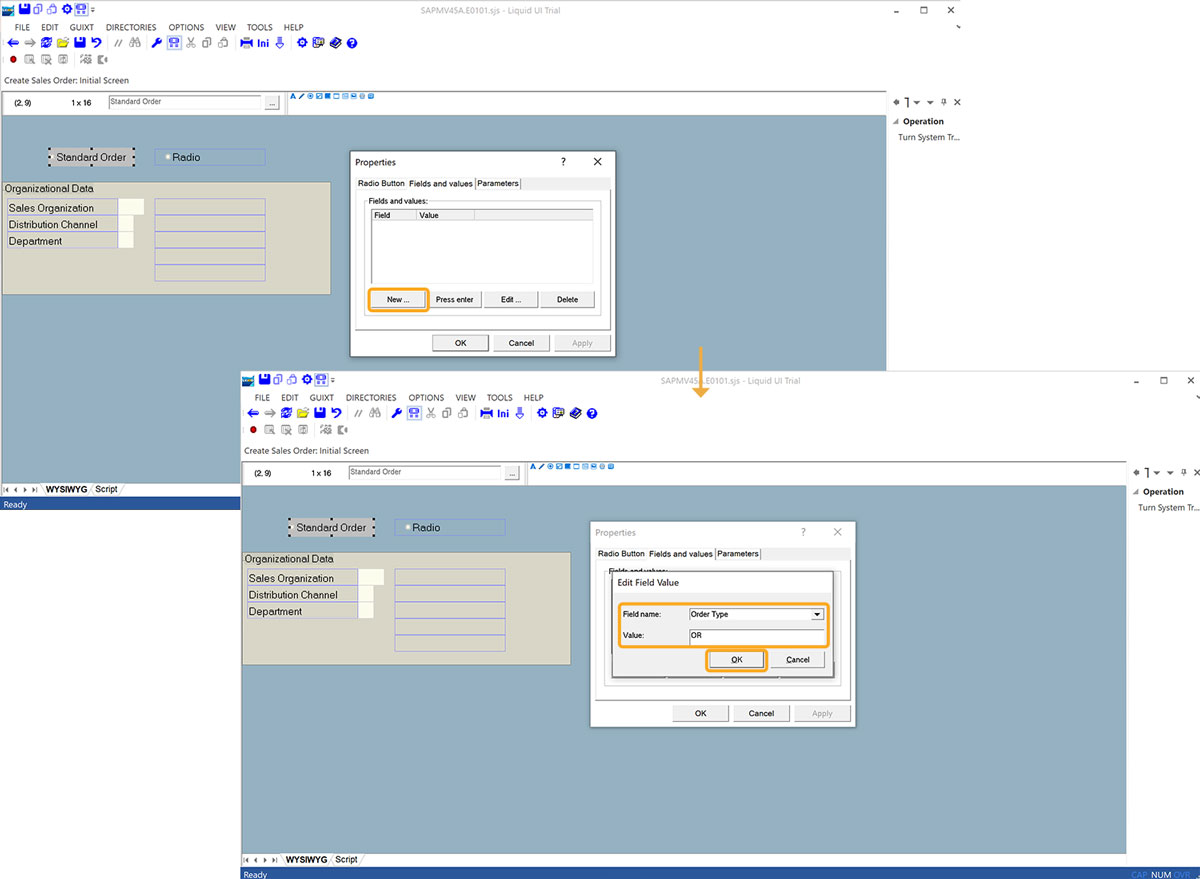
- Under the Fields and values tab, click New. The Edit Field Value dialog appears. Enter Order Type as the field name and OR as the value. Click OK.
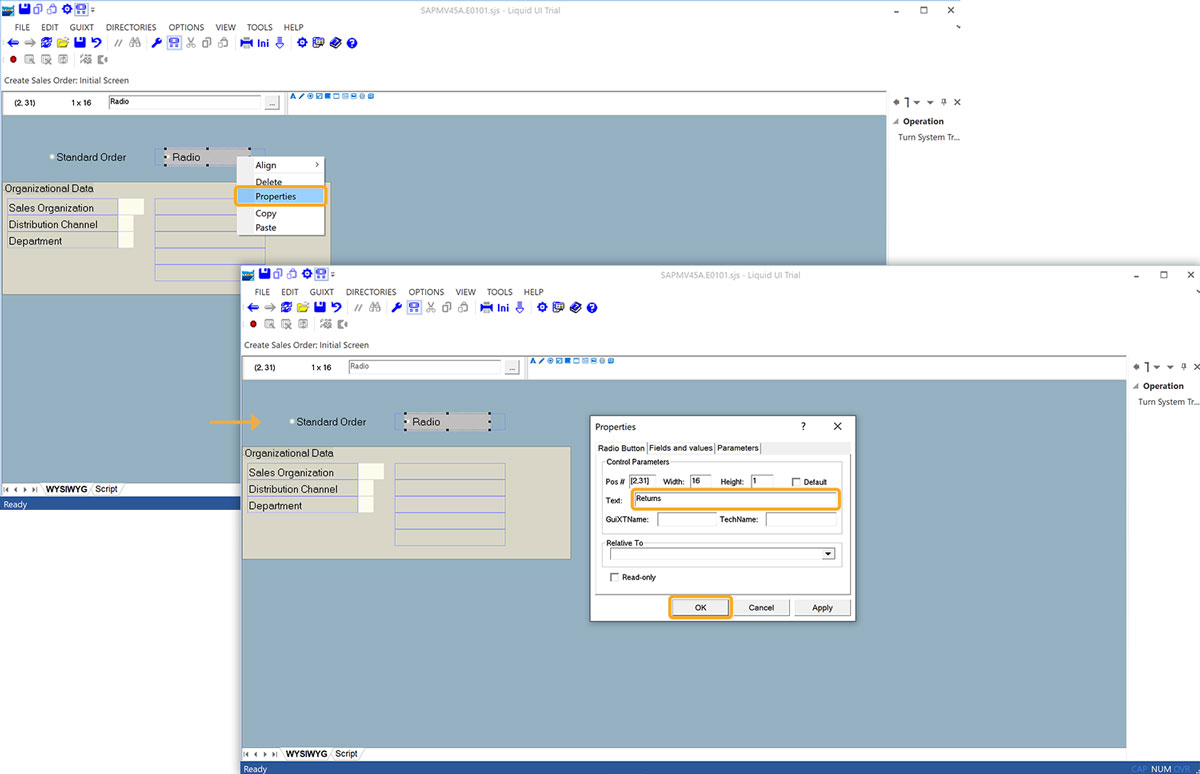
- Right-click on the second radio button and choose Properties. Under the Radio Button tab, set the Text to Returns, and click OK.
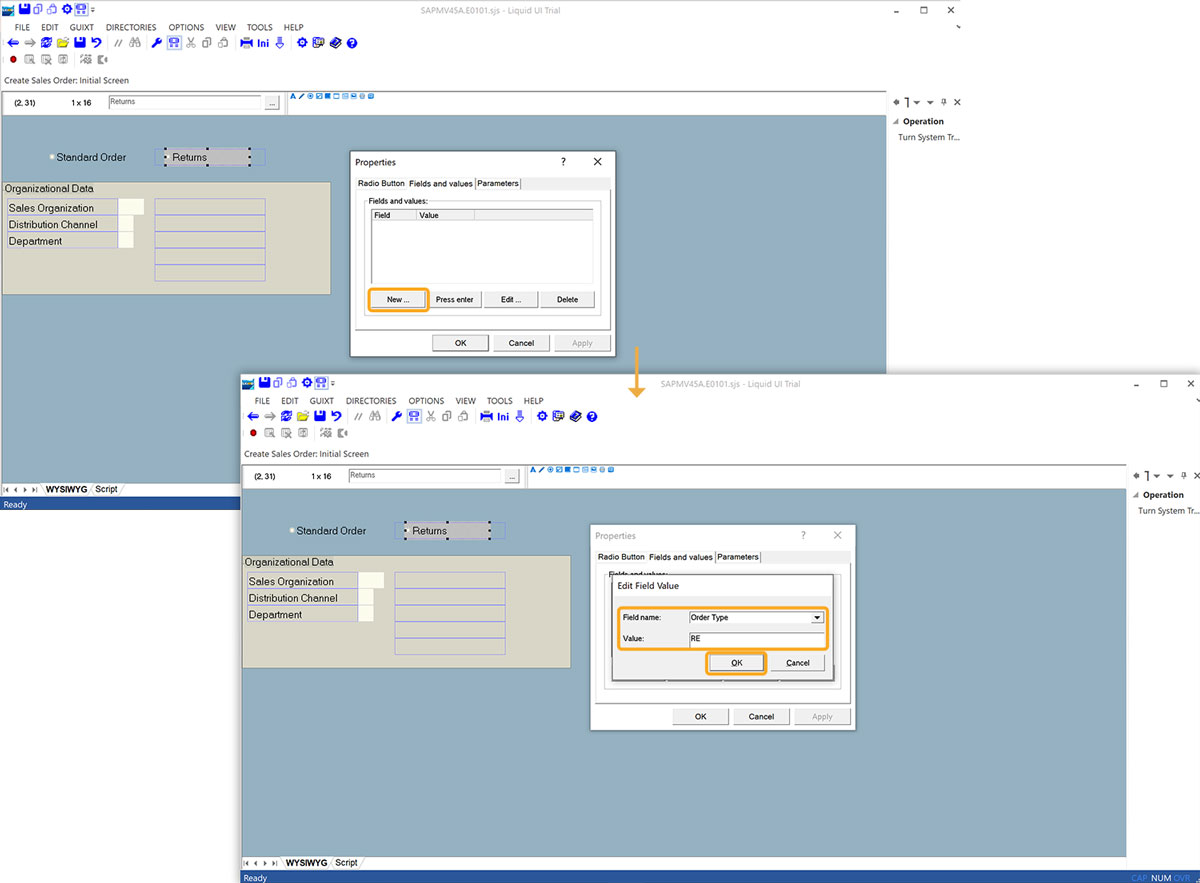
- Under the Fields and values tab, click New. The Edit Field Value dialog appears. Enter Order Type as the field name and RE as the value. Click OK.
Grouping radio buttons:
To group radio buttons:
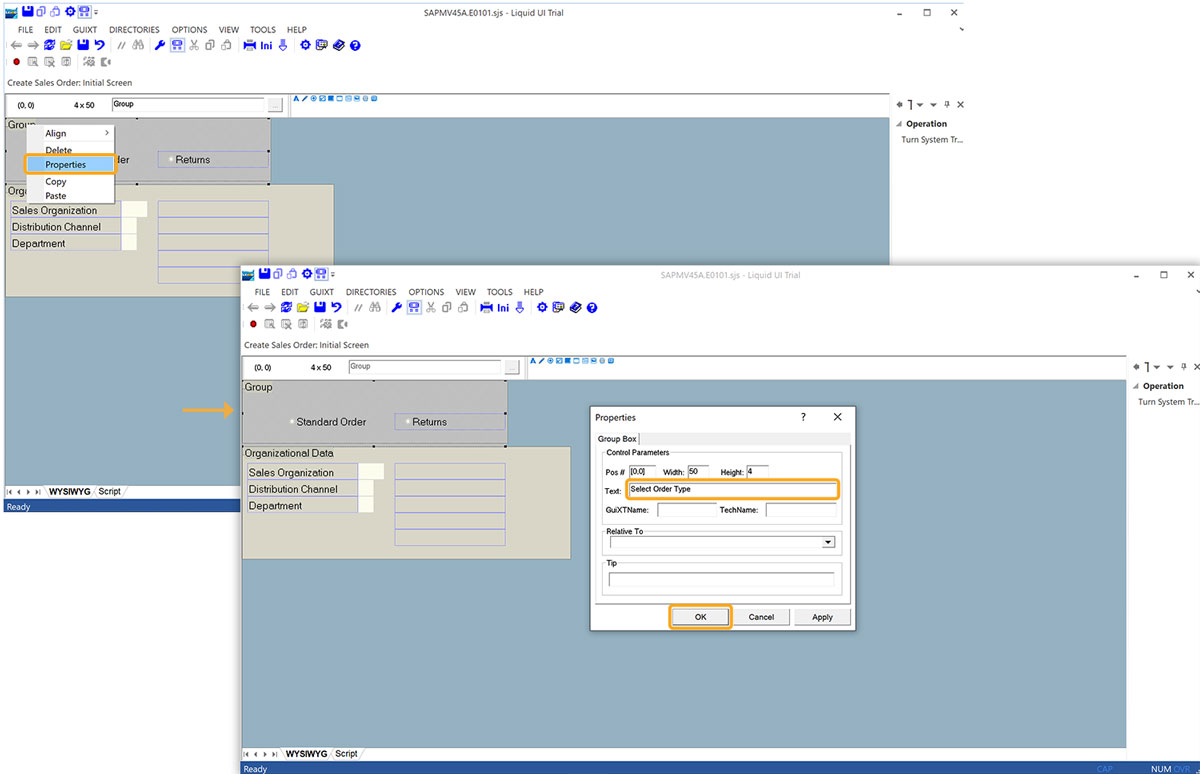
- Select the Groupbox icon and draw a box around two radio buttons. Right-click the Groupbox, open Properties, and set the Text to Select Order Type.
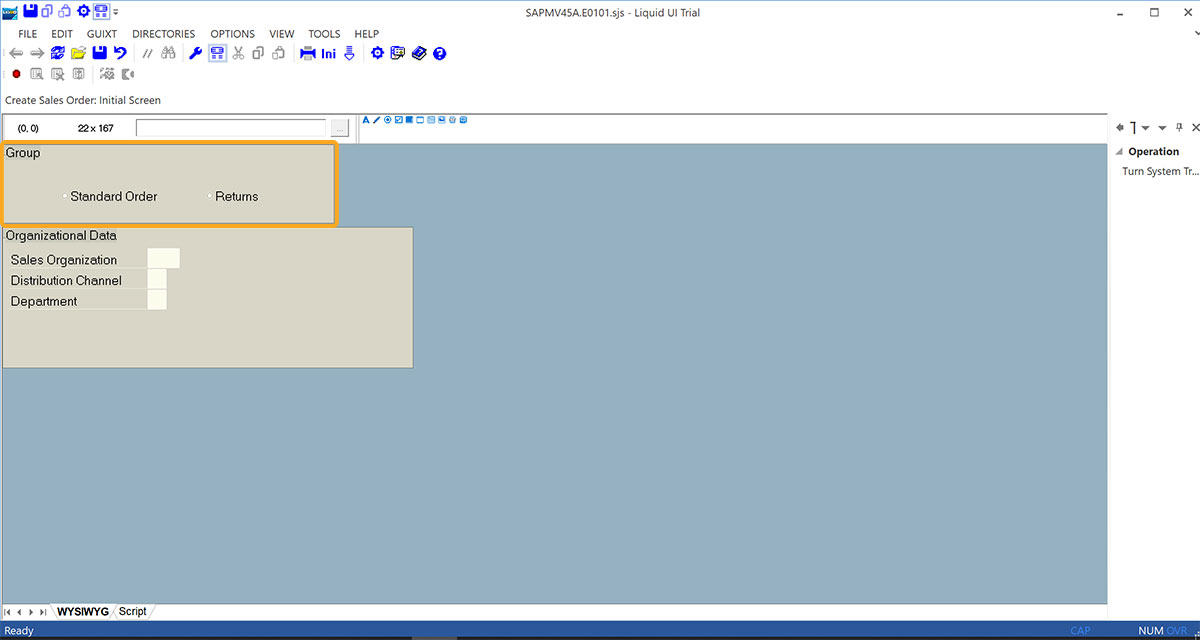
- The updated VA01 screen will now display with a new layout, as shown in the image below.
Note: Make sure to save your changes after customization..